Microsoft has simplified the PC setting up in Windows 10 by moving the essential features from Control Panel to the Settings app, and while the company is still in the process of phasing out the old configuration menu, most people have already gotten used to the new interface.
The Settings app has become the one destination for all options in Windows 10, and Microsoft is improving the experience with every single new update for the operating system. No matter if it’s a new section or a new layout, the Settings app is getting better and better with new releases.
Fortunately, the app already comes with the essential feature package, including a search box that lets you quickly find specific options without having to browse each category.
For users who want to quickly launch a specific Settings section, there’s an easy way to do that, and it all comes down to creating a desktop section with certain parameters.
Who needs that? you could ask. Surprisingly, there are lots of people who want to do that simply because it provides them with easy control over their computer’s configuration. For example, some people don’t just settle with the quick actions in the Action Center and instead prefer to launch the full network options in the Settings app. For these people, creating a shortcut to instantly access the section they need is a godsend.
Basically, creating a Windows 10 Settings app shortcut that points to a specific category isn’t rocket science and the whole magic comes down to the parameters that you’ll find below.
Let’s start with the standard command that we’re going to use and which we’ll modify according to the section that we want to launch from the shortcut:
explorer ms-settings:settingsection
The settingsection is the field that needs to be modified according to the category that you want to open when double-clicking the desktop shortcut.
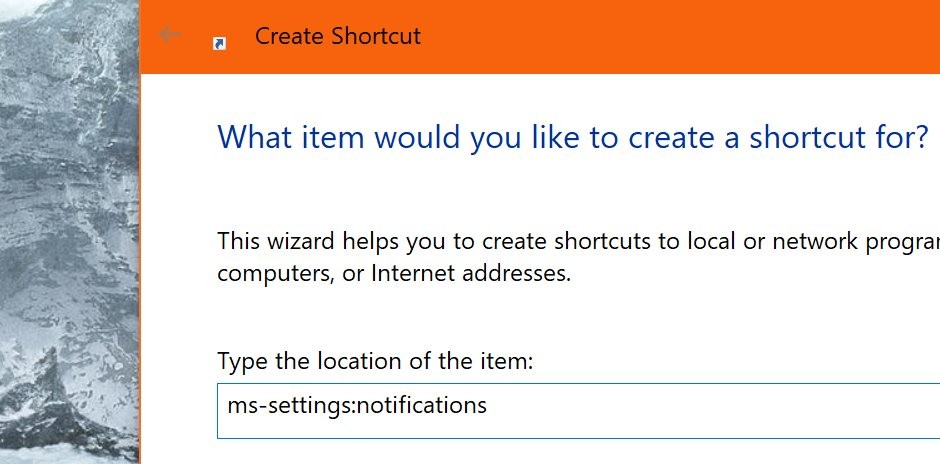
To better understand how the whole thing works, let’s create one simple shortcut. So go to the desktop, right-click it and head over to New > Shortcut. In the location of the item field, you need to input the special parameter that’s going to point your shortcut to the Settings app section. In our example, we’re going to use the display category under System > Display. This means location field of the new shortcut should look like this:
explorer ms-settings:display
Copy and paste this parameter in the new shortcut dialog and hit Next. In the next window, you just have to type a name for this shortcut, say Display settings, and click Finish. The next time you double-click the newly-created desktop shortcut, it should instantly launch the Display section of the Settings app directly.
The same thing applies to pretty much any other Settings app section. For instance, if you want to create a quick shortcut to launch the network status category, the parameter should look like this:
explorer ms-settings:network-status
Once you create the shortcut, you can easily change the icon using the built-in icon pack that Windows 10 comes with. To do this, right-click the icon, hit Properties, go to the Shortcut tab and click the Change icon button.
Each shortcut can always be changed to point to a different Windows 10 Settings app section. To do this, again right-click the shortcut, go to Properties > Shortcut and modify the Target field by replacing the section with the one you want to launch.
You can check out the full list of supported parameters in the box below (via WinAero), so you can easily use any of these to create a shortcut to access the Settings app. Just make sure that you copy and paste the full syntax and everything should work just fine.

 14 DAY TRIAL //


