Installing Ubuntu on a Windows computer is no different from dual-booting any operating system. In fact, it's easier than most, because Ubuntu is designed to be one of the most straight forward of Linux distributions, and it shows. It's one of the most popular distro options out there, making Linux repositories easy to use -- even letting you download apps directly from the Google Play Store or Apple App Store. It's also entirely free.
There are three installation types to choose from, so you need to know how you want to use Ubuntu. For example, you can use it inside a Windows virtual machine, or you can use Bash features directly from Windows. But those are for very specific use cases. For our purposes, we're going to assume you want to download a fresh copy of Ubuntu directly onto your computer for everyday use. Here's how you can do that.
Backup your data
Before you do anything big on your PC, you should always back up your most important data. That may mean just confirming your existing cloud backup solutions are working correctly and have all your precious data stored safely, or it might mean performing a manual backup to an external drive.
However you choose to backup your data, ensure it's done before you begin installing Ubuntu on your Windows PC.

Meet Ubuntu
The world's most popular Linux distro is created by Canonical, a South Africa-based company. While Ubuntu is free to install and use for individuals, organizations can pay for support and for a host of other Ubuntu-based products, such as server software.
Ubuntu gets regular updates every six months and major overhauls every two years. These overhauls, called LTS (for long-term support), introduce new Ubuntu versions and usually a silly animal name. For example, the latest LTS is Ubuntu 22.04 "Jammy Jellyfish." It was released in spring 2022, and so there should be another major LTS update in 2024.
There have been smaller, interim releases since then, including 23.04 Lunar Lobster, and 23.10 Mantic Minotaur.
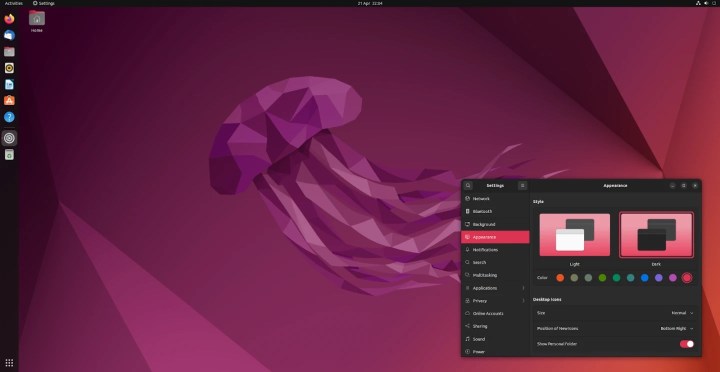
Ubuntu uses the GNOME desktop environment, which is the underlying user interface you see when you use Ubuntu. GNOME keeps the desktop clean and uncluttered and allows you to launch applications simply by clicking on an icon rather than inputting code into the terminal. GNOME gives you a Mac-like taskbar along the top of your screen where you can see the date and time, access app-specific files and options, and use other useful features.
However, if you want to get more nerdy, you can. After all, Ubuntu is a Linux distro, which means the terminal is never too far away. This will also allow you to tweak settings and opens up the full power of Linux. For instance, you can use the terminal to convert a bunch of images into PDFs at once, or you can create nested file directories deep in the system.
Whether you want to deep-dive into using Linux for greater system control, or just want to see what gaming on Linux is about, Ubuntu is still the best distro to begin with. Even for gaming.
Download Ubuntu
The first step to installing Ubuntu is to download Ubuntu. It comes as a single ISO image and is 2GB in size.
Step 1: Head to the Ubuntu desktop site on your favorite browser.
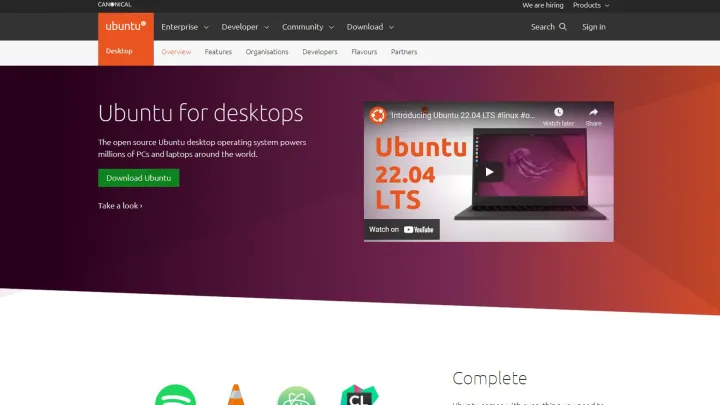
Step 2: Select Download.

Step 3: You will find the downloaded ISO in your downloads folder.
Format your USB stick
Once you've downloaded Ubuntu to your computer, you'll need to create a live USB stick. This is what your computer will use to install and run Ubuntu the first time around.
You'll need to install a free third-party USB formatting program to do this, but don't worry, these are small applications and they're extremely easy to use. You can delete it afterward if you don't want to keep it.
Don't have a USB drive to hand? You can use any external drive for this process, too. Just be aware before you format it that you might want to backup any existing data on the drive if it's important.
Step 1: Download and install Rufus.
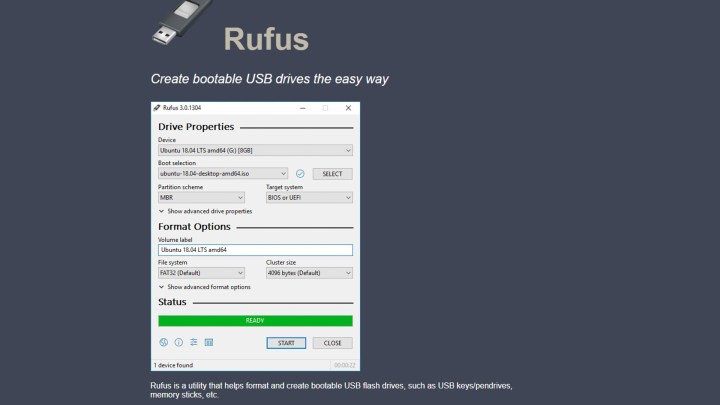
Step 2: Launch Rufus once it is installed.
Step 3: Choose your USB drive from the Device menu if it hasn't auto-populated.

Step 4: Choose Select, to the right of the Boot Selection menu

Step 5: Select the Ubuntu ISO file you downloaded.

Step 6: The Volume Label menu will update to show your version of Ubuntu. Leave the other settings as is.
Step 7: Select Start.
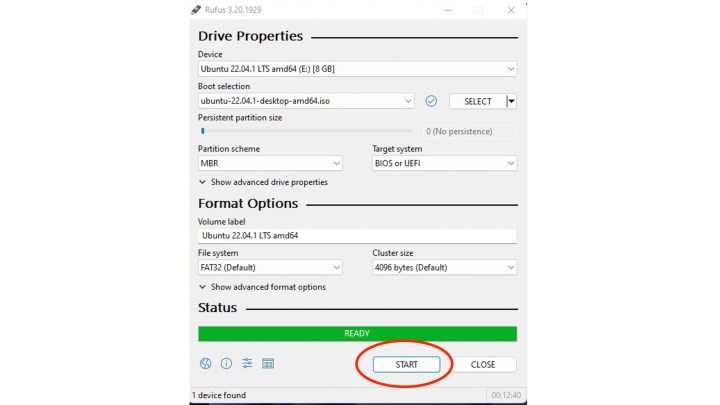
Step 8: Wait while Rufus writes the Ubuntu ISO to your USB. You can see the progress in the status bar at the bottom. It should take 10 minutes or less.
Step 9: Your USB is ready when the Status bar is green and displays "Ready."
Replace your OS with Ubuntu
Next, you're going to install Ubuntu on the computer or laptop of your choice. You can choose to partition your hard drive and dual-boot Ubuntu or to completely overwrite your current operating system and use only Ubuntu.
Step 1: Insert the USB thumb drive with your live Ubuntu ISO into the computer.
Step 2: Restart the device.
The computer should recognize the USB thumb drive and boot from it immediately. However, if this doesn't happen, you will need to boot your computer.
With the thumb drive inserted, restart your computer. Then hold down F12 during the startup and select your USB device from the Device menu.
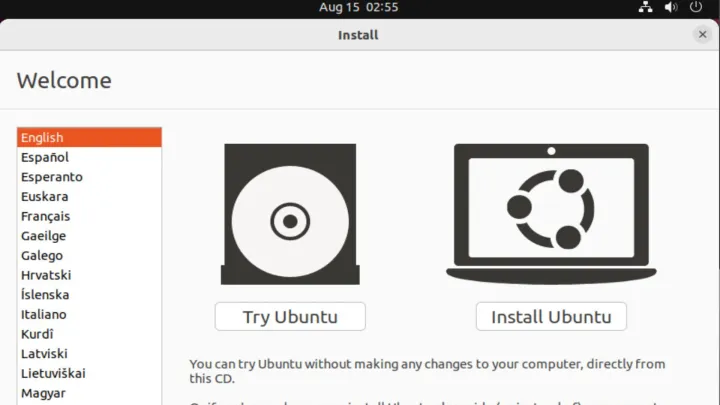
Step 3: Choose Install Ubuntu.
You can test-drive Ubuntu direct from the USB. However, this is a limited version of Ubuntu and will not save anything.

Step 4: Choose your language, and select Continue.
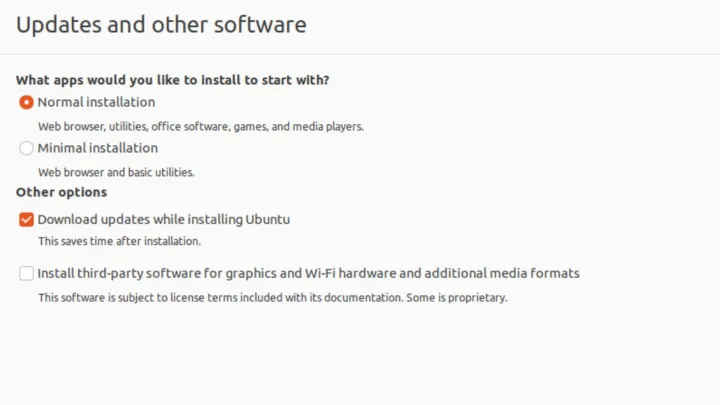
Step 5: Select your preferred installation setup.
We recommend choosing Normal installation unless you are using an extremely limited computer.
Select Download updates while installing Ubuntu and Install third-party software for graphics and Wi-Fi hardware and additional media formats.
Select Continue.
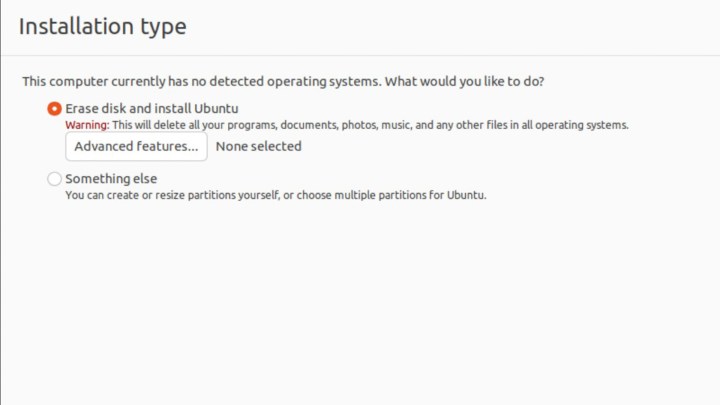
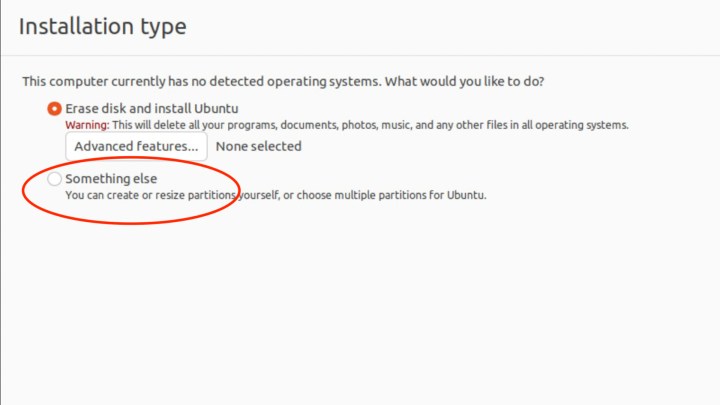
Step 6: The Installation Type menu allows you to choose between overwriting your current system with Ubuntu and dual-booting Ubuntu from a partitioned drive.
Select Erase disk and install Ubuntu, followed by Install Now.
Step 7: Choose your location.
Press Continue.

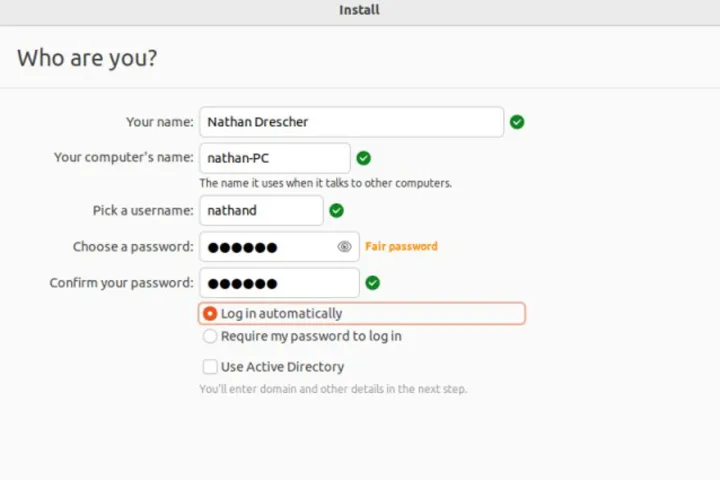
Step 8: Input your details. Add your name, your computer name (make this up), and pick a username. You'll also need to create a password for logging into Ubuntu and some Ubuntu services. Keep it secure but easy to remember.
You can then select to log in to your computer automatically or require a password each time you use it. Ignore the Use Active Directory option for now.
Select Continue.
Step 9: Ubuntu will now complete the installation.

Step 10: Select Restart now when the installation is finished.

Step 11: Congratulation! You just installed Ubuntu!
Install Ubuntu alongside your operating system
If you don't want to completely erase your current OS, be it Windows, Mac OS, or another Linux distro, you'll need to install Ubuntu on a partitioned drive. Thankfully, the Ubuntu installer makes it easy to do this.
For starters, you'll need to go through steps one to six in the "Replace your OS with Ubuntu" section above. However, when you get to the Installation Type menu, you can jump down to here and we'll walk you through the rest.
Step 1: From the Installation type menu, select Something else and click Install now.
Step 2: Select New partition table on the next screen.
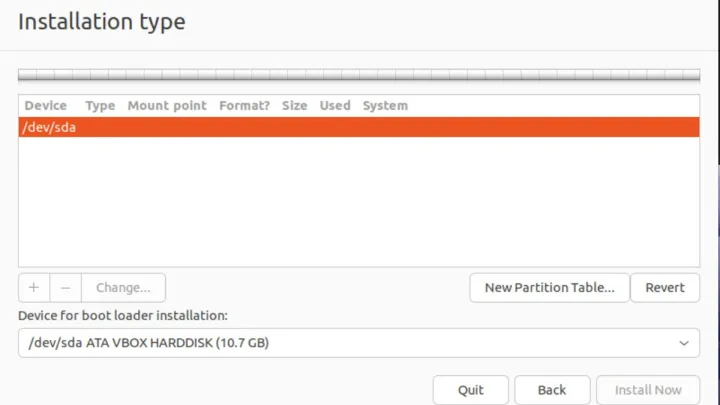
Step 3: Select Continue on the pop-up.

Step 4: Double-click on Free space to create a new partition.
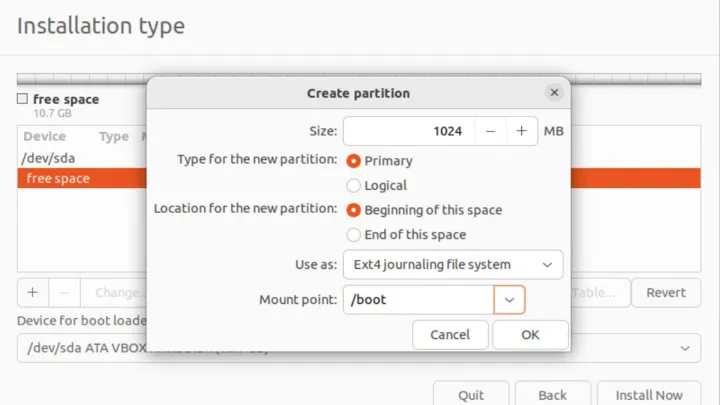
A new partition window pop-up will appear.
Step 5: In the Create partition menu, set the size to 1024MB.
Set the type for new partitions to Primary.
Set the location for the new partitions to Beginning of this space.
In the Use as menu, select Ext4 Journaling file system.
In the Mount point menu, select /boot.
Select OK.
Step 6: Double-click on Free space to create a home partition.
Leave the free space as is.
Set the type for new partitions to Primary.
Set the location for the new partitions to Beginning of this space.
In the Use as menu, select XFS journaling file system.
In the Mount point menu, select /home.
Select OK.

Step 7: Double-click on Free space to create a root file system.
Set the type for new partitions to Primary.
Set the location for the new partitions to Beginning of this space.
In the Use as menu, select XFS journaling file system.
In the Mount point menu, select /.
Select OK.

Step 8: Double-click on Free space to create a swap partition to help when RAM fills up.
Set size to 4096.
Set the type for new partitions to Primary.
Set the location for the new partitions to Beginning of this space.
In the Use as menu, select Swap area.
Select OK.

Step 9: Now that you've got a partition scheme set up, you can complete your Ubuntu install.

Step 10: Choose your location.
Press Continue.
Step 11: Input your details.
Add your name, your computer name (make this up), and pick a user name.
You'll also need to create a password for logging into Ubuntu and some Ubuntu services. Keep it secure but easy to remember.
You can then select to log in to your computer automatically or require a password each time you use it.
Ignore the Use Active Directory option for now.
Select Continue.
Step 12: Ubuntu will now complete the installation. Hit Restart now when the installation is complete.
Installing Ubuntu on a Windows PC FAQ
How long does it take to install Ubuntu on Windows?
This depends on your own technical ability and how ready you are before you begin. If you've done all the preliminary file backing up, have the Ubuntu ISO ready to use and you've done this once or twice before, you might get it done in an hour or so. If this is your first time and you're following these steps one and a time to be sure, it'll probably take you a few hours. Don't be disheartened, though. This process gets a lot quicker and easier the more times you do it.
What's the latest distribution of Ubuntu?
At the time of writing in early 2024, the latest release version of Ubuntu is 23.10 (Mantic Minotaur), release in October 2023. The latest LTS release is from Aril 2022, and is version 22.04 LTS (Jammy Jellyfish).
Editors' Recommendations
- How to transfer photos from an iPhone to a computer
- How to change margins in Google Docs
- How to double space in Microsoft Word
- How to dual boot Linux and Windows
- How to convert FLAC to MP3 on Mac, Windows, and web