How To Carve a Thanksgiving Turkey: A Step-By-Step Guide From Ray Venezia's "Everyday Meat Guide"
How To Carve a Thanksgiving Turkey: A Step-By-Step Guide From Ray Venezia's "Everyday Meat Guide"
How to Carve a Thanksgiving Turkey
Remove the turkey from the oven and let it rest for 20 to 30 minutes before carving. This will give the juices and flavors time to saturate the meat and allow the meat to become cool enough to handle. It's much easier to work on a slightly cooled turkey.
Start the carving process by setting yourself up for success. Make sure you have a spacious, clean, and dry work surface. You'll also need a 6- to 8-in [15- to 20-cm] boning knife, but you will not need a fork. When carving, never use a fork—use your hand instead to prevent any juices from running out.
The big mistake most people make is trying to slice meat right off the bird. Turkey bones are curved, which means you'll inevitably leave a lot of meat on the bones, you won't be able to slice against the grain for tenderness, and the slices will be irregular. The secret is to remove each part of the turkey before you slice it correctly and safely on a cutting board.
1. Start with the whole leg (leg and thigh). Slowly cut through the joint between the body and leg, using the tip of your knife. Apply steady pressure to force the whole leg away from the body, and open up the joint as you cut. Keep cutting until you get to the joint, then cut through the seam of the joint (don't try to cut through the bone—you won't be able to do it).
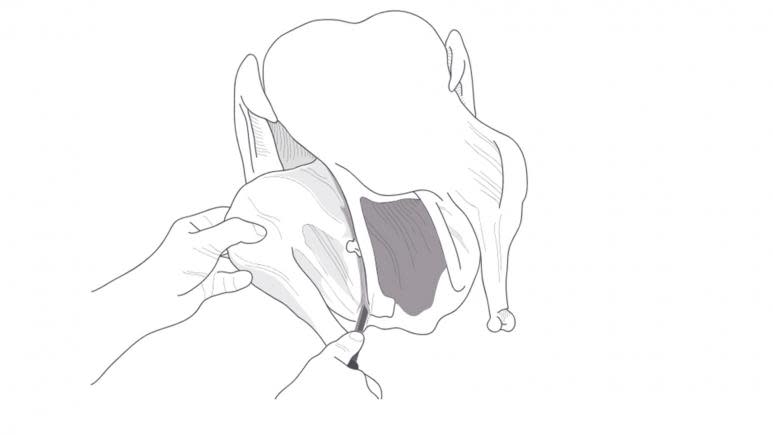
The Everyday Meat Guide/Ray Venezia
2. Remove the whole leg, and cut through the joint between the thigh and the drumstick. Use the same process you did in separating the whole leg from the body. Set the drumstick on the platter and repeat with the other whole leg.
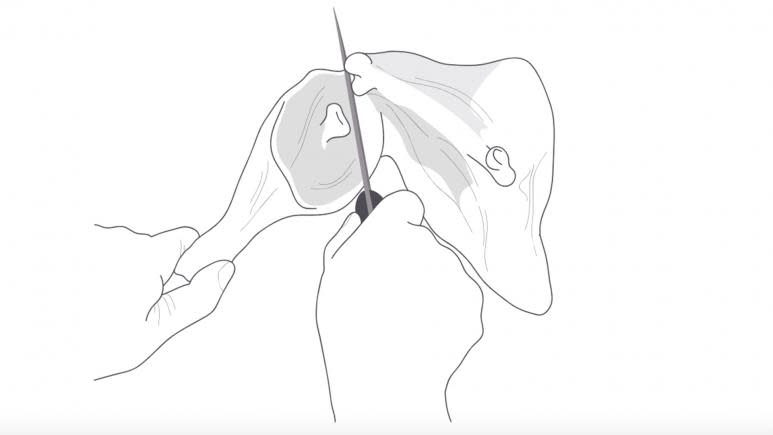
The Everyday Meat Guide/Ray Venezia
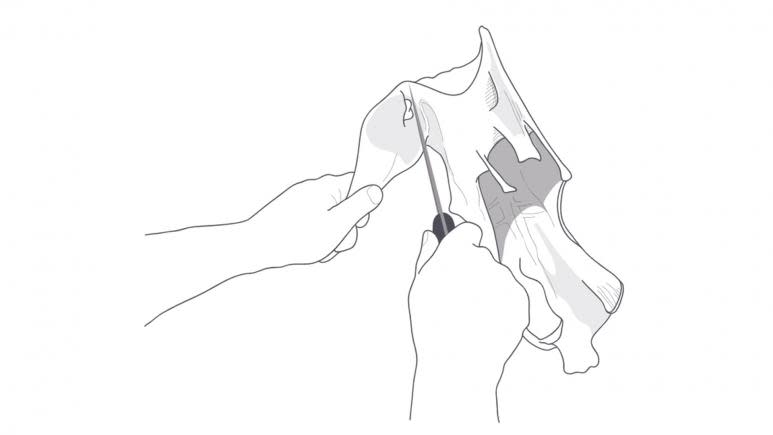
3. Debone the thigh by running the knife along the bone on one side just enough to clearly see the bone. Grab one end of the bone and repeat the process on the other side, turning the bone as you cut. The bone should roll right out.
The Everyday Meat Guide/Ray Venezia
4. Cut the thigh into thick slices and arrange on the platter between the drumsticks.

The Everyday Meat Guide/Ray Venezia
5. Cut off the wing by grabbing the tip and pulling the wing out. Cut through the joint at the bottom of the V of the wing. This will leave the drumette connected to the body, making the bird more stable and preventing it from rolling when you remove the breast meat. The drumettes can easily be removed at the end of the carving process. Repeat with the opposite wing and arrange the wings on either side at the front of the serving platter.

The Everyday Meat Guide/Ray Venezia
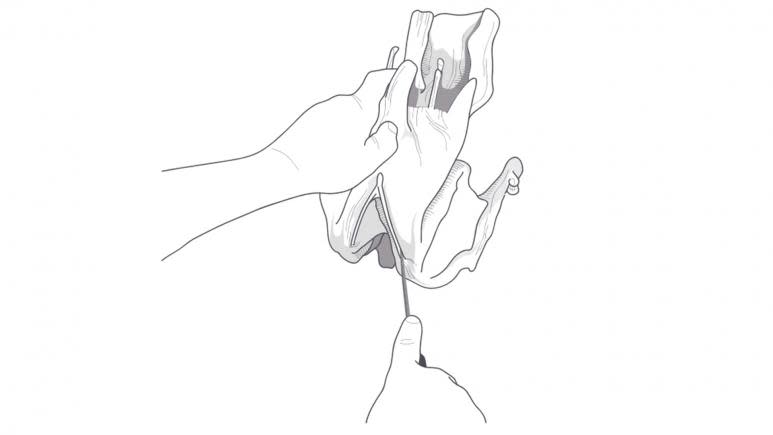
6. Remove the breast meat by running the point of the knife along one side just under the top of the bone where the meat attaches. Cut front to back, scoring the bone and creating an opening just big enough to slide your fingertips between the meat and bone. Pull the meat away from the bone steadily and evenly as you run the point of your knife along the curve of the bone.
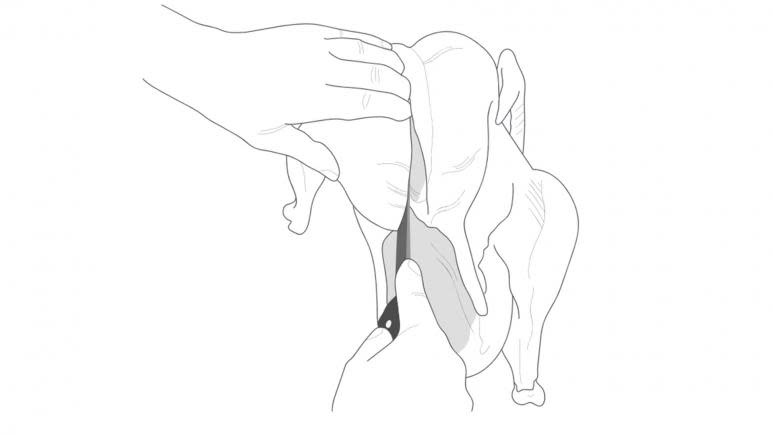
The Everyday Meat Guide/Ray Venezia
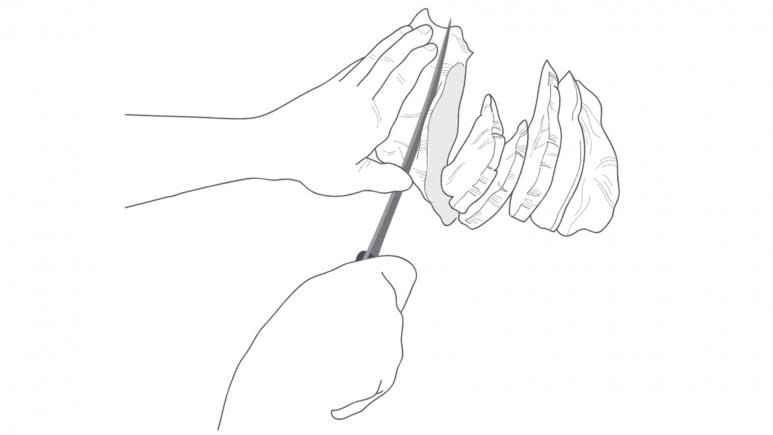
7. On a cutting board, slice the breast meat at least ¼ in [6 mm] thick, to keep the slices from drying out when they come in contact with the air. Cut against the grain. (Determine the direction of the muscle fibers, and cut perpendicular to those lines in the meat.) This will ensure the slices are solid and hold together, and, most important, that they remain tender. Arrange the slices down the center of the platter by laying them down straight across between the wings, shingling them as you go. This will ensure that less of the meat is exposed to air, so that the slices will be kept moist and warm.
The Everyday Meat Guide/Ray Venezia
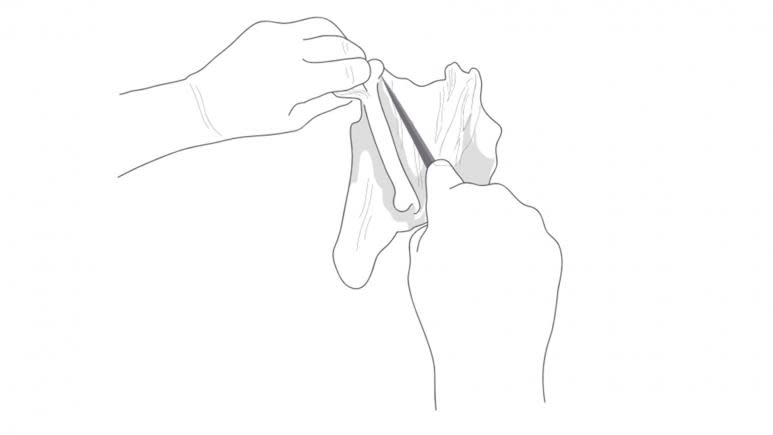
8. After you've removed the breast, trace the wishbone that runs along the top of the breast by the neck with the point of your knife. The wishbone will pull out easily and cleanly.
The Everyday Meat Guide/Ray Venezia
9. Remove the drumettes by pulling them away from the body to expose the joint and running a knife through the joint.
The Everyday Meat Guide/Ray Venezia
Adapted from The Everyday Meat Guide: A Neighborhood Butcher's Advice Book by Ray Venezia. Copyright © 2016 by Ray Venezia. Used with permission by Chronicle Books. All rights reserved.

