Content creation is an art.
That’s the biggest lesson I didn’t understand three years ago at my first Men’s Health Christmas party. Back in 2017, when I first started trying to break into the influencer space as the fitness editor of Men’s Health, a post was just a post. I didn’t understand editing tools, or even think they mattered, and I certainly wasn’t thinking about video quality or production values.
Somebody at the party, a bit drunk (and blunt, anyway) had noticed that. So she walked up to me and asked if I wanted some advice. I nodded (I was two months into my time at MH), and she blurted out: “Your Instagram kind of sucks.” She wasn’t wrong either. It was just pictures and videos and very little strategy—it wasn’t well-edited quality content.
Fast-forward to 2020, and I’ve grown my Instagram audience to more than 325,000, partly because I focus on quality video content. That content translates beyond Instagram, too, which is why I’ll self-shoot Youtube videos for Men’s Health, and I have a whole self-shot Eb and Swole workout series on menshealth.com.
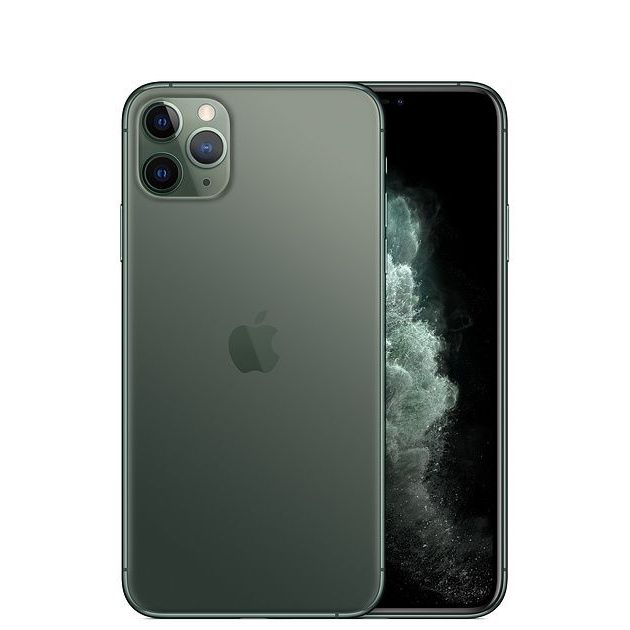
And it’s all possible because quality video content is easier to make than ever. Phones are equipped to pump out 4K and even 8K video, and editing tools are more potent than ever. You have a host of options that can get the job done. And you can own the influencing game with exactly two tools, the iPhone 11 Pro Max and the iPad Pro.
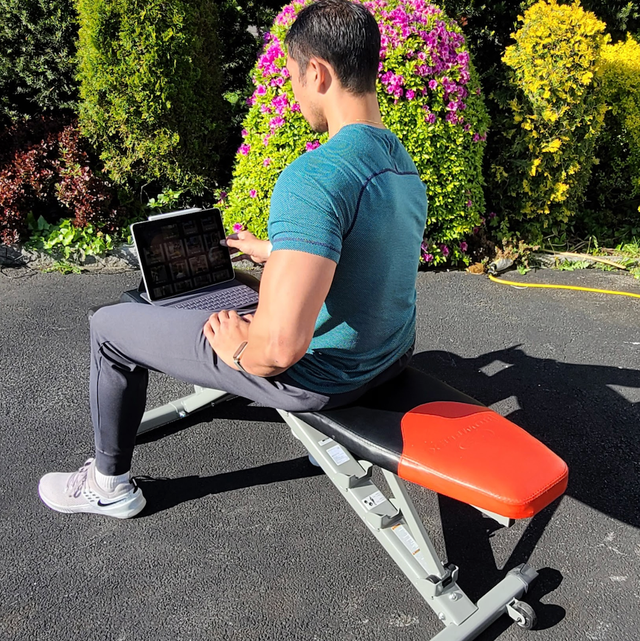
Seriously, that’s all I use to shoot my video, video that goes to multiple platforms mind you. Plenty of phones and tabs can deliver power and video-recording bells and whistles, but none can compare to the ease-of-use you get with the iPhone and iPad combo. I’ve spent the last three years building all my content on the iPhone with the help of only a water bottle (yes, really), and then late last year, I started working with the iPad Pro. The workflow with both devices is simple and a testament to the fluidity of Apple: I shoot the content on my iPhone 11 Pro Max, then wait just a bit (long enough to make and down a protein shake) for it to hit iCloud. I pull it down onto my iPad Pro from there, then drop it into iMovie.
From there, I can crop and zoom to my heart’s content, and then, within iMovie, I record the voiceover form cues and explanations that have become my signature on Instagram. (They’re a signature I could develop, by the way, only because of how easy iMovie makes it to record them.) It’s all super-easy to do.
Here’s my step-by-step guide to making and editing elevated, high-quality video content for social media.
The Way You Shoot Video on Your iPhone Ensures Quality and Versatility for Content
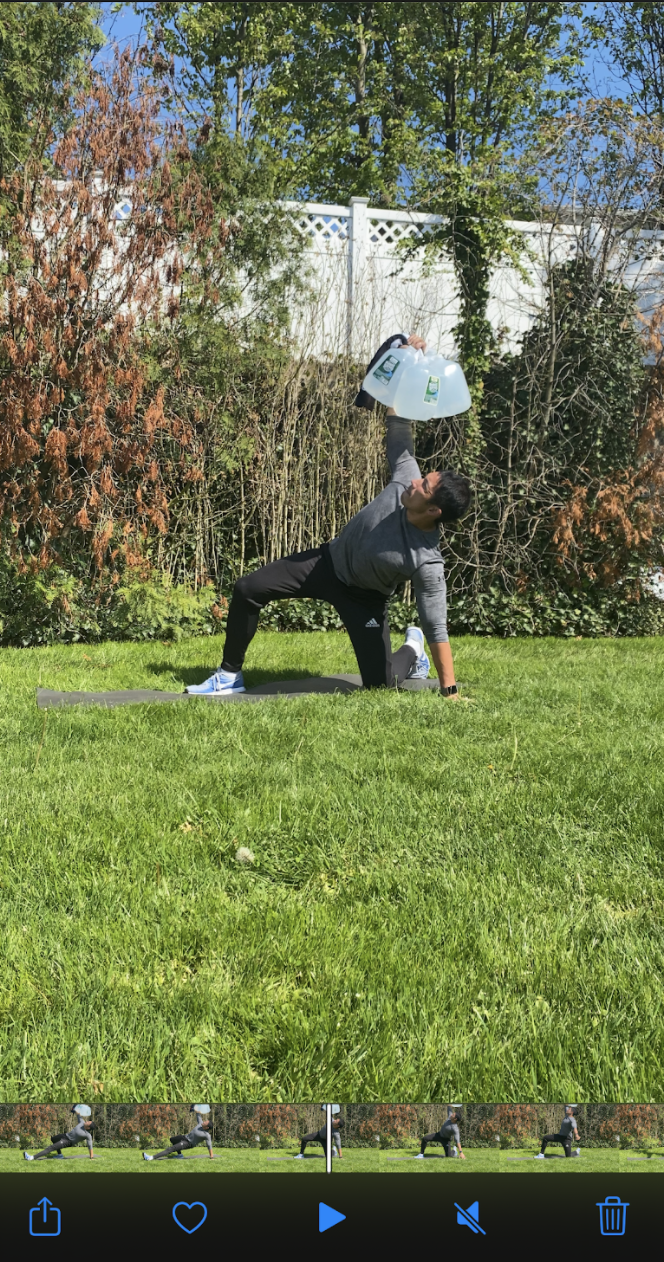
It all starts here, and it all starts with that iPhone Pro Max camera, a great, ultra-powerful machine that does everything I need. I’ll typically lean the camera against a water bottle, in portrait mode, and then do whatever exercise I need to do. I’ll shoot a full set of an exercise from the angle that I want.
This is harder than you may think, because lighting and angles can be tricky shooting by yourself. Often, I wind up taking two or three videos before getting an angle that can give the viewer all the information I need to convey.
It’s always best to shoot in landscape mode, too. This offers me versatility: my videos often wind up as square cuts for Instagram, but for YouTube and the Men’s Health website, I need things in landscape mode. So if I don’t want to shoot things over and over, I need to shoot in landscape mode. The trick with shooting in landscape, of course, is making sure that the key info can also fit into an Instagram square cut. So I generally keep the action within a thumbs-width on both sides of the screen.
Insider Tip: Always Shoot in 4k
Shoot in 4K, at 60 frames per second. This is critical, even if it means it’ll eat more storage on your iPhone and in your iCloud. I used to shoot in 1080p or even 720p, but the 4K video serves several key purposes. First off, it’ll give you options when you want to zoom in using iMovie, because you have a stronger-quality video to start, one that can handle a zoom.
The other big one is longevity: Always shoot in the densest format your phone offers, because that content isn’t solely for Instagram. The smartest influencers and content creators constantly repurpose their content across platforms (YouTube, Instagram, TikTok), and that’s easier to do with a higher-quality starting video. It also makes it easier for me to reuse old video if it’s higher-quality video. A #throwbackthursday or #flashbackfriday post built from my 2017 assets looks so dated that it’s just not worth doing.
Additionally, always shoot in 1x zoom. You can add zoom flourish later, in iMovie, if needed.
Upload Your Videos in Bunches in iMovie Before Editing Your Video
Once I have the video shot, I upload it into iMovie. While recent iOS updates have added a huge suite of editing tools into the iPhone photo editor, it’s still easier to do most of your editing in iMovie. The process also takes a matter of seconds: You open iMovie, select new project, choose movie, then select the clips you want to add.
I don’t cut my clips yet, though. I’ll upload these in bunches, a few packs of videos at a time, because the next step for all these videos is my point of no return. iMovie works simply, letting you the start- and endpoints of a video back and forth, but once you’ve started that process and saved it, there’s no turning back. So after the upload, I down some salmon and think about how each video, or these packs of video, will be cut.
Uploading Early Prevents iMovie Hiccups
Another reason to upload in bunches: Especially if you keep a ton of video on your phone, iMovie can occasionally freeze up for a few seconds if you aim to upload an older video that sends you searching through your archives. It’ll eventually work, but you save yourself unnecessary frustration if you upload the videos just shortly after they’ve been taken. So even if I don’t have time to edit and add voiceovers to everything, I want to get the video into iMovie shortly after it’s been shot for work later.
This is also where I switch from iPhone to iPad Pro most of the time. The iPhone, with its potent camera lenses, and tiny form factor, is the best starting point for all this shooting, but once the edit comes, it’s easier to work on the iPad Pro.
The Edit Isn’t As Daunting As You May Think
Now we’re onto the video editing, and this is a lot simpler than it sounds. When I first got into this, I feared I wouldn’t be able to create the kind of content that pops on social media. But iMovie provides you with a wealth of tools. And if you’re smart, you won’t need many of them. (Pro-tip: Less is more if you want professional-looking video. The video content should take center stage, not a bells-and-whistles edit.)
Crop and Zoom Early
First comes the crops. I now tighten everything, dragging sliders to new start- and endpoints. It’s a simple enough process. Then, I’ll play around with zooming in on things just a bit. Everything you do in iMovie only happens to the cut of the video in iMovie, too, so nothing’s actually changing the form of the video you shot that lives in your Photos. I play with multiple levels of zoom, too; a handy undo button on the right-hand corner lets me reverse my decisions, as long as I don’t exit the project and allow it to save.
I’ll also occasionally “flip” the video. iMovie works great for Instagram because it shifts videos shot in portrait mode into a square cut that fits Instagram ideally, but that doesn’t translate over to the newcomer, TikTok, as well as you’d want. So if I want to edit a TikTok video, or even something for Instagram’s mostly portrait-powered IGTV, it’s necessary to flip the video now so I can see what I’m working with. I’m basically flipping it into landscape video so I can work in the longer form factor, and it’s slightly annoying, but it’s an OK workaround; I flip it back to its proper orientation in photos before I post.
Play With Transitions . . . Just a Bit
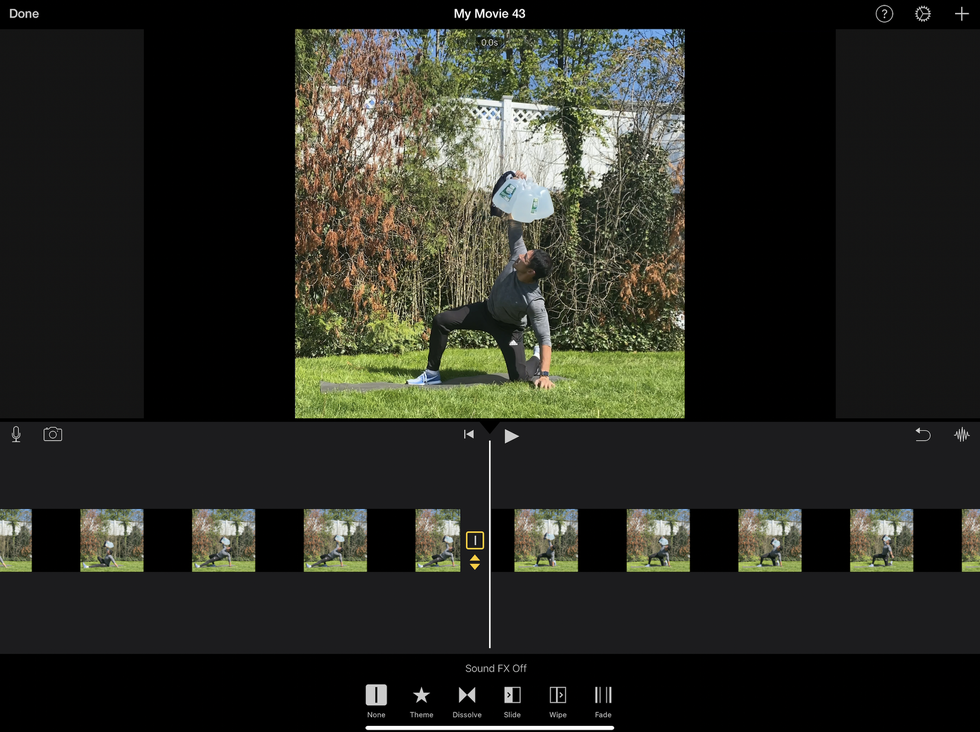
You can also add “transitions” if you’re combining multiple video clips. In general, I use a video clip per instructional exercise, because I make heavy use of Instagram’s carousels. But my intro videos are compilations of these other clips, so I dive into transitions when I build these. You have several transition options, allowing you to let the next clip “slide” in from a side, “wipe” in, or “fade” in. I generally go to a “dissolve” feature that lets the last clip and first clip bleed into each other for a split moment. It’s simple but effective. You can get granular with these transitions, too, changing the length of time it takes for each to work. Don’t mess around here: Especially on Instagram, where you only have a minute to work with anyway, I don’t want to burn time on a snazzy transition because I want the content to stand out.
Insider Tip: iMovie Can Handle Slow-Motion
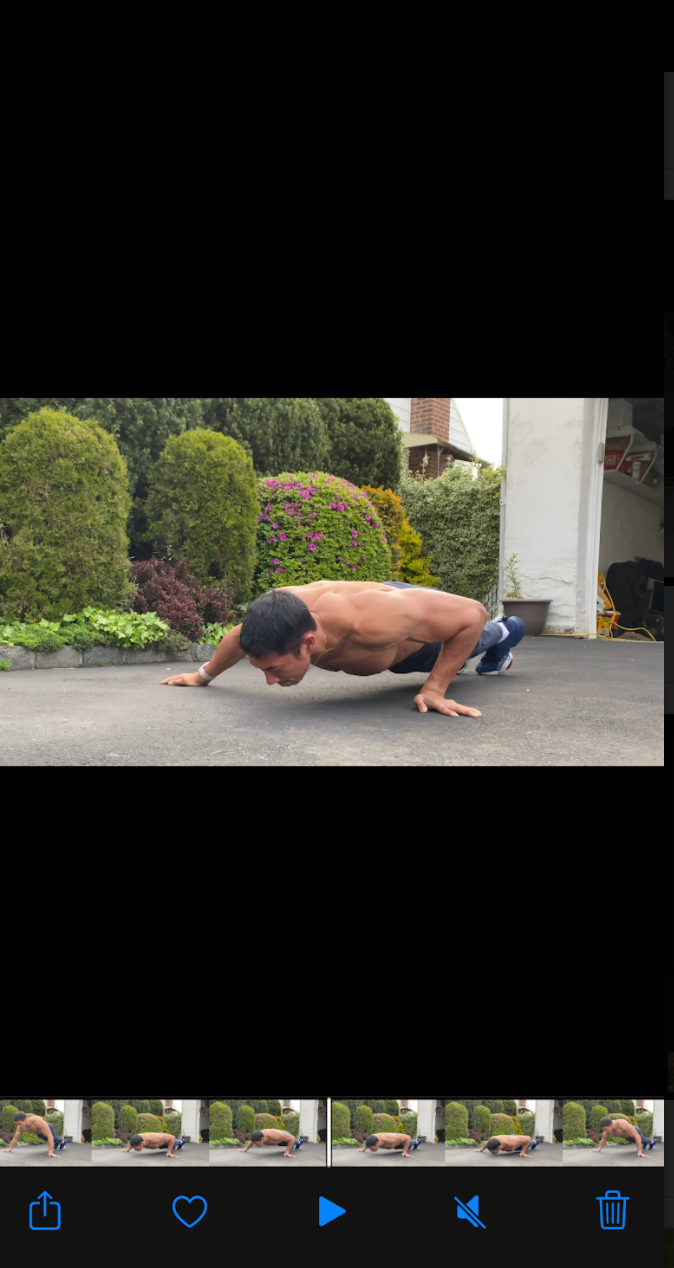
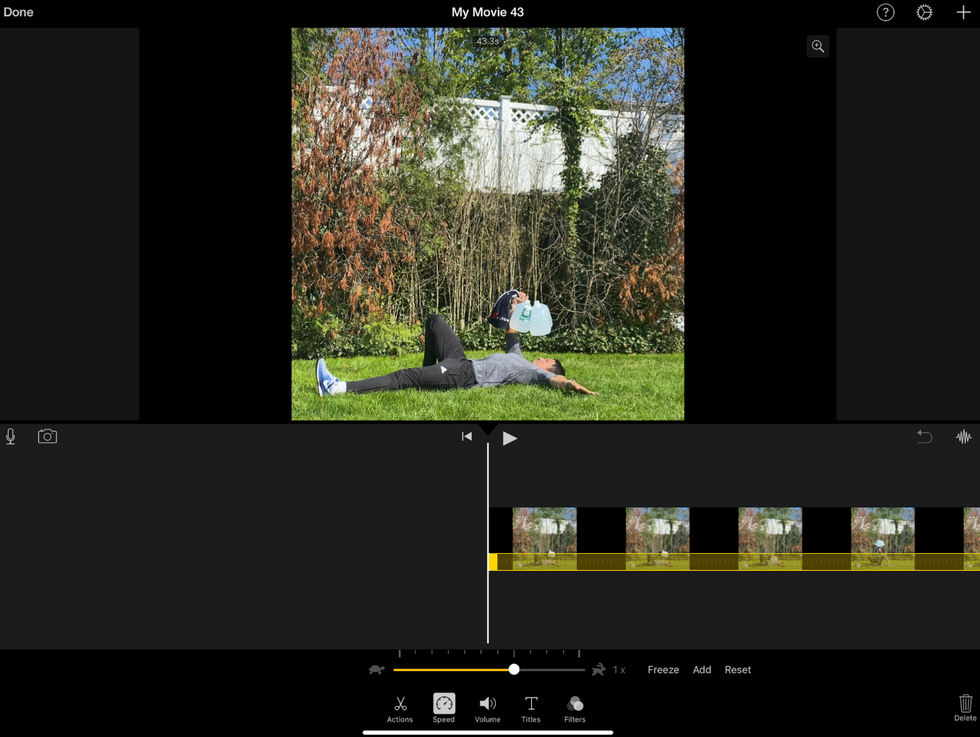
There are other tools here, too, but again, I want the content to shine, and the edit only needs to aid that. Sometimes, it helps to add a fast-motion touch to portions of video, or to deliver a bit of slow-mo to, say, a Superman pushup video. It’s easy to add these in iMovie, and yes, native iMovie is a potent weapon for things like this.
I actually bought another app, called Lumafusion, about a year ago because I thought that was the only way to build slow-motion video. I also paid a friend to add slow-motion touches to video, especially for Superman pushups. But iMovie can do it natively and efficiently. All you do is cut your video into the parts you want to slow-motion, and the parts you want at a normal pace, and turn the transitions off between these parts. Then you can adjust the speed of the part you want to slow-mo with a handy slider. You can make your vid up to twice as fast (handy for when I’m showing a high volume of exercise reps) or reduce the speed to an eighth of normal speed (so slow you won’t hold anyone’s attention on Instagram). This has been a game-changer for me on highlight reel exercises.
Insider Tip: Less Editing Is Better
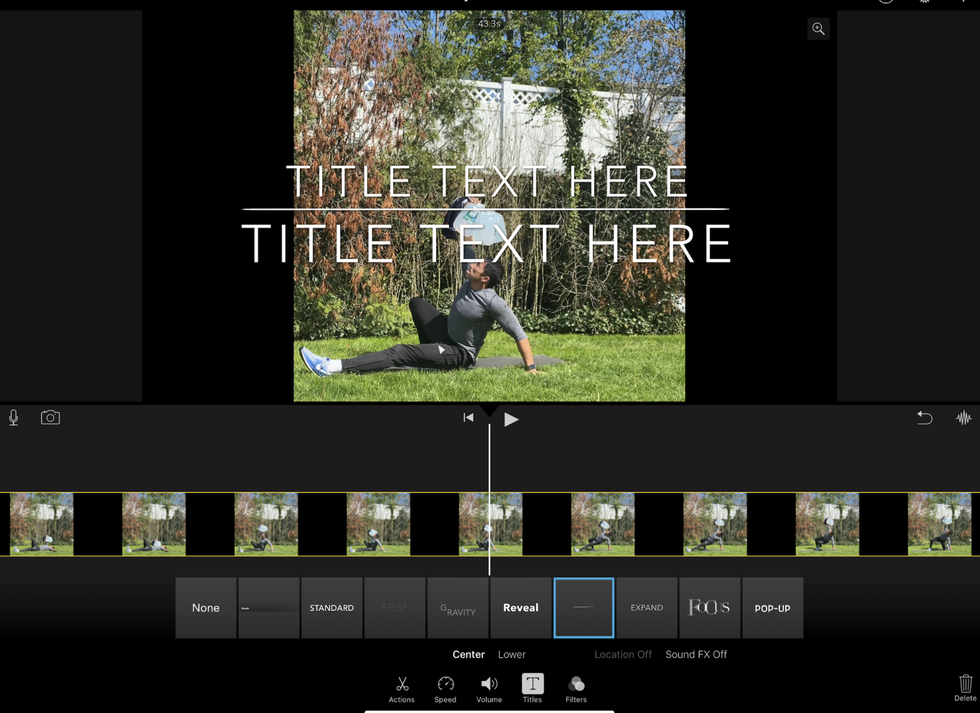
Less is always more when it comes to video editing. iMovie also has a suite of other goodies, including captions and title boxes, and these work well. I’ve dabbled in them here and there, but I don’t think they add much to the video. I want the videos themselves to shine, so I shy away from using too many extra frills. If anything, I’ll occasionally add a title card so people know what body part I’m training.
In that context, a title card can do three things. On the plus side, it serves as an at-a-glance look at what body part I might be working out, helpful for the user. The downsides? It can take away from the opening action shot, limiting my ability to catch a user’s attention with that shot. And it can create overall clutter for the eye, too. I’ve shied away from this, although I’m sure it can be useful in some situations.
Add Some Color and Talk To Your Audience With Voiceovers
Once I have the cut where I need it, the voiceover part is the final step. Here, the iPad Pro’s hand mic shines. I’ve never used an external mic or any other accessory to pick up my voice. I just go to a quiet room in the house, hit the voiceover button, let it countdown, and start talking. Heck, the iPad Pro’s mic is so excellent at picking up sound that I’ve recorded video for Men’s Health on it, with only my voice picked up and maybe only the slightest hints of white noise.
It’s a simple enough process, but be sure you do it all in one sitting. Little differences in your tone and your surroundings, even the distance you are from the mic, can occur if you break this up into multiple sessions.
One great secret of recording voiceover with iMovie and the iPad Pro is this: You don’t need to do the whole minute at once. Record full phrases and sentences, then cut the recording and take a break. Then set a little space, and do a separate recording for the next phrase or sentence. This often actually helps the pacing of the final audio recording product: We tend to rush when we talk, cutting out appropriate breathers, especially when we’re recording. This actually forces you to include breathers, and it leads to well-paced audio. A bonus: it also gives you time to think.
Finish the Edit and Put The Post in Your IG Drafts
Once all that’s done, I have my videos and I’m ready to go. I’ll save each video as a 4K file back to my Photos folder, then compile them as a carousel in Instagram, and write the caption for the entire batch. I try to cue a few videos for use, setting up a week’s worth of programming for followers. This part’s easy and simple, and I’ve reverted back to my iPhone by now; before quarantine, I’d often do this on the train, or during lunchtime breaks (or in meetings when things got boring, but let’s not tell anyone about that).
Then, when I need a video, I’m drawing from a bank of predone posts that fill certain slots that I want to give my followers. It lets me maintain a daily cadence, and if you’re serious about being an influencer, that’s important. You should to treat this like a job, posting quality content at least once every workday. That’s what separates influencers from regular folks who just post on Instagram in their spare time.
The difference between this and a regular workday: iMovie and the tools of the iPad and iPhone make it simple (and snappy). And yes, just a little bit fun.
