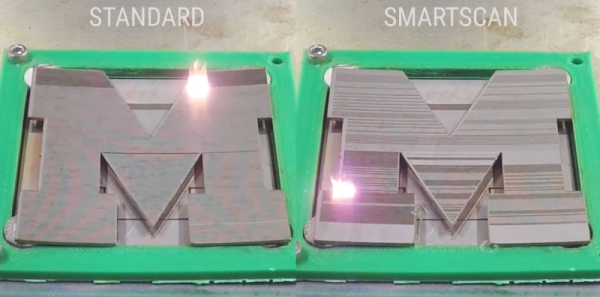
We are used to dealing with warping when printing with thermoplastics like ABS, but metal printers suffer from this problem, too. The University of Michigan has a new technology, SmartScan, that promises to reduce this problem. You can see a video about the technique, below.
The idea is to develop a thermal model of the printed part before laser sintering and then move the laser in such a way that heat doesn’t accumulate. The video shows how engraving metal in the traditional way causes the metal to warp as the laser heats up areas. Using the SmartScan thermal model, they were able to reduce deformation by almost half.
If you’ve seen both a fused filament fabrication (FFF) printer and a wire welder, you may have noticed that they work on a similar basic principle. Feedstock is supplied in filament form — aka wire — and melted to deposit on the work piece in order to build up either welds in the case of the welder, or 3D objects in the case of the printer. Of course, there are a number of difficulties that prevent you from simply substituting metal wire for your thermoplastic filament. But, it turns out these difficulties can be overcome with some serious effort. [Dominik Meffert] has done exactly this with his wire 3D printer project.
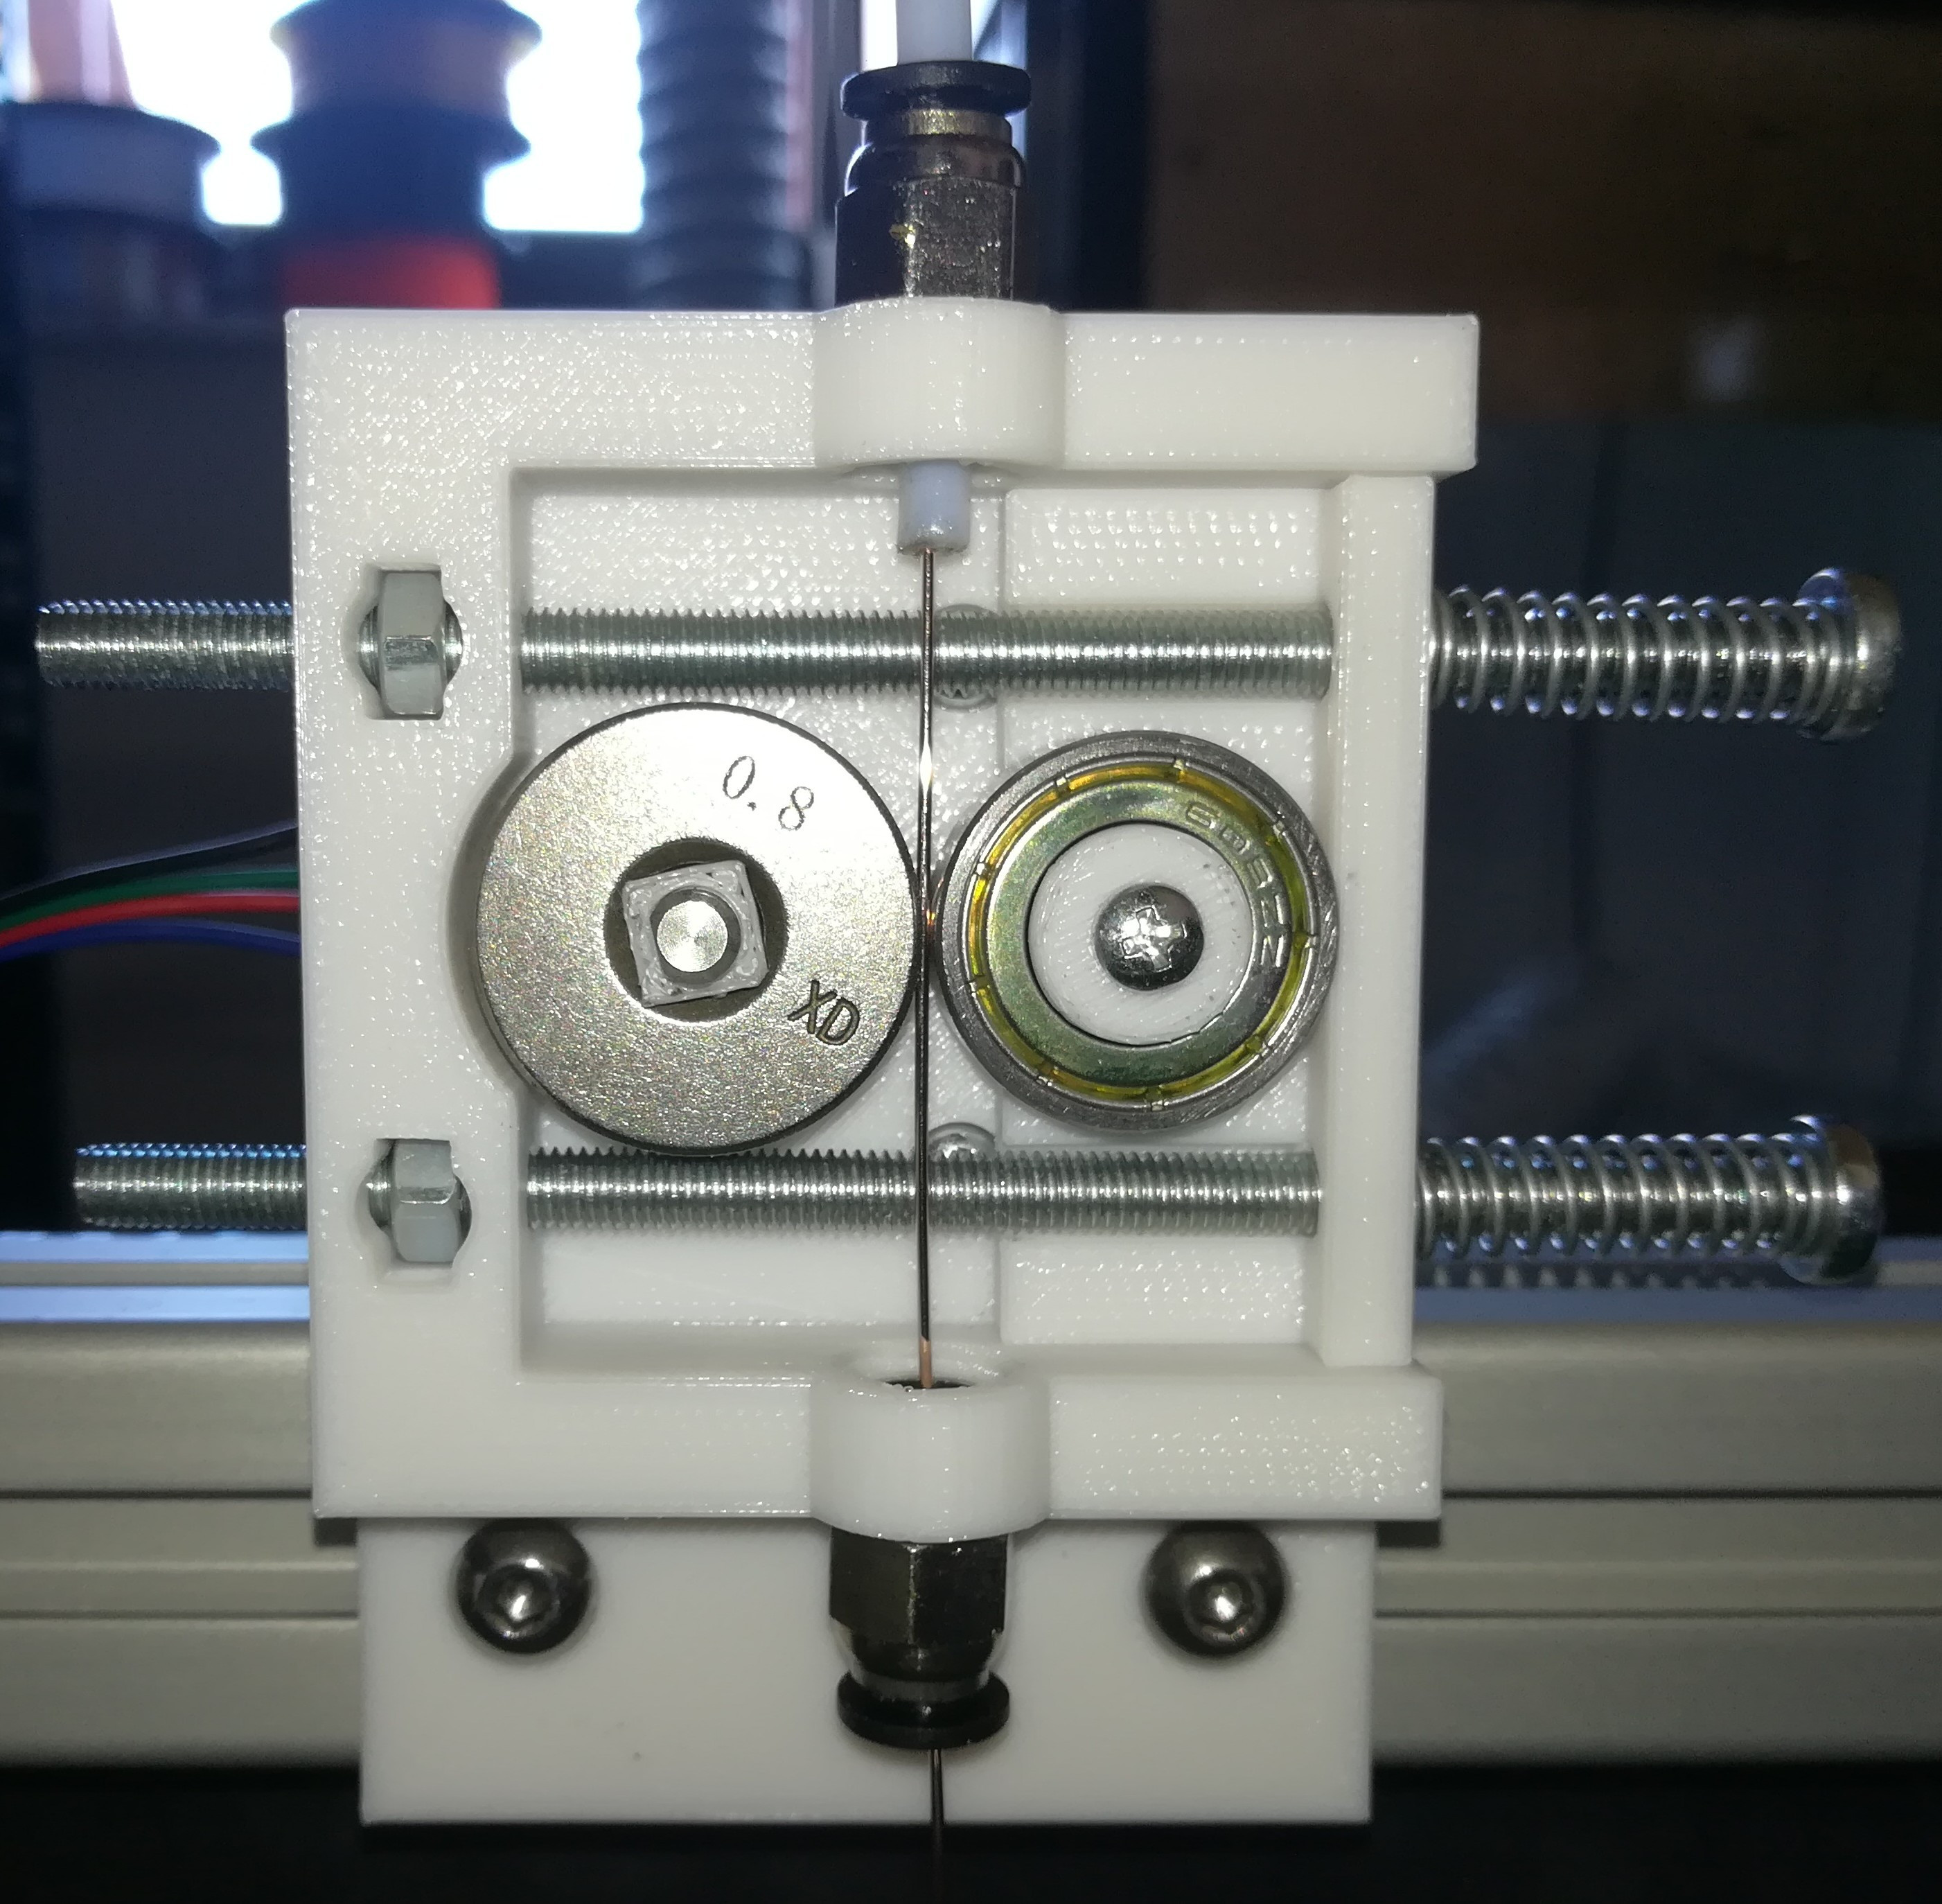
Extruder cold end using a standard feeder roller
For his filament, [Dominik] chose standard welding wire, and has also experimented with stainless steel and flux-cored wires. Initially, he used a normal toothed gear as the mechanism in the stepper-driven cold end of his Bowden-tube extrusion mechanism, but found a standard wire feeder wheel from a welder worked better. This pinch-drive feeds the wire through a Bowden tube to the hot end.
In thermoplastic 3D printers, the material is melted in a chamber inside the hotend, then extruded through a nozzle to be deposited. Instead of trying to duplicate this arrangement for the metal wire, [Dominik] used a modified microwave oven transformer (MOT) to generate the low-voltage/high-amperage required to heat the wire restively. The heating is controlled through a phase-fired rectifier power controller that modulates the power on the input of the transformer. Conveniently, this controller is connected to the cooling fan output of the 3D printer board, allowing any standard slicer software to generate g-code for the metal printer.
To allow the wire to heat and melt, there must be a complete circuit from the transformer secondary. A standard welding nozzle matching the wire diameter is used as the electrode on the hot end, while a metal build plate serves as the other electrode. As you can imagine, getting the build plate — and the first layer — right is quite tricky, even more so than with plastic printers. In this case, added complications involve the fact that the printed object must maintain good electrical continuity with the plate, must not end up solidly welded down, and the fact that the 1450 °C molten steel tends to warp the plate.
Considering all the issues that have to be solved to make this all work, we are very impressed with [Dominik’s] progress so far! Similar issues were solved years ago for the case of thermoplastic printers by a group of highly-motivated experimenters, and it’s great to see a similar thing starting to happen with metal printing, especially using simple, readily-available materials.
Last week I went to the International Manufacturing Technology Show (IMTS) and it was incredible. This is a toy store for machinists and showcases the best of industrial automation. But one of the coolest trends I found at the show are all the techniques used to 3D print in metal. The best part is that many of the huge machines on display are actually running!
It’s probably better to refer to this as additive manufacturing, because the actual methods can be significantly different from your 3D printer. Below you’ll find examples of three different approaches to this process. I had a great interview with a company doing actual 3D printing in metal using a nozzle-based delivery often called cladding. There’s a demo video of powder layer printing using lasers. And a technique that uses binders as an intermediary step toward the final metal part. Let’s take a look!
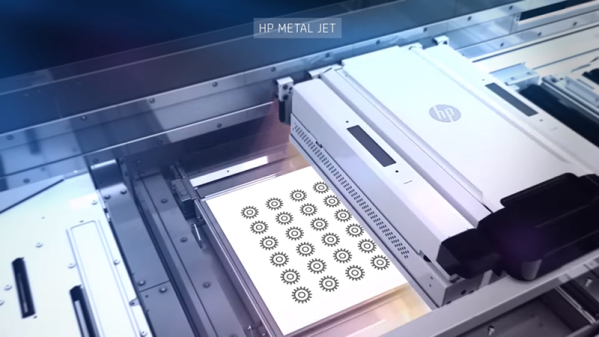
You normally think of HP as producing inkjet and laser printers. But they’ve been quietly building 3D printers aimed at commercial customers. Now they are moving out with metal printers called — predictably — the HP Metal Jet. The video (see below) is a little glitzy, but the basic idea is that print bars lay down powder on a 21-micron grid. A binding agent prints on the powder, presumably in a similar way to a conventional inkjet printer. A heat source then evaporates the liquid from the binder.
The process repeats for each layer until you remove the part and then sinter it using a third-party oven-like device. According to HP, their technique has more uniform material properties than fusing the powder on the bed with a laser. They also claim to be much faster than metal injection molding.
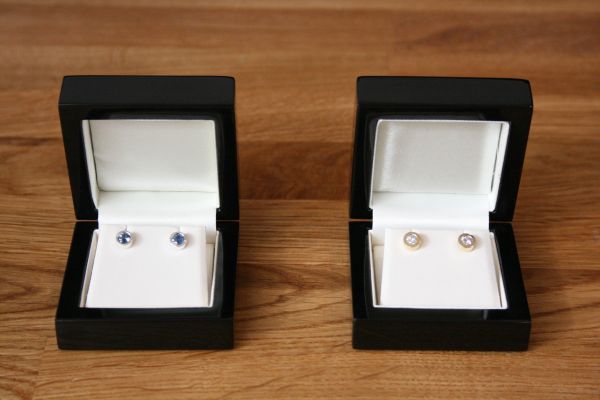
Machinists are expected to make functional items from stock material, at least hat’s the one-line job description even though it glosses over many important details. [Eclix] wanted a birthday gift for his girlfriend that wasn’t just jewelry, indeed he wanted jewelry made with his own hands. After all, nothing in his skillset prohibits him from making beautiful things. He admits there were mistakes, but in the end, he came up with a recipe for two pairs of earrings, one set with sapphires and one with diamonds.
He set the gems in sterling silver which was machined to have sockets the exact diameter and depth of the stones. The back end of the rods were machined down to form the post for the clutch making each earring a single piece of metal and a single gemstone. Maintaining a single piece also eliminates the need for welding or soldering which is messy according to the pictures.
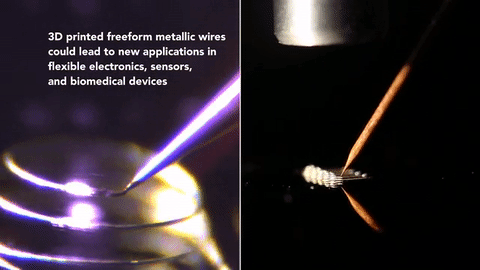
The material is silver nanoparticles extruded out of a nozzle, and shortly after leaving it is blasted with a carefully programmed laser that solidifies the material. The trick is that the laser can’t focus on the tip of the nozzle or else heat transfer would solidify the ink inside the nozzle and clog it. In the video you can see the flash from the laser following slightly behind. The extrusion diameter is thinner than a hair, so don’t expect to be building large structures with this yet.
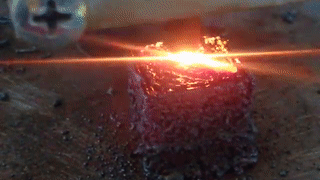
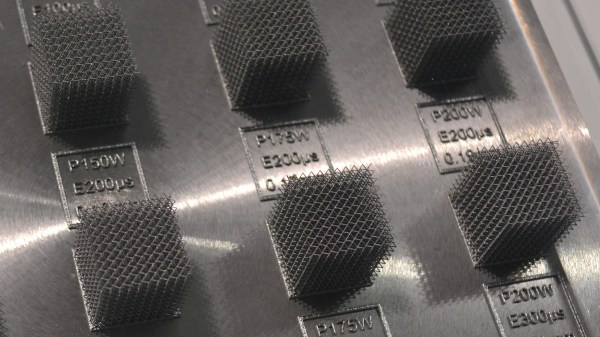
Laser sintering works by laying down a thin layer of metal powder and then hitting it with a strong enough laser to sinter the particles together. (Sintering sticks the grains together without getting the metal hot enough to melt it.) The rapid local heating and cooling required to build up 3D objects expands and cools the metal, and can result in stresses inside the resulting object.
The Northwestern team still lays down layers of powder, but glues the layers together with a quick-drying polymer instead of fusing them with a laser. Once the full model is printed, they then sinter it in one piece in an oven.
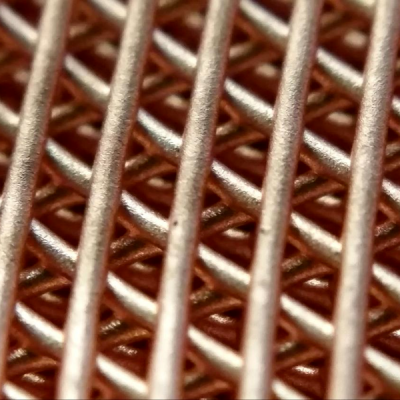
3D-printed copper lattice. Credit: Ramille Shah and David Dunand
The advantages of adding this extra step are higher printing speed — squirting the liquid out of syringe heads can be faster than fusing metal particles with a laser — and increased structural integrity because the whole model is heated and cooled at one time. A fringe benefit is that the model is still a bit flexible before firing, opening up possibilities for printing a flat model and then bending it into shape before sintering.
And if that weren’t enough, the team figured that they’d add a third step to the procedure to allow it to be used with rust (iron oxide) as the starting powder. They print the rust and polymer model, then un-rust the iron using hydrogen, and then fire it as before. Why rust? Do you know anything cheaper to use as a raw material?
What do you think? The basic idea may even be DIYable — glue metal particles together and heat them up enough to stick. Not in my microwave oven, though. We’d love to see a more energy-efficient 3D metal printer.