How to Grow Microgreens, Nutrient-Dense Vegetables and Herbs That Add Major Crunch to Your Meals
GETTY IMAGES
TABLE OF CONTENTS
On This Page
Indoor Growing
Outdoor Growing
Microgreen Varieties
Harvesting Tips
True to their name, microgreens are young seedlings of leafy green vegetables and herbs. They're also chock full of nutritional benefits, like antioxidants and vitamins C, K, and E. According to Sabrina Currie, writer, photographer, and the owner of West Coast Kitchen Garden, these greens are great for using in everything from salads, smoothies, and soups to pesto and sandwiches.
There are also plenty of benefits to growing these herbs yourself, Currie explains. "Microgreens are unique in that most of the energy they need to grow is in the seed itself," she says, adding that they are more nutrient dense than their full-sized siblings, too. "This makes them excellent for growing on a sunny, south-facing windowsill or under a small grow light."
Related: A Guide to Growing Kitchen Windowsill Herbs
How to Grow Microgreens Indoors
Because microgreens don't need too much in regards to light or space, Nathan Heinrich, a botanical designer and horticulturist, says they're remarkably easy to grow indoors.
What You Will Need
A shallow, watertight tray without drainage holes
Growing medium (potting soil or a grow mat)
Seeds
Water
Spray or mist bottle
A bright, sunny area or a grow-light system
A space that stays above 60 degrees
Gardening shears or scissors
Planting Your Microgreens
Heinrich recommends using a growing mat instead of garden soil to combat mold and fungal growth as your microgreens sprout—but you can use all-purpose potting soil, too.
"In your growing tray, lay down your pre-soaked grow mat or spread your potting soil, being sure to leave at least a half-inch from the top of the tray," Heinrich says. "If using potting soil, pour 2 cups of water into your tray before you put your soil in." If you add your soil to the top of the water, Heinrich says you'll have a better chance of preventing the dirt from becoming waterlogged.
"Next, distribute your seeds generously and evenly over the surface of the soil or mat and avoid clumping them together," he says, adding that you shouldn't bury the seeds.
"Water the seeds by spraying them gently with a spray or misting bottle," he says. "You're simply trying to provide a bit of moisture."
Your seeds will need to be in a dark area that is warmer than 60 degrees for two to three days while they germinate.
Once they begin to sprout, you can move them to a well-lit area, like a windowsill that gets indirect sunlight or under a grow light for 12 hours a day. "The more light they get, the faster the microgreens will grow," Heinrich says.
How to Grow Microgreens Outdoors
While you certainly can grow microgreens outdoors, it's not recommended: Controlling your external environment, says Heinrich, can be difficult. If you're set on adding microgreens to your culinary beds, however, Heinrich suggests following the same steps outlined above, while keeping a few specific things in mind. "It is not recommended that you sow seeds directly into garden soil in your garden unless you have a cold frame or a very protected environment," he says, adding that you'll need to protect your seedlings from any severe weather like heavy rain, frost, wind, extreme heat, and sun.
For the best outdoor growth, Heinrich suggests creating a makeshift greenhouse with old windows, plexiglass, or other recycled materials so that the seedlings receive plenty of sunlight without getting too hot, cold, or wet. "Protect your microgreens from insects, birds, rodents, and pets by covering the trays in sheer gardeners' netting," he says.
Growing Tips Based on Microgreen Variety
There are several different varieties of microgreens and some of them require a bit more nuanced care to grow. "The most popular microgreens are peas, broccoli, sunflower, radish, buckwheat, and cruciferous vegetable mixes—usually kale, cabbage, broccoli, kohlrabi, and other cruciferous varieties," says Margo Clayson of The Mighty Microgreen. "Each has a different nutrient profile and taste, and each is easy to grow."
Peas, Sunflower, and Buckwheat
That being said, Clayson notes that large seeds—such as peas, sunflower, and buckwheat—will benefit from a cold-water soak for six hours before planting. "This encourages all the seeds to germinate at the same time and cuts the growing time by nearly a day," she says.
Popcorn and Basil
There are also some microgreens that are grown differently, such as basil and popcorn. "Popcorn microgreens are eaten at just eight days and are super-sweet when grown in complete darkness, but bitter when put into the light," Clayson says. "To grow popcorn, plant as normal, then place the trays in a dark room with good airflow. Keep the lights off until harvest for a delectable, nutritious treat."
Basil, on the other hand, is a mucilaginous seed that is the opposite of corn, says Clayson; it must be kept in bright light, covered with clear plastic wrap, and misted daily for five days before uncovering.
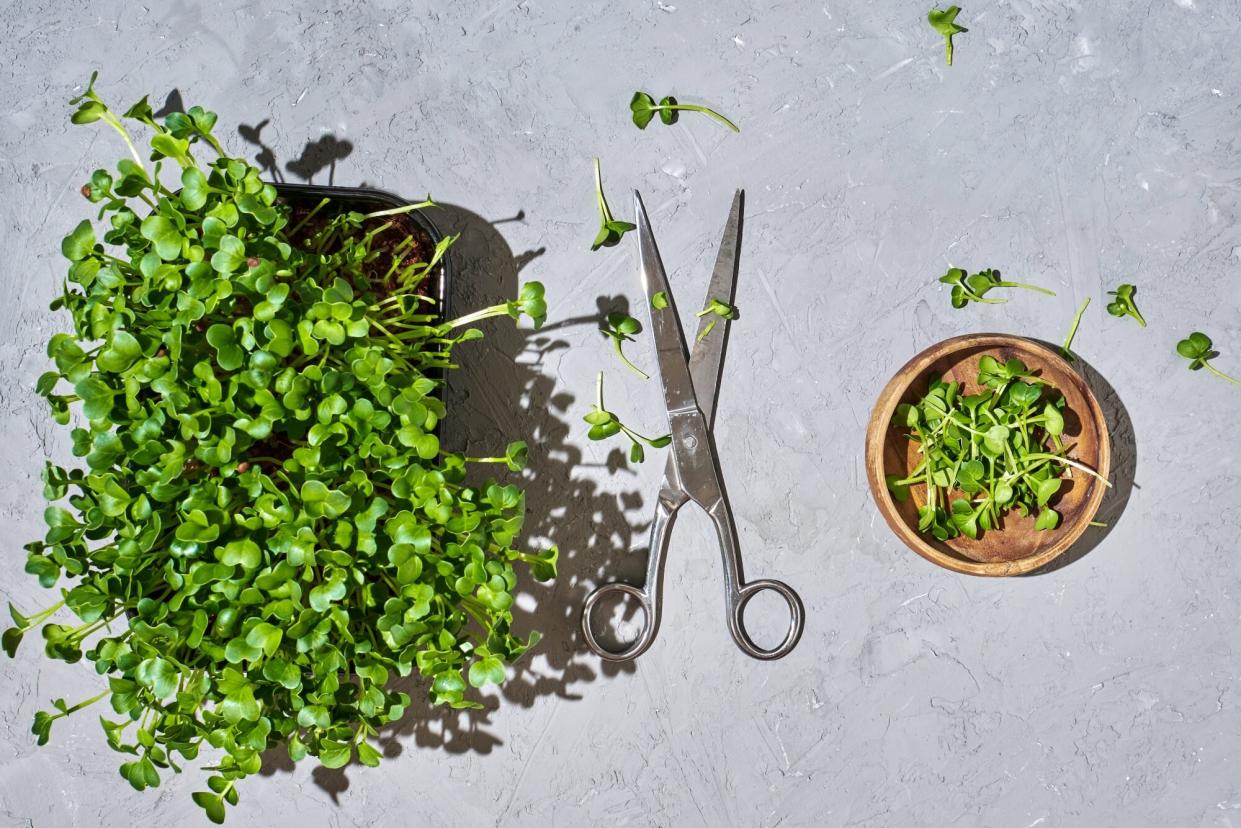
How to Harvest Microgreens
Once your sprouts appear, you'll likely be itching for a taste test—however, Currie says you'll need to be patient before you can start using them in your cooking. "Once your seedlings start to pop up, uncover them and continue to mist them daily until harvest," she says. "This will take anywhere from one to three weeks, depending on the type of seeds you plant."
"Once seedlings have their first pair of true leaves, they are ready to harvest," she says. "Simply cut them above soil level to prevent contamination and wash them well. If you want to pull them out and enjoy their roots too, be sure to wash those thoroughly before eating."

