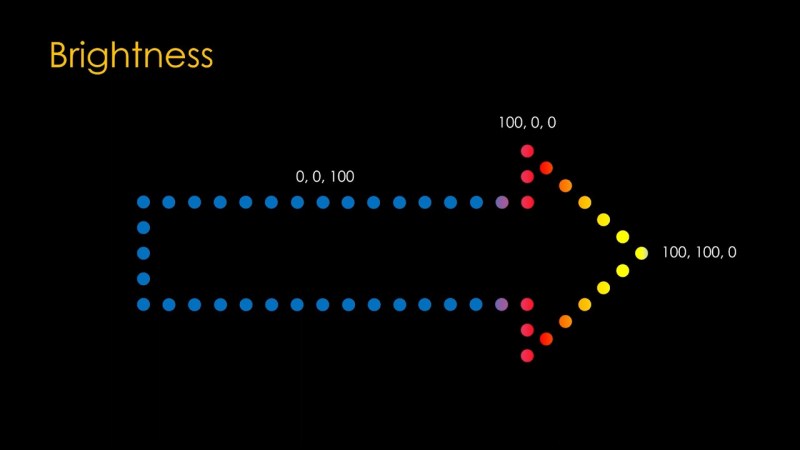
Visitors at the Garden D’Lights in Bellevue, Washington had a problem. While touring the holiday lights show, they kept straying off the path. The event organizers tried some simple LED arrows, but they were just more points of light among a sea filled with them. This is when [Eric Gunnerson] was asked to help out. He’s apparently had some experience with LED animations, even cooking up a simple descriptor language for writing animations driven by an ESP32. To make the intended path obvious, he turned to a PVC board with 50 embedded WS2812 pixels –RGB controllable LEDs. The control box was a USB power adapter and an ESP8266, very carefully waterproofed and connected to the string of pixels. The backer board is painted black, to complete the hardware. Stick around after the inevitable break, to get a look at the final
The description of the build process is detailed and contains some great tips, but without a clever LED animation, it’s still of questionable utility. The pattern chosen is great, with the LEDs being blue most of the time, and a flame-like gradient chasing through the arrow every couple seconds. It’s obviously different from the lights of the show, and seems to be a real winner. [Eric] has published his code, with the sheepish caveat that he had to reinvent the wheel once again, and couldn’t reuse any of his previous LED animation work on this one. It’s a simple hack, but a great build log, and an effective solution to a subtle problem. And if addressable LEDs are your thing, check out our other hacks!


Maybe they could use a lighted pathway?
Or a solar roadway, with bands of LEDs animated to show the direction of travel.
Solar does not work; there’s simply not enough energy in December in the gray overcast december days of seattle. You would need huge panels to get enough.
Well, okay then, never mind.
Very cool! For simple 2D jobs like drilling holes I would recommend using a printer to make a paper template for the drills. I think that could reduce the turn time from 30 minutes down to something like 10 or 15. Also, the arduino IDE supports OTA firmware updates for the ESP. I’ve used this a few times when my projects are in enclosures.
It’s hard to believe printing and using a template would be either easier or faster than the Shaper Origin he used.
I’ve used paper templates in the past. They can work okay but you need to take quite a bit of care on each hole to makes sure that you get the results you want, and you need the right bits in a size that works. In this case, that would be easy because it’s a 1/2″ hole, but that’s not generally the case.
And yes, I could have done OTA, but that means that I’m the only one who can do the updates, while with the web server anybody with a phone can do them.
Am I supposed to hear speech or something in this video? Minus 12dB. Please normalize before posting.
-10 to -12dB has been the level for regular speech in video for decades. This is what the “0” mark was on many camcorders that had manual recording level controls. It’s only because of audio inflation on TV and YouTube that everybody seems to now think that -3dB is as quiet as it should ever get, so this is what the automatic level controls in most cameras now aim for. And I’ve seen videos that never drop below -1dB for more than 10ms, which is ridiculous.
This means that you have to apply a limiter and/or compressor in order to meet the new user expectations, and to hell with dynamic range. But I realize this is an argument I’ll never win, so forget I mentioned it.
Oh: do you, by any chance, have a volume control on the device you’re using to watch videos? Maybe this could be a workaround.
Sounds fine to me on an iPad.
Nice build, aside from the horrors happening with those mains adapters and hot glue hidden in the boxes. (6mins into the vid)