Since 2013, I’ve been using the Nokia Lumia 1020 as my go-to phone for just about everything and especially those days when I know there will be scenic photos to take or especially low-light photos or anything else where I know I’ll want really high resolution flexible RAW photos. I’ve been waiting for a new phone to come out that could compare with its sheer image quality prowess. Finally I think the Huawei P20 Pro with its 40 megapixel camera (plus 3 other cameras) has the flexibility and quality to take the Lumia 1020’s crown. The P20 Pro is much different though and there are lots of tricks to learn and things to avoid in order to make the most out of its photography capabilities. The first part of this article is going to go over a lot of the problems you may encounter, but don’t let that dissuade you from the great imagery you’ll be able to create by the end of the article.

Can the Huwei P20 Pro top my old Nokia Lumia 1020?
Pros shoot in RAW
Okay, fine, maybe that’s not entirely true. I know a lot of professional photographers who trust their digital SLR’s in-camera post-processing capabilities, but for me… I always shoot RAW because there are huge advantages to it. I’ve been shooting RAW on my mobile phones since it was possible with the Nokia Lumia 1020 and always shoot RAW on my full-sized cameras.
As you may have learned from Ansel Adams, 50% of the creative process in taking a great photograph occurs as post-processing in the darkroom. I took this to heart when I was a film photographer creating color or B&W prints in the darkroom, and the concept has extended to my work in digital photography. When you shoot JPGs, you don’t have as much of the flexibility to correct or create a really amazing photograph as you do with the RAW data. This is especially true when the JPGs are processed in a way that isn’t so nice… such as ugly splattered noise reduction or over sharpening filters. Furthermore, having the RAW data from old photos in the future is so great for making photos I shot 15 years ago look like new. 15 years from now, we’ll have much better RAW processing software, too. I’d hate to be stuck with crappy JPGs when that time comes. Ever since Photoshop 3 gained the ability to make layers, non-destructive image editing has been a priority. Being able to go back later and change the way an image was processed is extremely useful.
Unfortunately, the Huawei P20 Pro only supports RAW capture in one camera software mode (the Pro mode) and only on one camera sensor (the 40Mp sensor). That means you can’t get RAW data from the 87mm telephoto 8Mp camera/lens combo, the B&W 20Mp camera, or the 24Mp front facing camera/lens combo. You can’t even get alpha channel depth map data from the multi-camera artificial intelligence processes.
There is no “Optical Zoom”
None of the 4 camera sensors on the Huawei P20 Pro have optical zoom. I know you’ve probably seen marketing materials and other tech reviews that talk about optical zoom on the P20 Pro, but that’s not true at all. Optical zoom is when the optics (lens elements) physically move in order to change the way the light hits the film or imaging sensor. The point is to be able to change the photo’s composition without moving and without changing the image quality. That doesn’t happen here…

What the Huawei P20 Pro (and most other multi-camera smartphones) do is switch between cameras with different lenses in order to change the focal length. Again, this isn’t really zooming at all. It’s analogous to having one camera with a 27mm prime lens and one with an 87mm prime lens… putting one down and picking up the other one when you want to use a different focal length.
There is some digital zooming tech (cropping) which can smooth the transition between using the 27mm wide angle lens/camera combination and the 87mm lens/camera combo. And anything beyond the 87mm focal length is just further digitally cropping image data from the sensor to give a more close-up photo. Huawei calls the digital zoom beyond the 87mm focal length “hybrid zoom”, but that doesn’t really mean anything. It’s just digital cropping with some software resampling.
The 87mm telephoto camera
I was very interested in the 87mm telephoto camera on the P20 Pro since having that longer focal length will let me get a closer framing without having to move closer to the subject. A telephoto lens also tends to behave differently with the depth of field compared to a wide angle lens, so that was another photographer’s tool I was interested in using. This lens/camera combo on the phone is the only one with optical image stabilization meaning there are movable parts and sensors inside the lens/camera housing that compensate for handheld camera movement in order to keep the optics steady.
Unfortunately this camera/lens combo only has an 8 megapixel sensor and its image quality is much much worse than the 40 Megapixel sensor. It’s even worse than an iPhone. So again, this doesn’t even give us anything resembling optical zoom. Optical zoom is supposed to change the focal length while keeping the image quality the same. Switching to the 87mm telephoto lens/camera combination is actually, in my opinion, worse than simply cropping the 40 Megapixel photo you’d get from the other lens.

Here’s an 8mp shot of a live performance using the telephoto lens/camera combo. The color is bad and there’s ugly noise reduction.

Here’s a cropped image from the 40Mp sensor that I edited in Adobe Camera Raw of the same performance. I was able to fix the color a bit better than Huawei’s software, and the noise looks a little better than the processed noise-reduction filter from the 8Mp shot.

In the above crop, I used the 8Mp telephoto camera, and you can see a huge amount of sharpening and post processing was applied to the JPG in camera. This might be acceptable for social network sharing, but it’s certainly not professional quality.

Here’s a similar view, except it’s a 100% view cropped from the 40Mp camera’s RAW file. It’s a much cleaner image.
It seems to me that there really isn’t much of an advantage to switching to the 8Mp telephoto camera versus simply saving the RAW file and cropping it later. The 8Mp camera/lens combo doesn’t even have RAW output, so you’re stuck with that ugly over-sharpened image quality, too. It’s too bad you can’t shoot full 40Mp RAW and use digital zoom on that sensor alone for the JPG like we could with the Lumia 1020.
A 20Mp greyscale camera
Speaking of extra cameras that are practically useless, the third camera/lens combination on the Huawei P20 Pro is a 20 megapixel greyscale sensor. It doesn’t collect color light information, just the luminosity levels. It also doesn’t output in RAW format, so we only get processed JPGs.
A dedicated greyscale camera might have been useful if it did anything better than the 40Mp color camera on the same phone. For the most part, it doesn’t. You might see other reviewers say that the 20Mp greyscale camera can provide better contrast or detail than the color image sensors or contributes to a higher dynamic range for the color photos, but from what I’m seeing, that’s not true.
Using channel operations to convert the 40Mp RAW DNG photos to greyscale gives me far more control over the exposure and levels than the B&W JPG from the 20Mp sensor does. I have color channels that can be adjusted individually in order to tweak contrast in specific areas where as the B&W straight JPG is just plain luminosity levels. In other words, I’m able to use the 40Mp sensor to make a much better B&W photo than the dedicated B&W camera can.

This sample was shot with the 20Mp monochrome sensor.

This sample was shot with the 40Mp color sensor and then converted to Black & White using per-channel contrast adjustments. You can see how much more control I have over contrast in specific areas.
As a photographer and artist, the rule is to only use black & white techniques when the color takes away from what the image is communicating. Sometimes you don’t realize that until later on, and clearly I have much more flexibility with the 40Mp RAW photos in generating beautiful black & white images.

In very low light scenarios, you can notice slightly less noise coming from the 20Mp monochrome sensor (above left) versus the 40Mp (downsampled to 10Mp) color sensor, but it’s not that significant considering your loss of RAW editing capabilities.
Artificial Intelligence Stupidity
Like some previous Huawei devices, the P20 Pro has a Neural Processing Unit that enables some artificial intelligence features such as automatic scene/object detection. The camera in “Photo” mode can recognize about 19 categories of scenes and automatically adjust the exposure settings and processing filters according to what Huawei has already programmed in for those specific categories.
There’s no way for me to customize or even enumerate what exactly is changed for each detected scene category, so that’s not very useful. It might turn on the fake blur filter, or make the blues bluer, but usually those are things that I don’t want. One exception is when pointing the camera at a poster or ad on the bulletin board, where it switches to a document scan mode that automatically crops and straightens the image so it’s more readable. That one is very nice.
What would have been really useful for this AI integration would be to use the scene detection as metadata keyword generation. If all of my photos had keywords automatically applied for things like “food”, “greenery”, “blue sky”, “text”, “Person”, etc… THAT would have been huge! In Adobe Bridge, Lightroom, Corel Aftershoot, or Capture One, I could easily sort by keyword to find all of my People photos and apply specific presets programmed by me to process those photos. Of course it would have to apply to the RAW photos and currently, RAW capture doesn’t work at all with the AI features. There’s no reason that it shouldn’t. DNG files are certainly capable of saving lens distortion, color correction, keywords, etc. as non-destructive metadata. Bringing it to the next next level would be allowing me to tag people with names and then have the AI automatically recognize and re-tag those people with keyword metadata.
Unfortunately, zero useful AI-generated metadata is applied to the photos. There are no keywords or any kind of sortable metadata that tells me what processing or filtering was done to the image AND all the processing is destructive. There is some “Description” metadata though, but it’s always nonsense letters like “mon” or “nor” for B&W photos, “dav” or “mde” for the 40Mp sensor, “rhdr” and “edf” for I don’t know what, “btfmdn” or “btf” or “btfhdr” or “frem” for the front-facing camera, “oznor” for the 8Mp telephoto camera, and “rpt” seems to indicate using the fake bokeh filter. Unfortunately all of that is in the “description” metadata so it can’t really be sorted or searched as well as if it were applied as keywords.
If you find the AI features don’t add any useful utility, they can nicely be shut off by tapping the “X” button next to their recognition tags in the viewfinder or it can be shut off entirely in the settings. Really I wish the AI was used in a more-professional and useful manner though. The AI processing should be non-destructive and preserve the RAW data so that it can be modified later. Using AI for metadata keywords would be amazing as well. There is so much potential to use AI as a photography tool, but this implementation is not flexible enough to learn or adjust to my needs. It’s a very narrow poorly-done form of artificial intelligence.
The flash doesn’t work
Speaking of stupid implementations of artificial intelligence, the flash on the Huawei P20 Pro doesn’t even work. That’s right, it was not programmed to sync with the shutter when you take a photo in Pro mode with RAW format turned on. It goes off, but at the wrong time, thus making for a completely black image in low light. I mean, this phone has the Leica logo on the back and the word “Pro” in its name. I would think I’d have some extra flash sync options like rear-curtain sync or front-curtain sync or power level controls or off-board flash connectivity or even a decent flash like the Xenon one on the old Lumia 1020 and Nokia PureView 808. But no, it’s just a dual LED junker that doesn’t even turn on at the right time. To be fair, the flash does work in the non-professional modes, but still, if I can’t shoot RAW there’s no point in using this. We reproduced this problem on three different P20 Pro’s, too, so it’s definitely not just a defective unit.

Sorry, the flash doesn’t work when you want to save RAW files.
Since I can’t depend on the Huawei’s P20 Pro flash to fill in shadows or brighten really dark rooms like I could with the Lumia 1020, my fix for this included carrying around an off-camera pocket light like the Litra Torch. This works very very nicely for dimly light party photos as well as filling in shadows and adding some sparkle in outdoor photos.

A Litra Torch provides better lighting than Huawei’s LED flash that doesn’t work.

A Litra Torch is a huge help when lighting very dark areas since the Huawei P20 Pro’s flash doesn’t work.
3D filters are bad in almost all cases
It’s quite the trend these days to use multiple cameras on phones to generate somewhat 3-dimensional depth maps of 2D images in order to be able to apply filters for faking different lighting effects or blur the background like a wide-aperture large-sensor camera might be able to do. Apple doesn’t want you to call them filters, but they are. Anyway, none of them have ever worked well or reliably, and the P20 Pro is no exception. You’ll see other tech reviewers praising these filters on the Google Pixel 2, iPhone X, and plenty of other phones, but if you actually look at the pictures, you’ll see plenty of ugly artifacts and consistency problems. In most cases, these filters look like something a high school student did in a Photoshop class that he or she signed up for because they thought it would be an easy A.

All of those above lighting effect filters use the depth map created from combining the data from the monochrome camera and color sensor to apply effects to selective parts of the image. It attempts to isolate the subject and also determine some z-axis depth channel information to apply lighting effects.

Portrait mode’s background blur filter really doesn’t detect or filter hair or other fine edges properly at all.
The “portrait mode” which has become synonymous with crappy background blurring filter effects is a little better than all of the other phones that try to follow this trend, but it’s still totally unacceptable for anyone that deals with professional photography. When I show my model friends these samples, the initial impression is “Oh wow!”, but then that sentiment quickly turns to disappointment when she touches the screen to zoom in on the edges and sees the messy filter artifacts.
But wait, with a little skill and positioning, we can actually get that fake bokeh filter to look somewhat acceptable.

By positioning the subject’s hair near something the AI background blur filter can see better and we can improve the effect.
In the above example, our model is positioned next to a lamp post which takes a good portion of her hair out of the depth mapping equation and thus out of the range of fake blur compositing problems. You can still see the hard edge of the blur filter on the left side of her head, but it’s much less noticeable than if it was the whole head.
Still, the background blur effect looks unnatural and fake because it doesn’t change the extent of the blurring based on distance from the focal point like a real camera would. The blur levels should increase as the z-axis distance from the focal point increases, but with these filters, the blur level doesn’t simulate physics quite right.
Night Mode
One more nice AI mode feature is the Night Mode. You have to specifically switch to this mode, but what it does can be useful. Night mode seems to take a series of bracketed exposures and then combines them into one photo that should appear brighter and less noisy than a normal single exposure would.

That’s pretty nice, but again a photographer is at the mercy of letting the software do what it wants here. The old Nokia Lumia 950 does this much better in its “rich capture” mode since with that, not only do we get to edit the extent to which the bracketed exposures are merged post-shooting, but we also get all of the RAW files for each exposure which allows for far more-extensive and future-proof editing & merging. It’s disappointing that Huawei’s software lacks this professional forward-thinking focus.
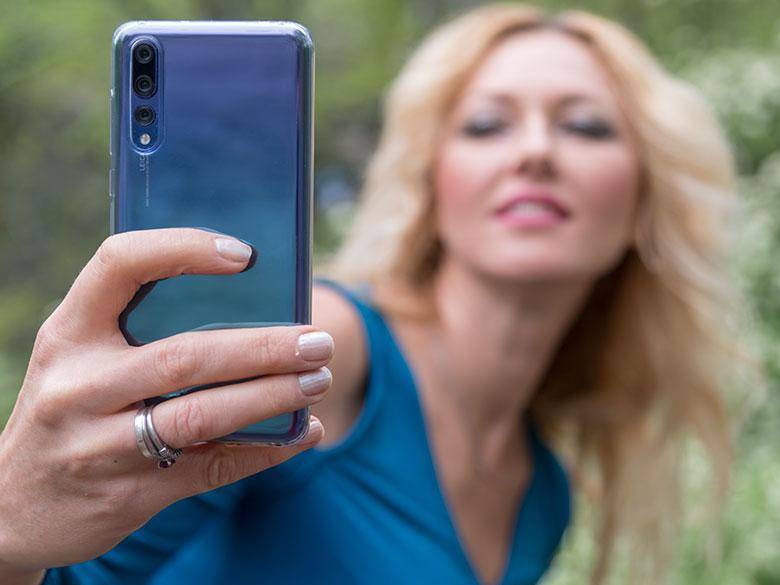
24 Megapixel front facing camera
The front-facing camera on the Huawei P20 Pro is the best I’ve ever seen. That’s not saying much since just about all front-facing phone cameras are very low quality, but this one has stepped things up a lot. You can actually count eyelashes, the detail is so good (relative to other front facing cameras)!

The 24Mp front facing camera can capture great detail (if you get the right focus point).
However, you may notice that sometimes your selfie photos are very soft, even blurry. It turns out that this front facing camera has a pretty narrow depth of field due to its wide aperture… and it also has fixed focus. That means there is only a specific distance from the lens that’s going to be sharp, so if you want the photo to look good, you have to get your face in just the right spot. Don’t hold the phone straight out with your hand… those will be blurry. Bend your arm a bit and get a little closer so that your face is within the focus area.

If you click to zoom in on this front facing camera photo, you’ll see it’s pretty blurry. The Huawei P20 Pro is not great for multi-person selfies since both people can’t usually fit within the focus point area.

If we get the subject in just the right spot where the focus point is, find some good lighting, and keep things from shaking, then we can get a pretty sharp photo with the front facing camera.

You’re going to want to turn off all of the front-facing camera filters, too. They don’t work very well.
40 Megapixels of awesomeness
That brings us to the real deal… the reason for buying this phone… the 40 Megapixel sensor.
Firstly, you’re going to want to turn on RAW DNG mode so that you can take full advantage of this camera’s imaging capabilities without being locked into its built-in post processing. This is the only camera on the phone that supports RAW and the “Pro” mode is the only mode that allows for saving the RAW photos as well. In fact, none of the AI features or even zoom/cropping are available if you want to save the RAW files. That’s a huge disappointment as the Nokia Lumia 1020 was able to use digital zoom to create the a JPG while at the same time saving the 41Mp RAW DNG file for further edits later on.
Step 2 for me at least is going to be generating a lens geometric distortion and vignetting model profile that I can use in Lightroom or Adobe Camera Raw. (Here’s how.) The Huawei P20 Pro has software built in that does some of these corrections in a destructive way when processing the JPGs, but we’re professionals so we need a more-flexible non-destructive method.

It turns out Leica’s lens quality on the Huawei P20 Pro is pretty bad, though not as bad as the Hasselblad MotoMod, but much worse than the Carl Zeiss lens on the Lumia 1020. The Huawei P20 Pro lens has a huge amount of light fall-off and color imbalance anywhere other than the center of the frame. Correcting this manually, you’ll have to crank the vignetting correction amount up to 100, and crank the vignetting midpoint all the way down to zero. You’re still going to get a blue color casting ring around the center too, so a radial filter with maybe +11 temperature and +17 tint values should help with that. The Huawei P20 Pro’s camera software corrects this in the JPGs somewhat, but still it would have been way better to have a good lens instead.

Despite all of these lens problems, the 40 Megapixel camera is still pretty awesome. It gets amazing detail and great color reproduction in the center of the frame. The sharpness of the image is even a little better than the 41Mp Nokia Lumia 1020 from 2013. Of course, it saves RAW files much quicker and the auto-focus is much faster than the Lumia 1020 as well, so those are huge advantages.

Once you get used to the 40Mp camera’s limitations, you can get some extraordinary images.

The detail and color coming out of the 40Mp RAW photos is very impressive.
Real Bokeh
While that fake bokeh effect is usually pretty terrible, the Huawei P20 Pro has a pretty big physical sensor at 1/1.7″ (Though that’s not as large as the Nokia Lumia 1020’s 1/1.5″ sensor) with a wide f/1.8 aperture and really close focusing distances. That means if you get close enough to the subject, you’ll have some nice real background blurring bokeh effects.

When you’re close to a subject, you can get really nice natural bokeh (background blur) without any filters.

Here’s a 100% crop of a 40Mp photo of some flowers. The depth of field is VERY narrow at this focal distance, so only a very small portion of the image is in focus. That means you get lots of real bokeh, but if you really wanted more of the subject to be in focus, you’d have to adjust the focal distance since you can’t adjust the aperture.
However with certain smaller subjects, that wide aperture may cause a depth of field that’s too narrow! Real cameras generally have variable aperture lenses so you can control the depth of field (and the amount of light hitting the sensor/film), but there’s no such capabilities on the Huawei P20 Pro. Make sure you don’t confuse an actual aperture with the fake aperture filter effect which can also be found in the Huawei P20 Pro’s software.
Conclusion
There’s a lot to get used to in using the Huawei P20 Pro as my new daily driver and pocket camera as would be true with any camera. It certainly has the best imaging quality for any phone that’s been released in the past 5 years since the Nokia Lumia 1020. Still, there are a lot of things that could have been done much better and the 2 extra cameras on the back besides the 40Mp sensor seem almost completely unnecessary. I really wish the artificial intelligence chip was used in a more professional manner as opposed to the consumer-style “we know better than you” manner that was implemented. Huawei gets a lot of the basics wrong too. Having a flash that doesn’t go off at the same time as the shutter is embarrassing. I’m surprised it’s still not fixed weeks after we told Huawei about it.
Still, this is the most satisfied I’ve ever been with the camera on an Android phone or iPhone. Ever since Microsoft bought out and fired everyone at Nokia, there really hasn’t been any significant improvements in smartphone camera quality. With the proliferation of terrible filters, I’d say it’s even gotten worse! Thankfully, with the Huawei P20 Pro, the time has finally come to see some real improvements in a smartphone camera. Still, we have a long way to go.
If you want more full resolution samples, check out my Flickr Album.
You can also try downloading my Lens Profile Corrections file (though it may still need some tweaks.)
Thanks to Brana (web, insta) and Angelina (insta) for modeling.