Uncharted 3 Drake's Deception Walkthrough
Glob trotting kleptomaniac Nathan Drake returns. Our Uncharted 3 Drake's Deception Walkthrough provides a guide to the story, hidden secrets, and puzzle answers.

- Walkthrough: There is a lot of treasure to plunder. Time to find the booty
- PlayStation 3 Trophies: Gain new Trophies for your collection
What's New:
- November 3, 2011: Version 1.1. We have more videos of treasure locations and puzzle answers
- November 1, 2011: Version 1.0 of the Uncharted 3 Drake's Deception Walkthrough is here. We go through and find all hidden treasures. Videos will be coming later.
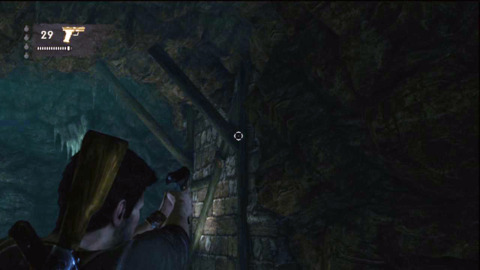
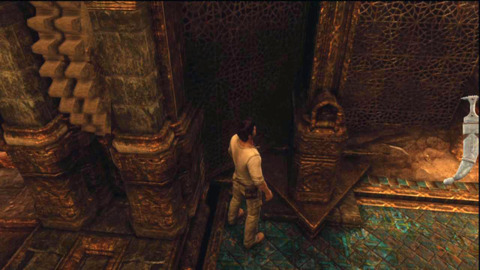
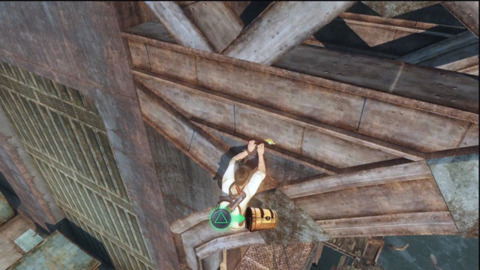
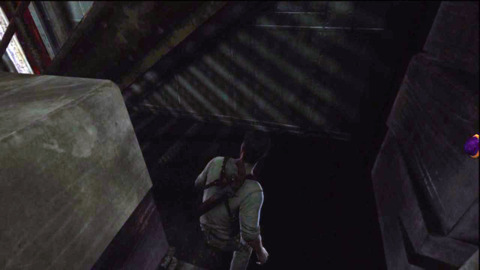
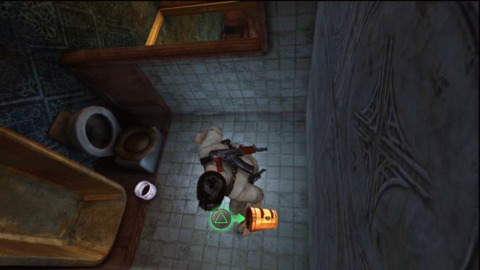
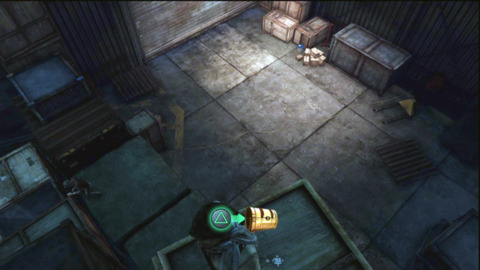
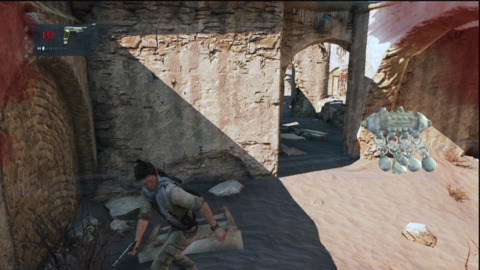
Chapter 1: Another Round
Minecraft – Kung Fu Panda DLC Trailer Sclash - Console Release Date Trailer Kingdom Come: Deliverance 2 - Official Cinematic Announcement Trailer Stellar Blade - BIBI ‘Eve’ Official Music Video Trailer | PS5 Apex Legends: Urban Assault Collection Event Trailer Total War: WARHAMMER III - Elspeth von Draken Gameplay Showcase Potionomics: Masterwork Edition - Official Announcement Trailer Genshin Impact - "Arlecchino: Sleep in Peace" | Official Character Teaser Snowbreak: Containment Zone - "Gradient of Souls" Version Trailer Harold Halibut GameSpot Video Review Nancy Drew: Mystery of the Seven Keys | World Premiere Official Trailer Modern Warfare III & Warzone - Official Cheech & Chong Bundle Gameplay Trailer
Please enter your date of birth to view this video
By clicking 'enter', you agree to GameSpot's
Terms of Use and Privacy Policy
2 Treasures
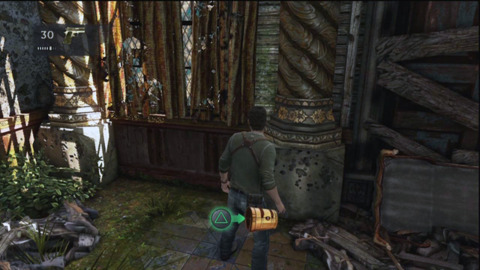
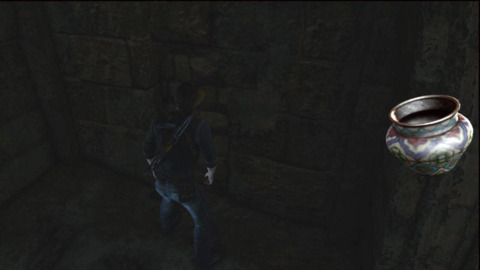
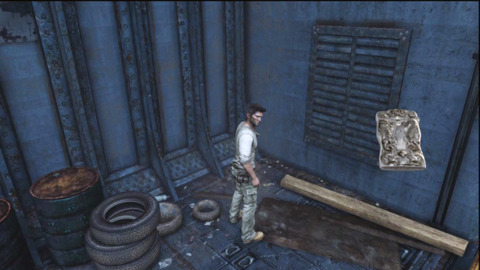
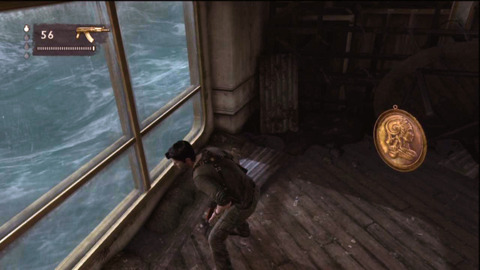
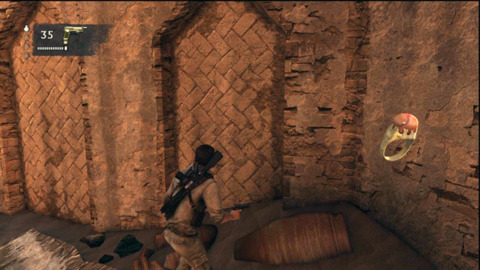
Antique Boxing Medallion
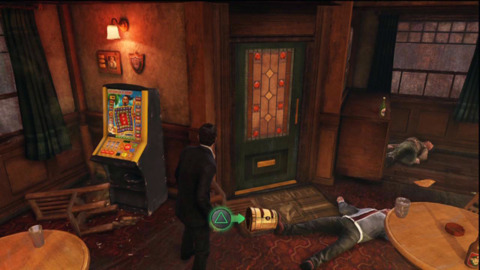
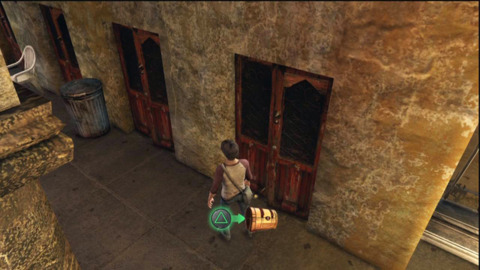
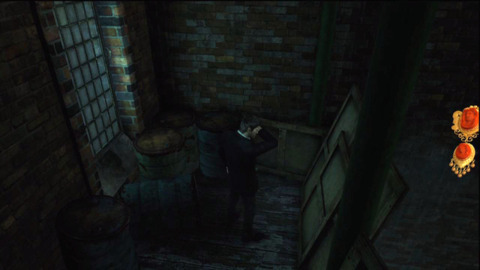
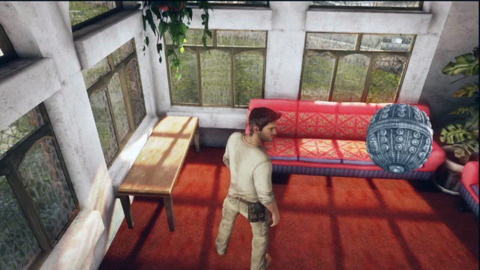
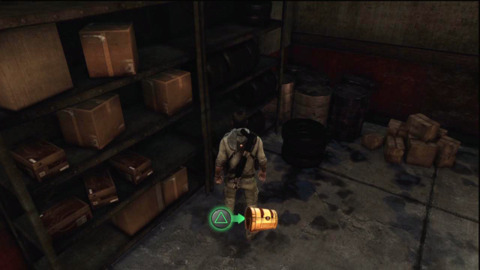
Chapter 1 is short and simple. Both of the treasures are in the first floor of the bar. However, you'll be right in the middle of a brawl and won't be able to pick up either until dealing with most of the enemies. Anytime Drake is engaged in a fist fight you can't collect treasures; however if Sully or another friendly is the beating on baddies you're free to nab the booty.
Brass Vesta Case
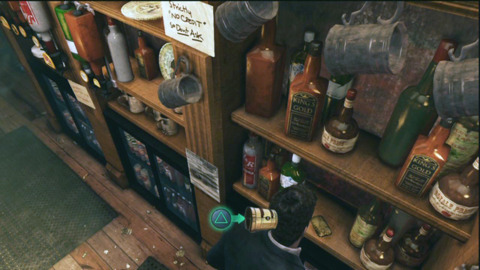
After taking out the first wave of enemies, head over to the slot machine near the front door to collect the Antique Boxing Medallion. You'll have to deal with some large trouble in the bathroom, but afterwards are free to exit the building. Don't rush out just yet, as the Brass Vesta Case is sitting on a shelf behind the bar.
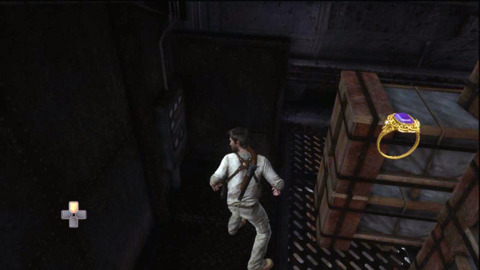
Chapter 2: Greatness from Small Beginnings
7 Treasures
Emerald and Diamond Ring
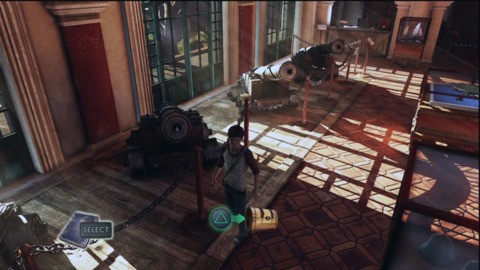
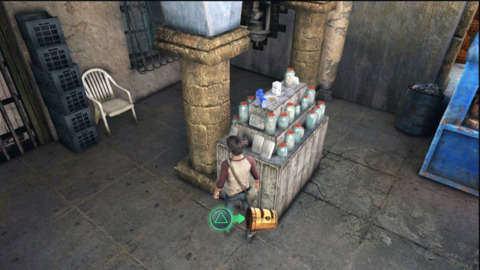
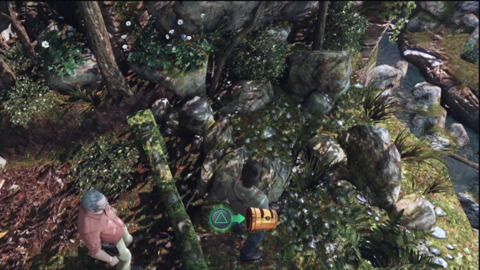
In Chapter 2 you'll be whisked to Flashback City (Also known as Colombia) to steer mean machine child Nathan. You start a street urchin in a museum, which is like a kid in a candy store. While your main goal is explore the museum to find a specific piece of Drake memorabilia, we recommend taking the time to pilfer a few extra items. On the first floor, head to the right and pluck the Emerald and Diamond Ring from the third cannon.
Antique Purse
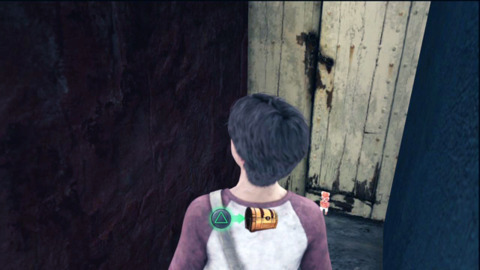
Next, head into the small alcove just ahead to gain the Antique Purse.
Antique Colombian Soup Ladle
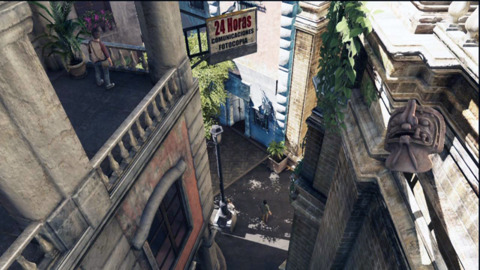
The popos won't like you snooping around and you'll soon find yourself on the untamed streets. After being jettisoned from the premise, corner left around the first column to collect the Antique Colombian Soup Ladle. Gross; be sure to wash it before sticking it in your mouth.
Pottery Chimu Vessel
Around this point you'll be tailing an eerily familiar mustached gentleman. Rather than following right into the strange and dark murder alley, explore the market. There are two more treasures just waiting to be plundered. The Pottery Chimu Vessel is in the right corner of the market sitting among a few jars of who-knows-what.
Ancient Chupicuaro Figure
Head up the street again but this time turn left once, and then left again to find a short stairway leading nowhere. Hike up to the top of the steps and you'll be able to pluck the Ancient Chupicuaro Figure from its final resting place.
Shamanistic Jaguar Head
Your pursuit of the mysteriously youthful bloke will soon take you to the city balconies and rooftops. The end of the first balcony will house the Shamanistic Jaguar Head.
Antique Colombian Table Knife
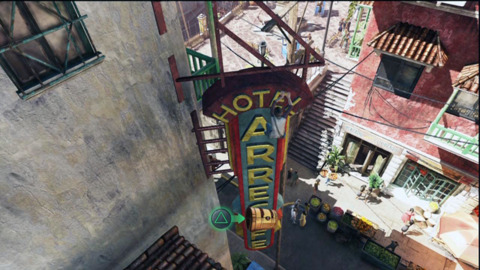
For the last treasure, the Antique Colombian Table Knife you'll need to climb up to the top of the hotel sign. It appears to be contently lodged inside the "O", but should be no match for your child sized claws.
Chapter 3: Second-Story Work
3 Treasures
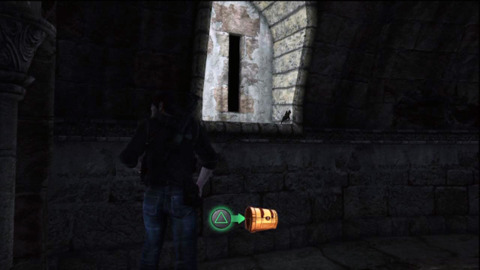
Dog Shaped Whistle
Chapter 3 only has three treasures and all of them are before the action. Therefore you won't have to worry about searching for treasure while evading Marlowe's "Tickle Squad". Anyway, the first treasure is the Dog Shaped Whistle and is carelessly littered on the first balcony of the museum.
Silver Chimu Pendant
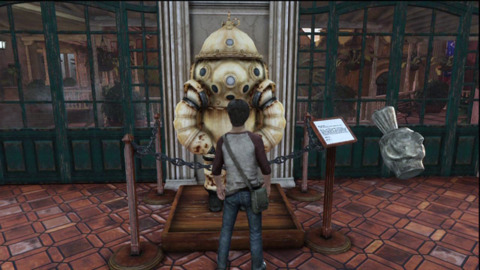
Once inside the Drake exhibit, the Silver Chimu Pendant can be found on top of the "16th centaury" diving suit, right near where you entered.
Seventeenth Century Coin
Now just step to the left, near the locked door leading to the first floor stairs. The Seventeenth Century Coin will be sitting right next to the ship leaver.
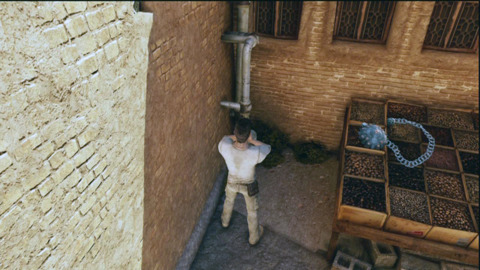
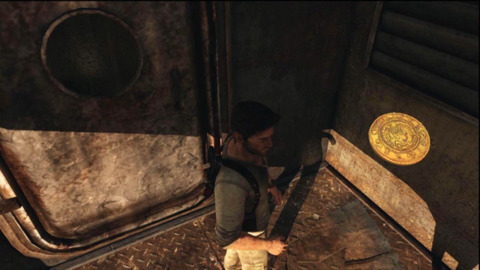
Chapter 4: Run to Ground
Minecraft – Kung Fu Panda DLC Trailer Sclash - Console Release Date Trailer Kingdom Come: Deliverance 2 - Official Cinematic Announcement Trailer Stellar Blade - BIBI ‘Eve’ Official Music Video Trailer | PS5 Apex Legends: Urban Assault Collection Event Trailer Total War: WARHAMMER III - Elspeth von Draken Gameplay Showcase Potionomics: Masterwork Edition - Official Announcement Trailer Genshin Impact - "Arlecchino: Sleep in Peace" | Official Character Teaser Snowbreak: Containment Zone - "Gradient of Souls" Version Trailer Harold Halibut GameSpot Video Review Nancy Drew: Mystery of the Seven Keys | World Premiere Official Trailer Modern Warfare III & Warzone - Official Cheech & Chong Bundle Gameplay Trailer
Please enter your date of birth to view this video
By clicking 'enter', you agree to GameSpot's
Terms of Use and Privacy Policy
6 Treasures
Diamond-Studded Horse Brooch

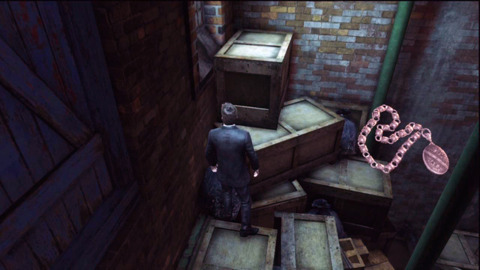
Not only are you an adult again, you're also surprisingly alive during Chapter 4. Head into the alleyway's to dodge the London authorities, but sure to hold right. You'll come into a small nook housing the Diamond-Studded Horse Brooch.
Coral Cameo Brooch
You'll soon find yourself inside a warehouse looking for British people. As you descend over the bars and rafters, stop on the small ledge to collect the Coral Cameo Brooch.
Victorian Locket and Chain
Now just drop down to the main floor and climb up some boxes to discover the Victorian Locket and Chain.
Silver Roses Bracelet

After heading through the secret passage and getting into a skirmish with Marlowe's thugs, veer to the right to pick up the Silver Roses Bracelet.
Fierce Lion Badge
Next you'll be heading down a long pipe. While your goal is to the right, shimmy to the left and nab the Fierce Lion Badge hanging on the broken grate.
Pearl, Diamond and Ruby Brooch

In the final area, Sully will head up and grab a switch on the right. You'll need to pull a similar switch on the left. As you ascend up the ridges, shimmy left, drop down and collect the Pearl, Diamond and Ruby Brooch.
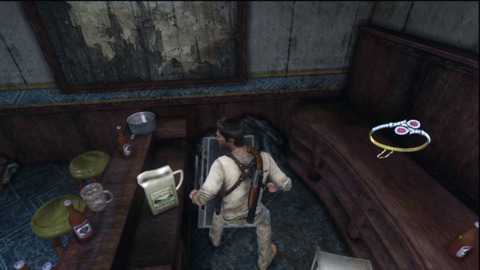
Chapter 5: London Underground
4 Treasures
Victorian Copper Penny
You'll soon arrive in the London Underground of Chapter 5 where four more treasures rest. The first two are inside Marlowe's bizarre hideout. As you climb the pillars in search of the Golden Hind, you'll find the Victorian Copper Penny on the first ledge.
Victorian Gold Sovereign

As you make your escape from the strange place, head up the stairs on the right and up to the second level. Circle around to the other side of the room to find the Victorian Gold Sovereign under a stand.
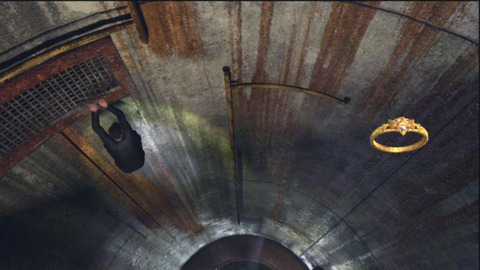
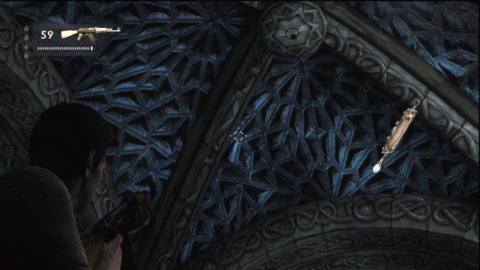
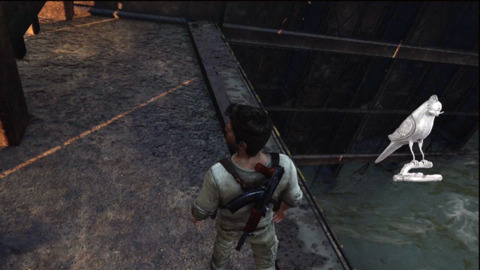
Silver Hunter Pocketwatch
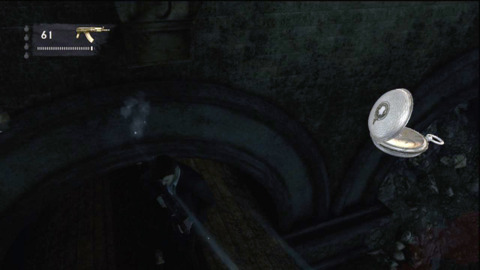
The third treasure is the Silver Hunter Pocketwatch. It's hanging over one of the left train cars during the intense firefight. Point your gun at the treasure and shoot it down. Now climb on top of the cars and grab the treasures.
Art Nouveau Flask

As you advance to the top of the train station, there will be a lone car with the numbers "126". Move to the front of this train and you'll gain the Art Nouveau Flask.
Chapter 6: The Chateau
Minecraft – Kung Fu Panda DLC Trailer Sclash - Console Release Date Trailer Kingdom Come: Deliverance 2 - Official Cinematic Announcement Trailer Stellar Blade - BIBI ‘Eve’ Official Music Video Trailer | PS5 Apex Legends: Urban Assault Collection Event Trailer Total War: WARHAMMER III - Elspeth von Draken Gameplay Showcase Potionomics: Masterwork Edition - Official Announcement Trailer Genshin Impact - "Arlecchino: Sleep in Peace" | Official Character Teaser Snowbreak: Containment Zone - "Gradient of Souls" Version Trailer Harold Halibut GameSpot Video Review Nancy Drew: Mystery of the Seven Keys | World Premiere Official Trailer Modern Warfare III & Warzone - Official Cheech & Chong Bundle Gameplay Trailer
Please enter your date of birth to view this video
By clicking 'enter', you agree to GameSpot's
Terms of Use and Privacy Policy
9 Treasures
Antique Wax Seal Stamp

Chapters 6 and 7 bring you to the exotic jungles of France. As you travel along the shallow river bed, take a right and you'll collect the Antique Wax Seal Stamp.
Gold Inlay Cameo Bangle
Over the next hill will be a statute of man playing a pan flute. Instead of heading to the left, walk up the ridge on the left to discover the Gold Inlay Cameo Bangle.
Diamond and Pearl Bracelet
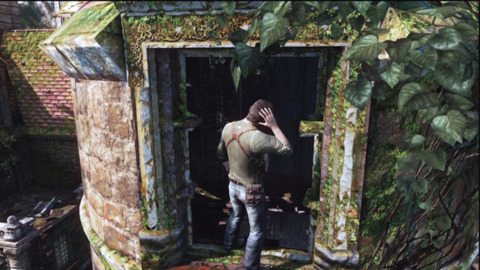
Soon you'll find yourself at the Chateau wall; literally climbing up them. At one point it's obvious you'll need to climb into a broken hole. Don't do this, instead shimmy to the right and climb up to the next floor to gain the Diamond and Pearl Bracelet.
Louis XVI Louis d'or Coin
After swinging on a few chandlers within the Chateau, you'll be at the bottom of two large, broken stair cases. Head to the dead end on the left to pilfer the Louis XVI Louis d'or Coin.
Emerald Cameo Brooch
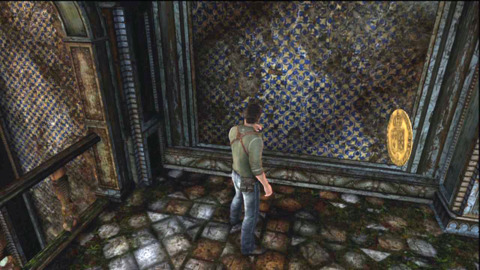
There will be a puzzle with four knights, each with a different piece of gear. Duck into the alcove to the left and you'll find a few paintings on the wall. Shoot at the painting on the far left to unhinge the Emerald Cameo Brooch.
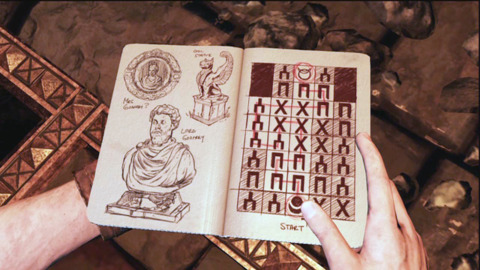
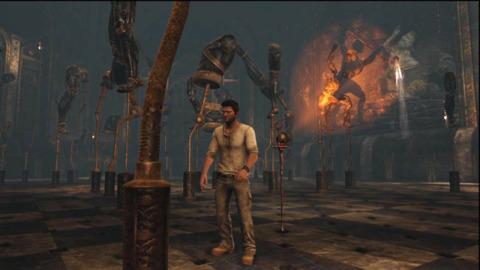
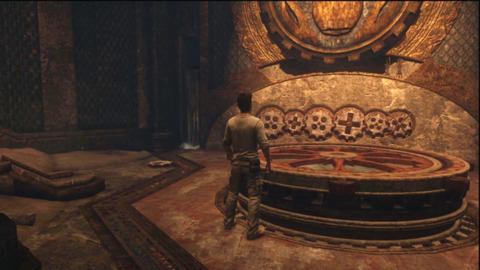
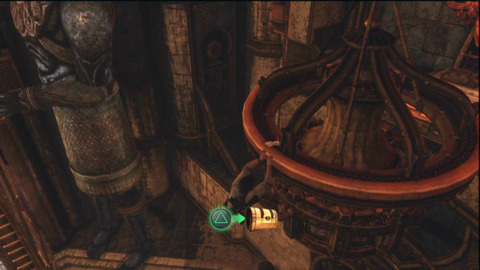
Knight Puzzle
Hey, not a treasure for once. The solution to this is simple: have the shield and axeface each other. Now, point the mace at the shield and the sword at the axe. Check these screenshots if you still have trouble.
Art Nouveau Belt Buckle
The knight puzzle leads to the caves, where the Art Nouveau Belt Buckle can be grabbed on the left.
Ruby and Diamond Ring
Later in the stage you'll be in another heated gun battle. After collecting your first few grenades, search the corner near the gate to gain the Ruby and Diamond Ring.
Silver Rococo Teapot
Now, after the battle you'll discover a dead agent. Head up into the alcove on the other side of the room and climb up to the broken beams. Walk across the wooden plank bridge to gain the Silver Rococo Teapot.
More Puzzle Solutions
The Path to John Dee's lab has two more puzzles to get through. The first requires you to walk over titles. First stand at the moon shaped symbol on the bottom now head up, left, up, right, up, up, left, down, left, up, up, right, right, right, up, left, and up. Check out the picute if you get a bit confused.
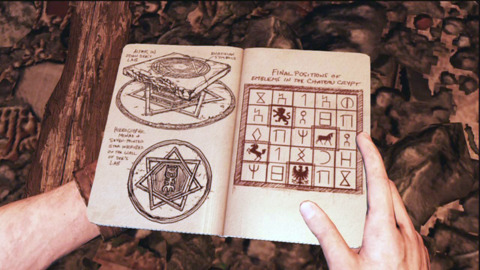
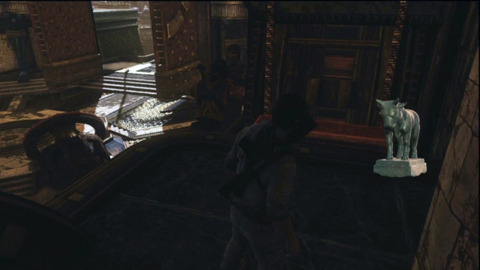
For the next puzzle place the bird at the coordinates (2,0), the horse at (0,1), the lion at (1,3), and the steer at (3,2). This will lead to the next area.
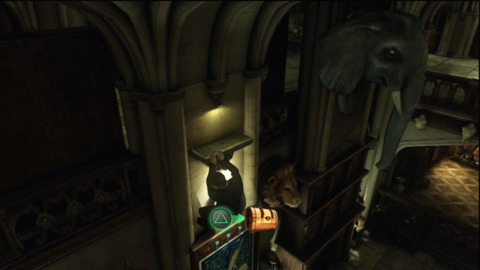
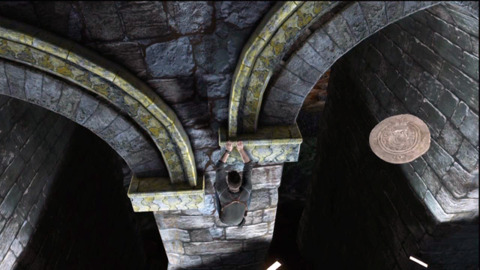
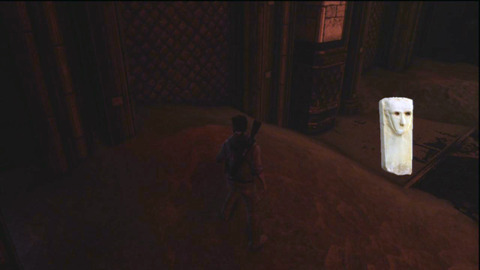
Miniature Portrait Pendant
The last treasure in chapter 6 is the Miniature Portrait Pendant. It's hidden on the ceiling of John Dee's lab. How did it get up there? Anyway, shoot it down and you'll nab everything for now.
Chapter 7: Stay in the Light
1 Treasure
Gold and Pearl Stickpin
Chapter 7 is brief so we've tucked it along with the rest of the French connection. During this chapter you'll return to the castle and swing over a few chandeliers. While Sully will point on to the next room, spin around to the other side, jump over a gap and pick up the Gold and Pearl Stickpin.
Chapter 8: The Citadel
Minecraft – Kung Fu Panda DLC Trailer Sclash - Console Release Date Trailer Kingdom Come: Deliverance 2 - Official Cinematic Announcement Trailer Stellar Blade - BIBI ‘Eve’ Official Music Video Trailer | PS5 Apex Legends: Urban Assault Collection Event Trailer Total War: WARHAMMER III - Elspeth von Draken Gameplay Showcase Potionomics: Masterwork Edition - Official Announcement Trailer Genshin Impact - "Arlecchino: Sleep in Peace" | Official Character Teaser Snowbreak: Containment Zone - "Gradient of Souls" Version Trailer Harold Halibut GameSpot Video Review Nancy Drew: Mystery of the Seven Keys | World Premiere Official Trailer Modern Warfare III & Warzone - Official Cheech & Chong Bundle Gameplay Trailer
Please enter your date of birth to view this video
By clicking 'enter', you agree to GameSpot's
Terms of Use and Privacy Policy
7 Treasures
Silver Sassanid Coin
As you traipse along the entrance path, you'll notice a broken floor walled with caution signs. To hell with warnings, hop over to the broken section and descend even further. Along one of the arches rests the Silver Sassanid Coin.
Ancient Metal Elephant
Passed the drawbridge and an encounter with some thugs will be an open courtyard. Locate the locked gate to spot the Ancient Metal Elephant above you. Shoot it down to collect the bounty.
Crusader Coin

Now shoot down the lock on the gate and proceed forward. On the first right will be a statue holding onto the Crusader Coin.
Enamel Copper Vessel
Ride down the well and you'll find yourself within the depths of the castle. As you waltz up you'll find the Enamel Copper Vessel on the left.
Marble Double Eye Idol

Sully will eventually shoot out a lock barring your exit. Once you can get out of this well, turn around to spot the Marble Double Eye Idol above you. Shoot it down and continue on.
Medieval Lead Horseman
As you reunite with your other allies you'll find yourself headed up a spiraling tower. Spin to the left side and you'll find the Medieval Lead Horseman sitting in a windowsill.
Byzantine Reliquary Cross
In the last area you'll be joined by Cutter. Eventually Sully will also join the party in an explosive matter. When the competition dies down, head through the large hole courtesy of Victor Sullivan. The Byzantine Reliquary Cross will be on the right.
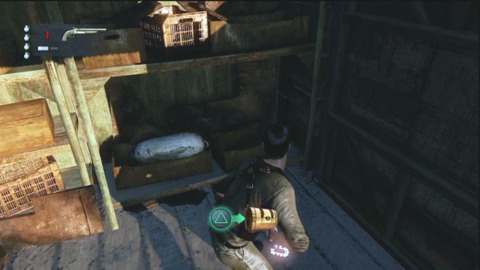
Chapter 9: The Middle Way
3 Treasures
King Bohemond III Coin
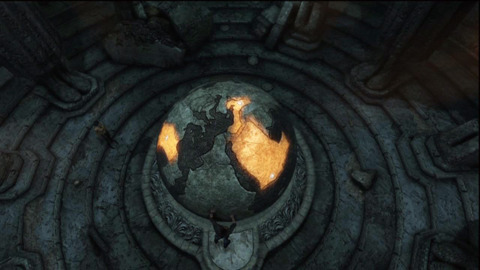
You'll head the crypts of the Syrian castle during Chapter 9. Near the start you'll arrive at a globe surrounded by four large statues. The King Bohemond III Coin will be laying on the left of this room as you enter.
Antique Cuff Bracelet
You and Cutter will come across a few floodgates. Let out the water and go for a swim. You should notice a flickering treasure right above you. Be careful about shooting it too soon. The weight of the Antique Cuff Bracelet will sink quickly. Stand directly under the treasures so that it drops right into your palms.
Crusader Fleur-de-Lis

After solving the globe puzzle you'll be granted access to the inner crypt. Down the first hallway sits the Crusader Fleur-de-Lis among some lovely dead bodies.
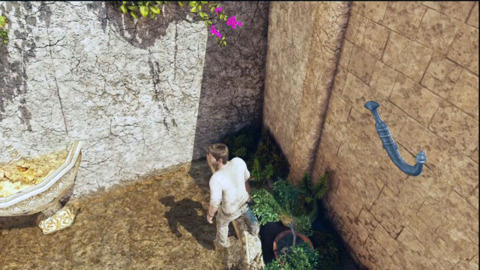
Chapter 10: Historical Research
Minecraft – Kung Fu Panda DLC Trailer Sclash - Console Release Date Trailer Kingdom Come: Deliverance 2 - Official Cinematic Announcement Trailer Stellar Blade - BIBI ‘Eve’ Official Music Video Trailer | PS5 Apex Legends: Urban Assault Collection Event Trailer Total War: WARHAMMER III - Elspeth von Draken Gameplay Showcase Potionomics: Masterwork Edition - Official Announcement Trailer Genshin Impact - "Arlecchino: Sleep in Peace" | Official Character Teaser Snowbreak: Containment Zone - "Gradient of Souls" Version Trailer Harold Halibut GameSpot Video Review Nancy Drew: Mystery of the Seven Keys | World Premiere Official Trailer Modern Warfare III & Warzone - Official Cheech & Chong Bundle Gameplay Trailer
Please enter your date of birth to view this video
By clicking 'enter', you agree to GameSpot's
Terms of Use and Privacy Policy
7 Treasures
Antique Cloak Clasp
You'll mostly be moving around a local market place without a whole lot of action. The first treasure, the Antique Cloak Clasp can be found on the left near the first fruit stand.
Silver Jambiya Dagger
Head down the next set of stairs and to the right to find a fountain. On the right of this water pool sits the Silver Jambiya Dagger.
Golden Yemeni Bracelet
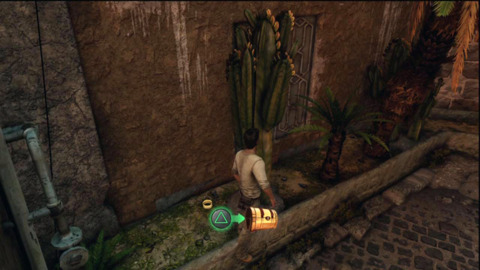
As you continue along one of the merchants will open up a locked gate. Near a patch of cacti will be the Golden Yemeni Bracelet.
Traditional Silverbead
Now head up into the next building and move left to the couch and coffee table. The Traditional Silverbead will be sitting on the floor.
Amber and Silver Necklace

You'll eventually brawl with a large gang of Talbot's men. After this brawl three treasures can be found in quick succession. The Amber and Silver Necklace will be just on the right after the first door.
Kahraman Amber Necklace
Down the stairs and to the right will rest the Kahraman Amber Necklace.
Unusual Red Bead Necklace
Now, climb up to the left and behind the boxes will contain the Unusual Red Bead Necklace.
Chapter 11: As Above, So Below
9 Treasures
Silver and Coral Ring
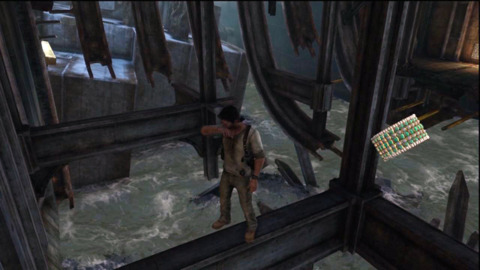
Chapter 11 descends into the Yemen underground. As you climb down the ladder and broken walls don't leap off right away. Instead, shimmy to the left and collect the Silver and Coral Ring. If you miss this treasure, you'll have a second chance to pick it up later in the chapter.
Silver and Leather Dagger
After solving Drake's little switch riddle, you'll open up a long hallway. As you make your way down, hold left to find the Silver and Leather Dagger.
Silver Box

There are two puzzle rooms, and you can enter them in which ever order you like. On the right will be a light and shadow puzzle. While the solution is on the right of the room, head left and you'll gain the Silver Box.
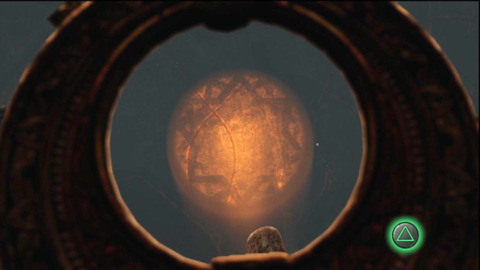
Light Puzzle
Place the light so that it forms a man wielding a spear. The picture above will show such a location. If the solution doesn't register right away, adjust the camera to get a better veiw.
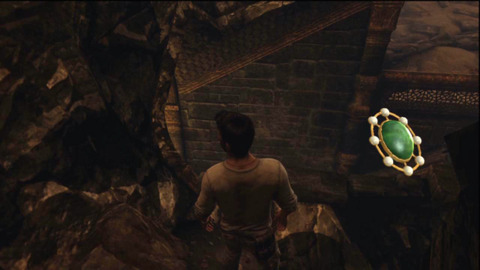
Silver Filigree Bracelet
Don't leave just yet. Take the light, head to the center of the map and shine the light to the right side of the ceiling. This will dislodge the Silver Filigree Bracelet. Place down the light and head over to the treasure.
Pearl and Emerald Brooch
In the adjacent puzzle room you'll find a gear puzzle. Loop around to the right side lower floor to gain the Pearl and Emerald Brooch.
Gear Puzzle
As for the actual puzzle, you will need to attached two more cross gears and three mor with four circles. Place them in the order in the picture ot solve the puzzle. The last large gear will be up on a ledge, and your allies will point out that you will need to climb on the apposite side of the room to reach it.
Amazonite and Amber Necklace
After escaping the well you'll find yourself back at the main city level. Sully and Elena will lead the way, but traveling on your own will reveal three more treasures in quick succession. Head down the dead end on the right to find the Amazonite and Amber Necklace.
Silver Capsule Pendant
Return to the trail of your teammates and you'll come to the large fountain. To the far right of the fountain will be a bench containing the Silver Capsule Pendant
Amazonite and Amber Earring

Now move to the left of the fountain and into the crowd of patrons. Right on the ground will be the Amazonite and Amber Earring.
Silver Yemeni Bangle
Towards the end of the chapter you'll be chasing one particular suited antagonist. In the last area the chase will come to a crawl within a busy bazaar. Instead of pursuing your target right away, duck into the nook on the right and pick up the Silver Yemeni Bangle sitting among the carpets.
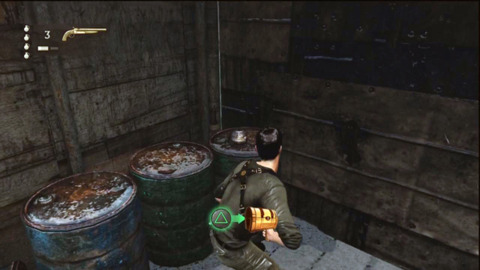
Chapter 12: Abducted
Minecraft – Kung Fu Panda DLC Trailer Sclash - Console Release Date Trailer Kingdom Come: Deliverance 2 - Official Cinematic Announcement Trailer Stellar Blade - BIBI ‘Eve’ Official Music Video Trailer | PS5 Apex Legends: Urban Assault Collection Event Trailer Total War: WARHAMMER III - Elspeth von Draken Gameplay Showcase Potionomics: Masterwork Edition - Official Announcement Trailer Genshin Impact - "Arlecchino: Sleep in Peace" | Official Character Teaser Snowbreak: Containment Zone - "Gradient of Souls" Version Trailer Harold Halibut GameSpot Video Review Nancy Drew: Mystery of the Seven Keys | World Premiere Official Trailer Modern Warfare III & Warzone - Official Cheech & Chong Bundle Gameplay Trailer
Please enter your date of birth to view this video
By clicking 'enter', you agree to GameSpot's
Terms of Use and Privacy Policy
7 Treasures
Seahorse Vesta Case
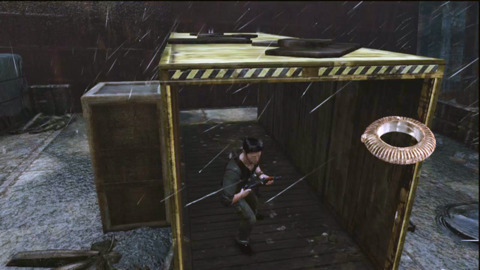
During Chapters 12 through 15 you'll find yourself abducted by Pirate bandits. After the first brawl, make your escape from the cargo ship by climbing up the containers. In one of the corners will rest the Seahorse Vesta Case.
Silver Figa Amulet

After a short climb you'll arrive at a hallway leading left. Instead enter the closet on the right to gain the Silver Figa Amulet.
Antique Silver Parrot
Eventually you'll wind up in a gun battle with the pirates. It's best to look for this treasure once clearing out the enemies, especially those with sniper rifles or behind turrets. Once the enemies are dead, head to the very far right and climb up to the broken platforms. Jump over two gaps to reach the Antique Silver Parrot. You'll know they way if you pass a M32-Hammer grenade launcher.
Turquoise and Pearl Bracelet
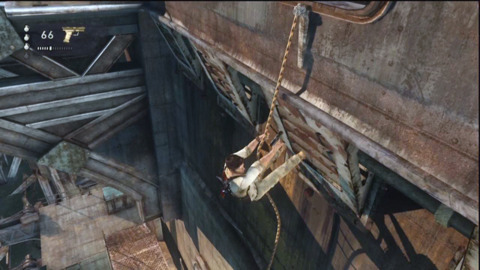
As you swing across the wreckage you'll come to a number of steel beams. Instead of heading forward, loop around to the left and drop down. Hop over and shimmy through the beams to reach the Turquoise and Pearl Bracelet
Unusual Blue Stone Ring
Later in the stage you will be climbing up many yellow and red bars. At once point you'll come to a rope to swing to the next area. Don't do this. Instead bring the rope to a halt and climb up to the window above. Here you'll discover the Unusual Blue Stone Ring inside the room.
Gold Scarab Brooch
Return back down to the rope and swing across to the left side. Instead of heading right into the control tower, move forward and drop down. Hanging at the bottom of the platform will be the Gold Scarab Brooch.
Gold Axumite Coin
Within the radio tower will be a line leading to the next area. Don't take this yet. Head straight and in the right hand corner will be the final chapter 12 treasure, the Gold Axumite Coin.
Chapter 13: Rough Seas
3 Treasures
Antique Silver Box
Chapter 13 will take you to the end of the ship graveyard. Only three treasures are here, and all of them are near the start of the chapter. You can use stealth to get by the guards, or just go guns blazing. Head to the right side of the wreckage to gain the Antique Silver Box.
Ancient Gold and Coral Bracelet
Just a bit north of previous treasure and a little to the right is the Ancient Gold and Coral Bracelet.
Silver Tribal Bangle
Now head to the other side of the wreckage to gain the Silver Tribal Bangle.
Chapter 14: Cruisin' for a Bruisin'
Minecraft – Kung Fu Panda DLC Trailer Sclash - Console Release Date Trailer Kingdom Come: Deliverance 2 - Official Cinematic Announcement Trailer Stellar Blade - BIBI ‘Eve’ Official Music Video Trailer | PS5 Apex Legends: Urban Assault Collection Event Trailer Total War: WARHAMMER III - Elspeth von Draken Gameplay Showcase Potionomics: Masterwork Edition - Official Announcement Trailer Genshin Impact - "Arlecchino: Sleep in Peace" | Official Character Teaser Snowbreak: Containment Zone - "Gradient of Souls" Version Trailer Harold Halibut GameSpot Video Review Nancy Drew: Mystery of the Seven Keys | World Premiere Official Trailer Modern Warfare III & Warzone - Official Cheech & Chong Bundle Gameplay Trailer
Please enter your date of birth to view this video
By clicking 'enter', you agree to GameSpot's
Terms of Use and Privacy Policy
9 Treasures
Unusual Mask Brooch
Well looks like we're on a boat from Chapters 14 and 15. Dart ahead towards the stairs with the weird symbol on them. However, corner around left to find the Unusual Mask Brooch.
Rose Cut Diamond Pendant
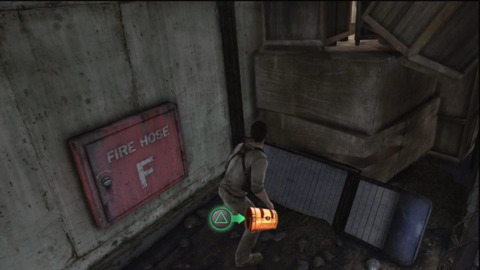
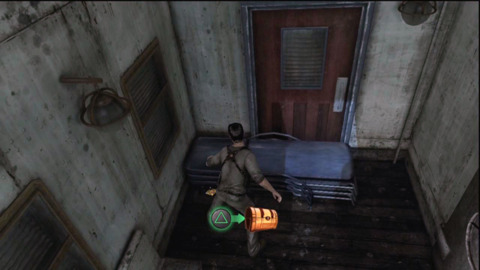
Continue on forward and at the dead end you'll discover the Rose Cut Diamond Pendant near a fire hose case.
Emerald and Pearl Necklace
You'll come to a fire fight with a large crowd of enemies. Due to the massive waves the cargo containers will soon start to shift. Look for the orange one that falls right. Climb on top and jump to the next container to nab the Emerald and Pearl Necklace.
Antique Minverva Pendant
After the battle you'll find yourself in a pool area. Head to the left side to collect the Antique Minverva Pendant.
Ruby and Peal Pendant
There will be another battle, this time in the ballroom. Eventually the enemy will bust through the one of the left doors. Enter through her and to the right will sit the Ruby and Peal Pendant.
Georgian English Compass
Now head down the next passage way and you'll find the Georgian English Compass sitting among some pool chairs.
Ruby and Diamond Bracelet
Fight through a few more enemies and you'll come to a mini bar. Head behind this to gain the Ruby and Diamond Bracelet.
Amethyst Cufflink
Now head down to the lower level, but move under the stairs you just traveled across. Below the steps will rest the Amethyst Cufflink.
Golden Amethyst Ring
Proceed forward and move left into the pile of crates. On the ground will be the Golden Amethyst Ring.
Chapter 15: Sink or Swim
1 Treasure
Silver Rococo Napkin Ring
There is only one lone treasure within Chapter 15. Eventually be climbing up and swinging across several hanging doors. On the first one climb up into the bathroom. The Silver Rococo Napkin Ring will be sitting near the top of the tub and toilet.
Chapter 16: One Shot at This
Minecraft – Kung Fu Panda DLC Trailer Sclash - Console Release Date Trailer Kingdom Come: Deliverance 2 - Official Cinematic Announcement Trailer Stellar Blade - BIBI ‘Eve’ Official Music Video Trailer | PS5 Apex Legends: Urban Assault Collection Event Trailer Total War: WARHAMMER III - Elspeth von Draken Gameplay Showcase Potionomics: Masterwork Edition - Official Announcement Trailer Genshin Impact - "Arlecchino: Sleep in Peace" | Official Character Teaser Snowbreak: Containment Zone - "Gradient of Souls" Version Trailer Harold Halibut GameSpot Video Review Nancy Drew: Mystery of the Seven Keys | World Premiere Official Trailer Modern Warfare III & Warzone - Official Cheech & Chong Bundle Gameplay Trailer
Please enter your date of birth to view this video
By clicking 'enter', you agree to GameSpot's
Terms of Use and Privacy Policy
3 Treasures
Mosaic Birds Pendant
Drake takes the final flight towards the Rub' al Khali desert. First off it's time to get da plane, da plane. Within the Yemen airport are three easy treasures to steal. In the first hanger head up the first tower of boxes to gain the Mosaic Birds Pendant.
Song Bird Brooch

After climbing up the car and heading to the next hanger, turn the corner on the left and head up the boxes to gain the Song Bird Brooch.
Enamel Bird Ring
The third treasure is after alerting the next set of guards. There will be a car parked on the left side of the room. Move left passed this vehicle to recover the Enamel Bird Ring among some boxes
Chapter 18: The Rub' al Khali
1 Treasure
Calcite Statue of Female Figure
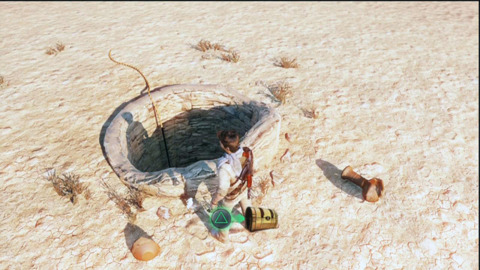
There are no treasures in Chapter 17 so let's skip right to chapter 18. There is only one during your desert walk. The Calcite Statue of Female Figure is behind the dry well. Kick the nearby bucket out of the way to gain the treasure.
Chapter 19: The Settlement
8 Treasures
Ancient Alabaster Ibex
You'll eventually reach an abandoned settlement where eight more treasures wait. Right outside the town on the left wall will be the Ancient Alabaster Ibex.
Coin of the Qataban Kingdom
Within the first room, search the right side wall to discover the Coin of the Qataban Kingdom.
Antique Silver Linked Bracelet

You'll eventually come crawling out of a dank well. You'll walk passed a few broken holes. Stop for a second and pick up the Antique Silver Linked Bracelet.
Antique Agate Wedding Ring
Soon you'll run into the convoy and another shoot out. One of the guards will shoot out a pillar, sending you to the bottom level. Charge to the left and nab the Antique Agate Wedding Ring sitting in the corner.
Silver and Cornelian Necklace
As you climb your way back up to the next floor, a sniper will attempt to gun you down. Dodge the laser sights be moving left. Behind a pillar here will be the next treasure: the Silver and Cornelian Necklace.
Ancient Sabaean Bust
During the next gun fight clear out the more dangerous enemies and head forward. There will be a small nook on the left hand side that houses the Ancient Sabaean Bust.
Ancient Kingdom of Sheba Coin
After the previous fight, slide through the crack and leap over the railing ahead. There is a fight to the left, but instead head right and pick up the Ancient Kingdom of Sheba Coin.
Antique Bedouin Bracelet
During the gun battle with more guards and turrets, book it to the far right side. Passed another entrance will be the final settlement treasure, the Antique Bedouin Bracelet.
Chapter 21: The Atlantis of the Sands
Minecraft – Kung Fu Panda DLC Trailer Sclash - Console Release Date Trailer Kingdom Come: Deliverance 2 - Official Cinematic Announcement Trailer Stellar Blade - BIBI ‘Eve’ Official Music Video Trailer | PS5 Apex Legends: Urban Assault Collection Event Trailer Total War: WARHAMMER III - Elspeth von Draken Gameplay Showcase Potionomics: Masterwork Edition - Official Announcement Trailer Genshin Impact - "Arlecchino: Sleep in Peace" | Official Character Teaser Snowbreak: Containment Zone - "Gradient of Souls" Version Trailer Harold Halibut GameSpot Video Review Nancy Drew: Mystery of the Seven Keys | World Premiere Official Trailer Modern Warfare III & Warzone - Official Cheech & Chong Bundle Gameplay Trailer
Please enter your date of birth to view this video
By clicking 'enter', you agree to GameSpot's
Terms of Use and Privacy Policy
8 Treasures
Carved Sabaean Face
Finally, you've made it to the gates of the Atlantis of the Sands. There are just a few more treasures to collect. This being a lost city of wealth, many of the treasures are in plain sight. The Carved Sabaean Face is sitting on the left as you enter the area.
The Royal Game of Ur
You'll need to climb up the ladder on the right in order for Sully to operate the mechanism. While your old buddy is doing this, leap to the left and onto the chandler. Shimmy around the other side to gain The Royal Game of Ur.
Bronze Sabaean Bull Sculpture
While Sully waits on the button and mans the lift, descend passed the rising platforms to gain the Bronze Sabaean Bull Sculpture.
Bronze Man of Nashqum
Once through the main gates, head down the broken stairs on the left to nab the Bronze Man of Nashqum.
Sabaean Alabaster Stele
Continue on to the right, down the spiral stairs. There will be a broken section on the right and a tower on the other side. Jump off the stairs and into the hole to collect the Sabaean Alabaster Stele.
Akkadian Statue Head
During the gun fight with the fiery enemies head up into the building on the right. Up the top of the stairs will be the Akkadian Statue Head.
Sabaean Moon Symbol
Talbot will set up a trap and you'll find yourself in a dreamy haze. As you arise from your stupor on the ancient elevator, move backwards. At the bottom of this statue will be the Sabaean Moon Symbol.
Statue of Gudea
Eventually the drugs will ware off and you'll be slumped in an empty pool. Head through the door ahead, but check the left side near the last statue to gain the Statue of Gudea.
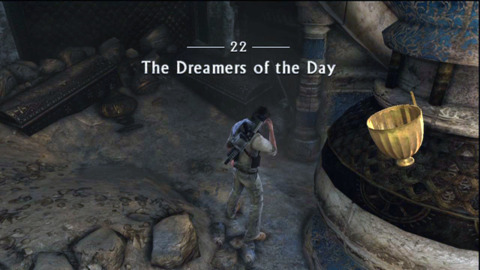
Chapter 22: The Dreamers of the Day
2 Treasures
Gold Cup from Ur
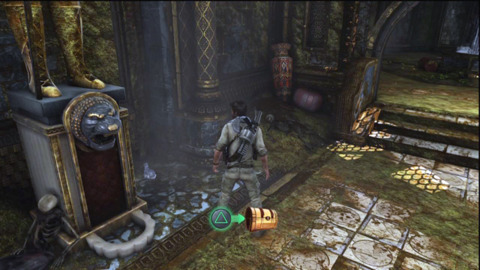
The final two Treasures in Drake's Deception are just ahead. The Gold Cup from Ur is right at the start of Chapter 22. After clearing the spiral staircase, loop around right to find it resting among some rubble.
Golden Hittite Goddess
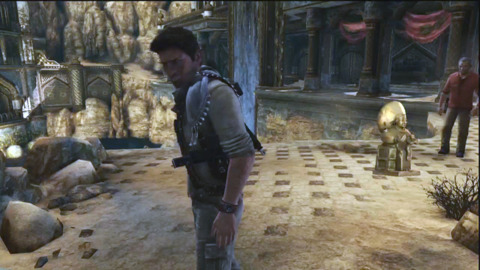
Once reuniting with Sully you'll walk near a chasm and a number of large chains. The stairs to the left is your main goal. However, if you move to the right you'll find the Golden Hittite Goddess, the final treasure in Uncharted 3: Drake's Deception.
PlayStation 3 Trophies
| Trophy Name | How To Earn | Reward |
|---|---|---|
| Drop the Bomb Hotshot | Make five enemies drop their grenade by shooting them | Bronze |
| 20 Headshots | Defeat 20 enemies with headshots | Bronze |
| 30 Kills: Arm Micro | Defeat 30 enemies with the Arm Micro | Bronze |
| 30 Kills: Dragon Sniper | Defeat 30 enemies with the Dragon Sniper | Bronze |
| 30 Kills: KAL 7 | Defeat 30 enemies with the KAL 7 | Bronze |
| 30 Kills: G-MAL | Defeat 30 enemies with the G-MAL | Bronze |
| 30 Kills: M9 | Defeat 30 enemies with the M9 | Bronze |
| 30 Kills: Mag 5 | Defeat 30 enemies with the Mag 5 | Bronze |
| 30 Kills: Mk-NDI | Defeat 30 enemies with the Mk-NDI | Bronze |
| 30 Kills: PAK-80 | Defeat 30 enemies with the PAK-80 | Bronze |
| 30 Kills: RPG-7 | Defeat 30 enemies with the RPG-7 | Bronze |
| 30 Kills: SAS-12 | Defeat 30 enemies with the SAS-12 | Bronze |
| 30 Kills: T-Bolt Sniper | Defeat 30 enemies with the T-Bolt Sniper | Bronze |
| 30 Kills: Tau Sniper | Defeat 30 enemies with the Tau Sniper | Bronze |
| Adept Fortune Hunter | Find 60 treasures | Bronze |
| Apprentice Fortune Hunter | Find 20 treasures | Bronze |
| Bare-knuckle Brawler | Defeat 20 enemies with hand-to-hand combat | Bronze |
| Bare-knuckle Slugger | Defeat 50 enemies with hand-to-hand combat | Bronze |
| Blindfire Marksman | Defeat 20 enemies by blind-firing while in cover (without aiming with L1/R1) | Bronze |
| Brute Beater | Successfully counter all of a Brute's damage-giving attacks | Bronze |
| Buddy System | Complete one Cooperative Multiplayer game | Bronze |
| Charted! - Easy | Finish the game in Easy Mode | Bronze |
| Expert Fortune Hunter | Find 80 treasures | Bronze |
| First Treasure | Find one treasure | Bronze |
| Grenade Hangman | Defeat ten enemies with grenades by aiming while hanging | Bronze |
| Hangman | Defeat 20 enemies with gunfire by aiming while hanging | Bronze |
| He's Gonna Need a Sturgeon | Hit three enemies with fish in the market | Bronze |
| Headshot Expert | Defeat five enemies in a row with headshots | Bronze |
| Land Shark | Defeat 20 enemies while swimming | Bronze |
| Macro Solo | Play in the swimming pool on the Cruise Ship | Bronze |
| Master Ninja | Defeat 50 enemies with stealth attacks | Bronze |
| Pro-pain | Defeat ten enemies with propane or acetylene tank explosions | Bronze |
| Quick Study | Inspect almost every display case in the Cartagena Museum | Bronze |
| Relic Finder | Find the Strange Relic | Bronze |
| Ride the Crocodile | Stand on the crocodile in the Secret Library | Bronze |
| Riot Rocker | Defeat five Riot Shield enemies by running over their shield | Bronze |
| Run-and-Gunner | Defeat 20 enemies by shooting from the hip (without aiming with L1/R1) | Bronze |
| Side Arm Master | Defeat 30 enemies in a row with your side arm | Bronze |
| Skilled Fortune Hunter | Find 40 treasures | Bronze |
| Thrillseeker | Complete one Competitive Multiplayer game | Bronze |
| Throwback | Kill 10 enemies with thrown-back grenades | Bronze |
| Throwback Master | Throw back a grenade and defeat two enemies at once | Bronze |
| Truck Brawler | Defeat ten enemies using hand-to-hand combat on the back of the convoy trucks | Bronze |
| 100 Headshots | Defeat 100 enemies with headshots | Silver |
| Charted! - Hard | Finish the game in Hard Mode | Silver |
| Charted! - Normal | Finish the game in Normal Mode | Silver |
| Combat Leapfrog | Defeat ten enemies in a row, alternating hand-to-hand combat and gunplay | Silver |
| Dyno-Might Master | Defeat four enemies with one explosion | Silver |
| Expert Ninja | Defeat five enemies in a row using stealth attacks | Silver |
| Master Fortune Hunter | Find all 100 treasures | Silver |
| Reload Master | Defeat 50 enemies in a row without auto-reloading | Silver |
| Rolling Ammo Master | 20 times in a row, pick up ammo while rolling | Silver |
| Survivor | Defeat 75 enemies in a row without dying | Silver |
| Finish the game in Crushing Mode | Finish the game in Crushing Mode | Gold |
| Platinum | Platinum | Platinum |
Got a news tip or want to contact us directly? Email news@gamespot.com
Join the conversation