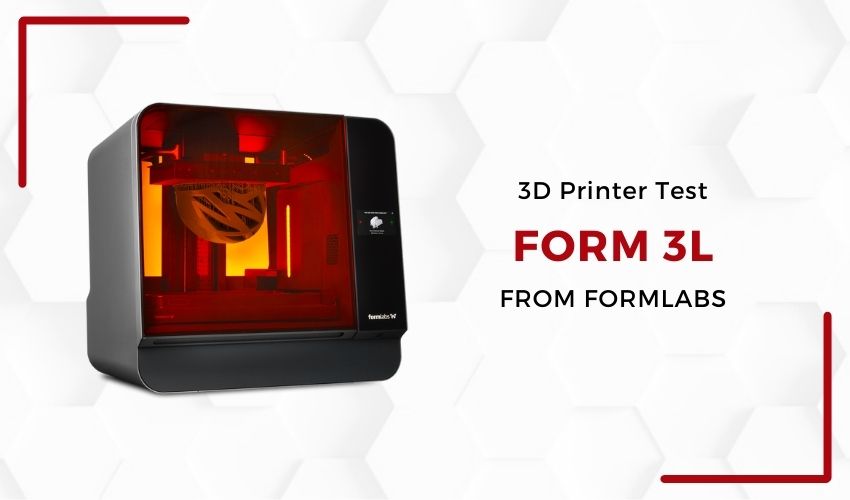
3Dnatives Lab: Testing the Form 3L from Formlabs
A prominent figure in the 3D printing market for more than 10 years, Formlabs introduced the third generation of its popular desktop SLA 3D printer with the Form 3 in late 2019. Since then, the Boston-based manufacturer has unveiled various Form 3-derived models, with the Form 3L, Form 3B, Form 3BL and more recently the Form 3+ as well as the Form 3B+. With machines historically based on SLA (stereolithography) technology, Formlabs developed its own technology called LFS (for Low Force Stereolithography) for the release of the Form 3. This new technology aims to offer a higher level of detail, a smoother finish, simplified removal of printing supports as well as improved precision and reproducibility according to the manufacturer.
A few weeks after our test of the Fuse 1, we have the pleasure today to put the Form 3L on the test bench of the 3Dnatives Lab. The Form 3L is a desktop resin 3D printer which offers one of the largest printing volumes on the market and is available for $10,999.00 on its own or $16,399.00 for the pack including two post-processing equipments called Wash L and Cure L. Below you can find the video of our test of the Form 3L to discover how it works and understand what makes it such a unique machine. You can also read on to find our full review of the machine.
Unpacking the Formlabs Form 3L
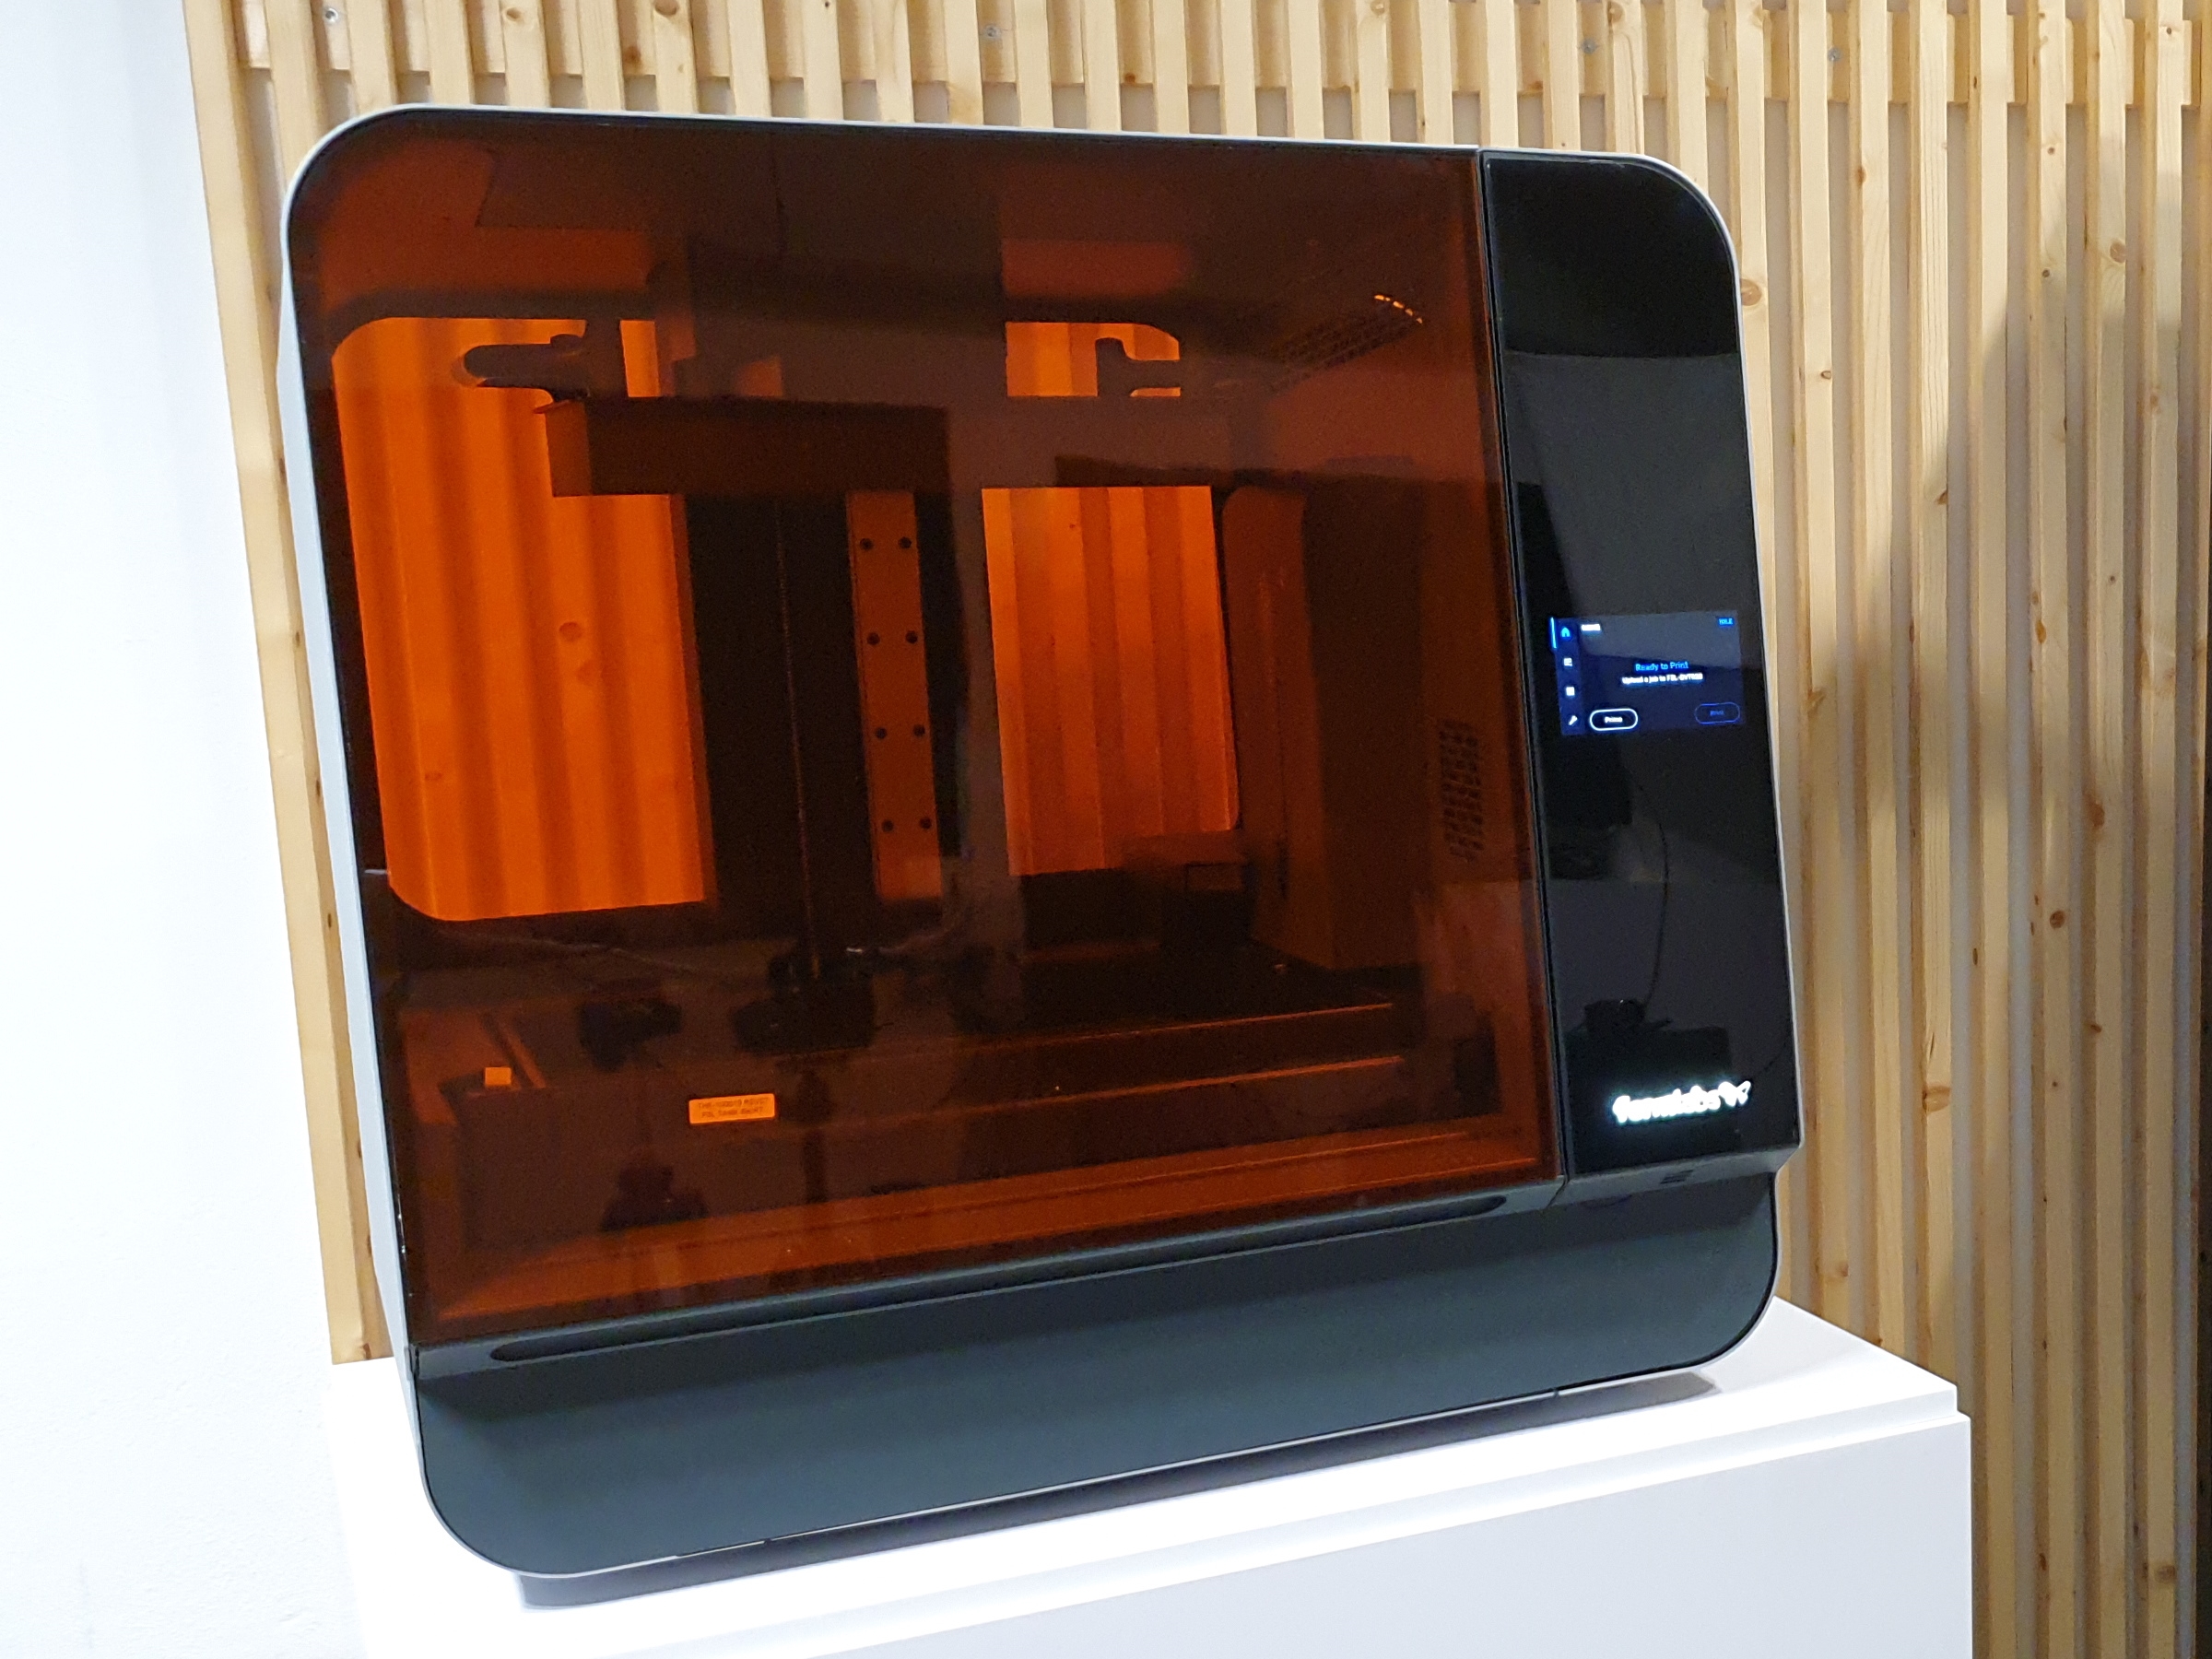
What first jumps out when you unpack the machine is that the Form 3L is an imposing desktop machine, especially for a resin 3D printer, with external dimensions of 770*520*740 mm (30.3*20.5*29.1 in) and a total weight of 54.4kg (120 lb).From an aesthetic point of view, the printer fits the usual design standards of the brand with its rounded edges, an anthracite aluminum chassis and a translucent orange polycarbonate cover, as well as a 5.5″ touch screen. What’s more, the Form 3L features a butterfly door for easy access to the large build tray, and the machine’s enclosure is illuminated by LED strips. Also on the side of the printer are two slots for Formlabs proprietary resin cartridges.
Among the components and accessories delivered with the Form 3L, we first discovered the build plate and the resin tray (VAT) but also post-processing tools (metal trays, electric pump, flush cutters, non-reactive nitrile gloves, rinse station) as well as tools for the maintenance of the machine and to detach the finished prints (scraper, a build platform jib that secures the build platform in place, removal tool).
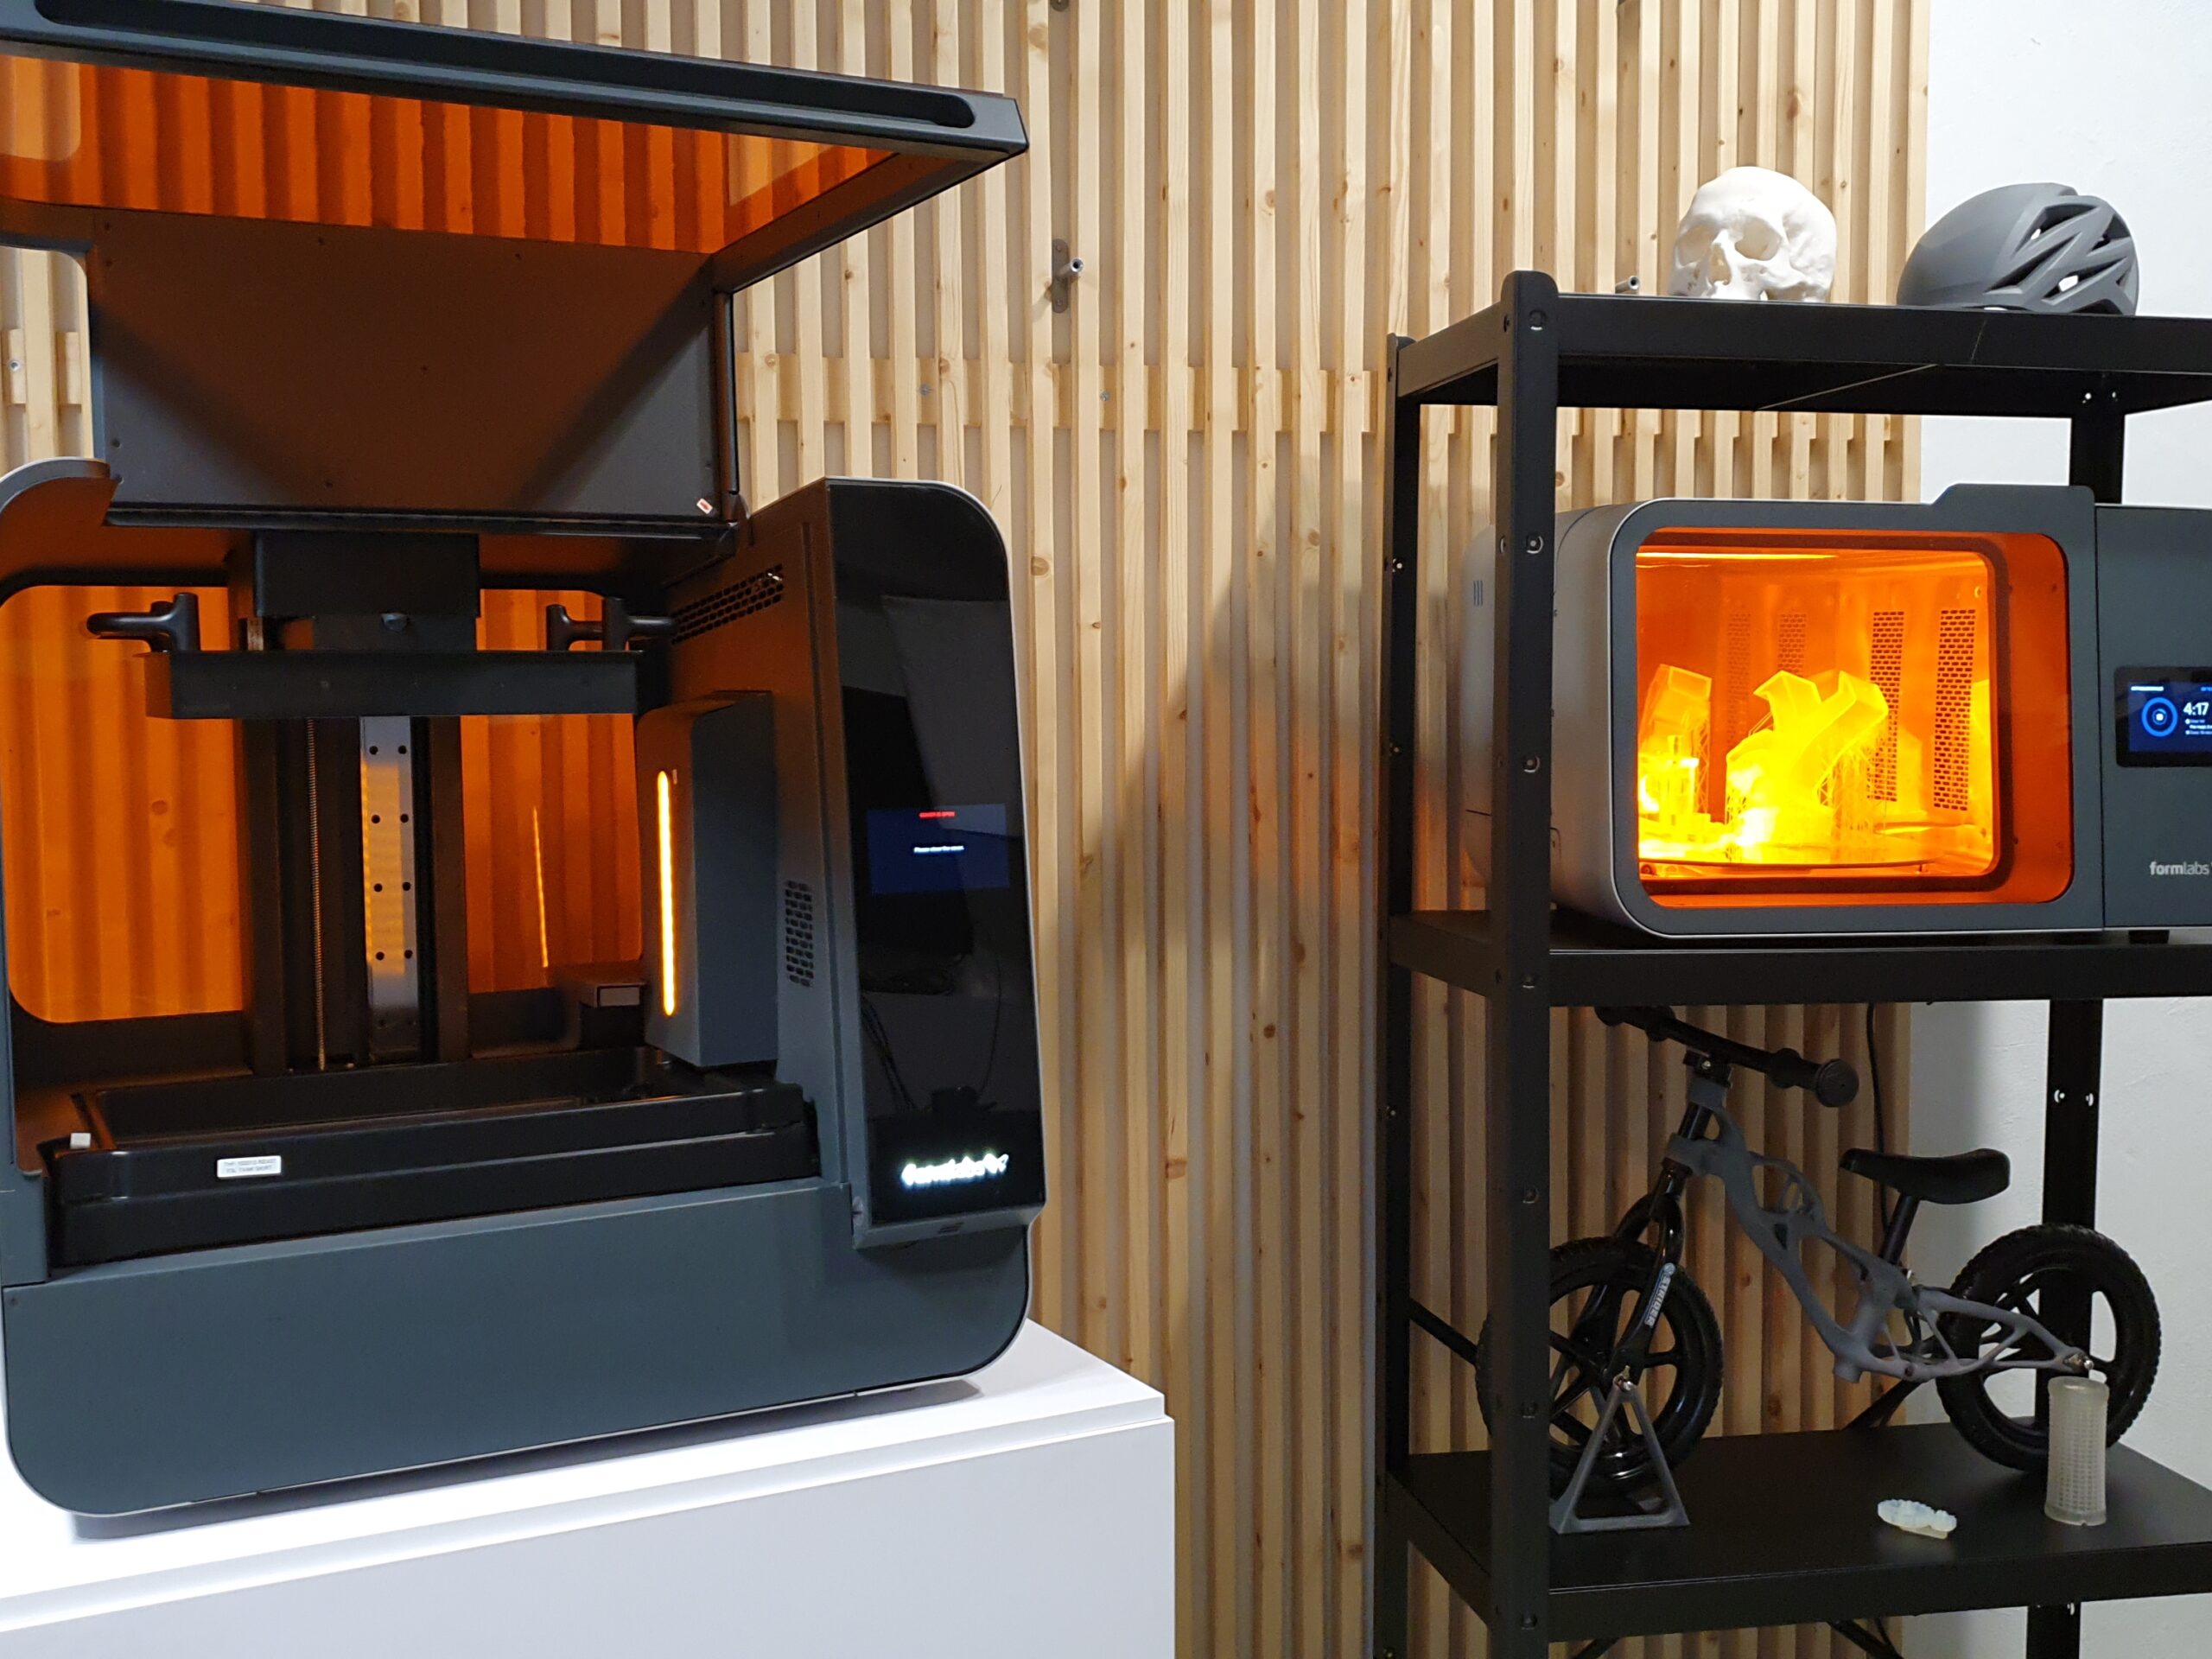
The Form 3L is easily accessible thanks to its large butterfly door (photo credits: 3Dnatives)
It is interesting to note that Form 3 and Form 3L use the same LFS process which is based on the use of a flexible film and an LPU (Light Processing Unit) equipped with a UV-A laser. Unlike the Form 3, the Form 3L uses two LPUs that work simultaneously (independently along the Y axis but linked on the X axis) allowing users to print faster and cover a larger surface.
In terms of specs, the Form 3L has a very generous build volume of 335*200*300 mm (13.2*7.9*11.8 in) which ranks it among the largest desktop SLA 3D printers today. In terms of print quality, the Form 3L relies on two 250 mW class 1 UV-A lasers (with a wavelength of 405 nm and a diameter of 85 microns) allowing users to reach, on paper, an X/Y resolution of 25 microns associated with a layer thickness ranging from 25 to 300 microns.
The Form 3L has a large print volume and a 5.5″ touch screen with a complete and intuitive interface (photo credits: 3Dnatives)
Installing the Form 3L 3D printer
As the machine comes fully pre-assembled, getting started is relatively easy. After unpacking the machine, there are a few simple operations to perform, starting with screwing on the Wi-Fi antenna, connecting the printer to the mains, connecting to the Internet via the touch screen, making sure the printer is level (using a virtual spirit level on the screen and a disc to adjust the height of each foot) and putting the printing plate in place.
As far as materials are concerned, all you have to do is install the resin container and mixer supplied with the Form 3L, fill it manually (to save time during the “Prime” stage – see below), then insert two resin cartridges on the side of the machine. Coupled with an ultrasonic level sensor, the machine is capable of automatic resin replenishment. Note, however, that the two cartridges installed must contain the same material and are not supplied by default.
The Form 3L incorporates sensors to determine whether the tray is correctly installed, and whether the resin used and the resin tray are correctly inserted. It is able to associate a tray with a material to avoid future contamination. However, this association means that the tray must be changed each time the resin is changed and that a dedicated tray must be used for each material.
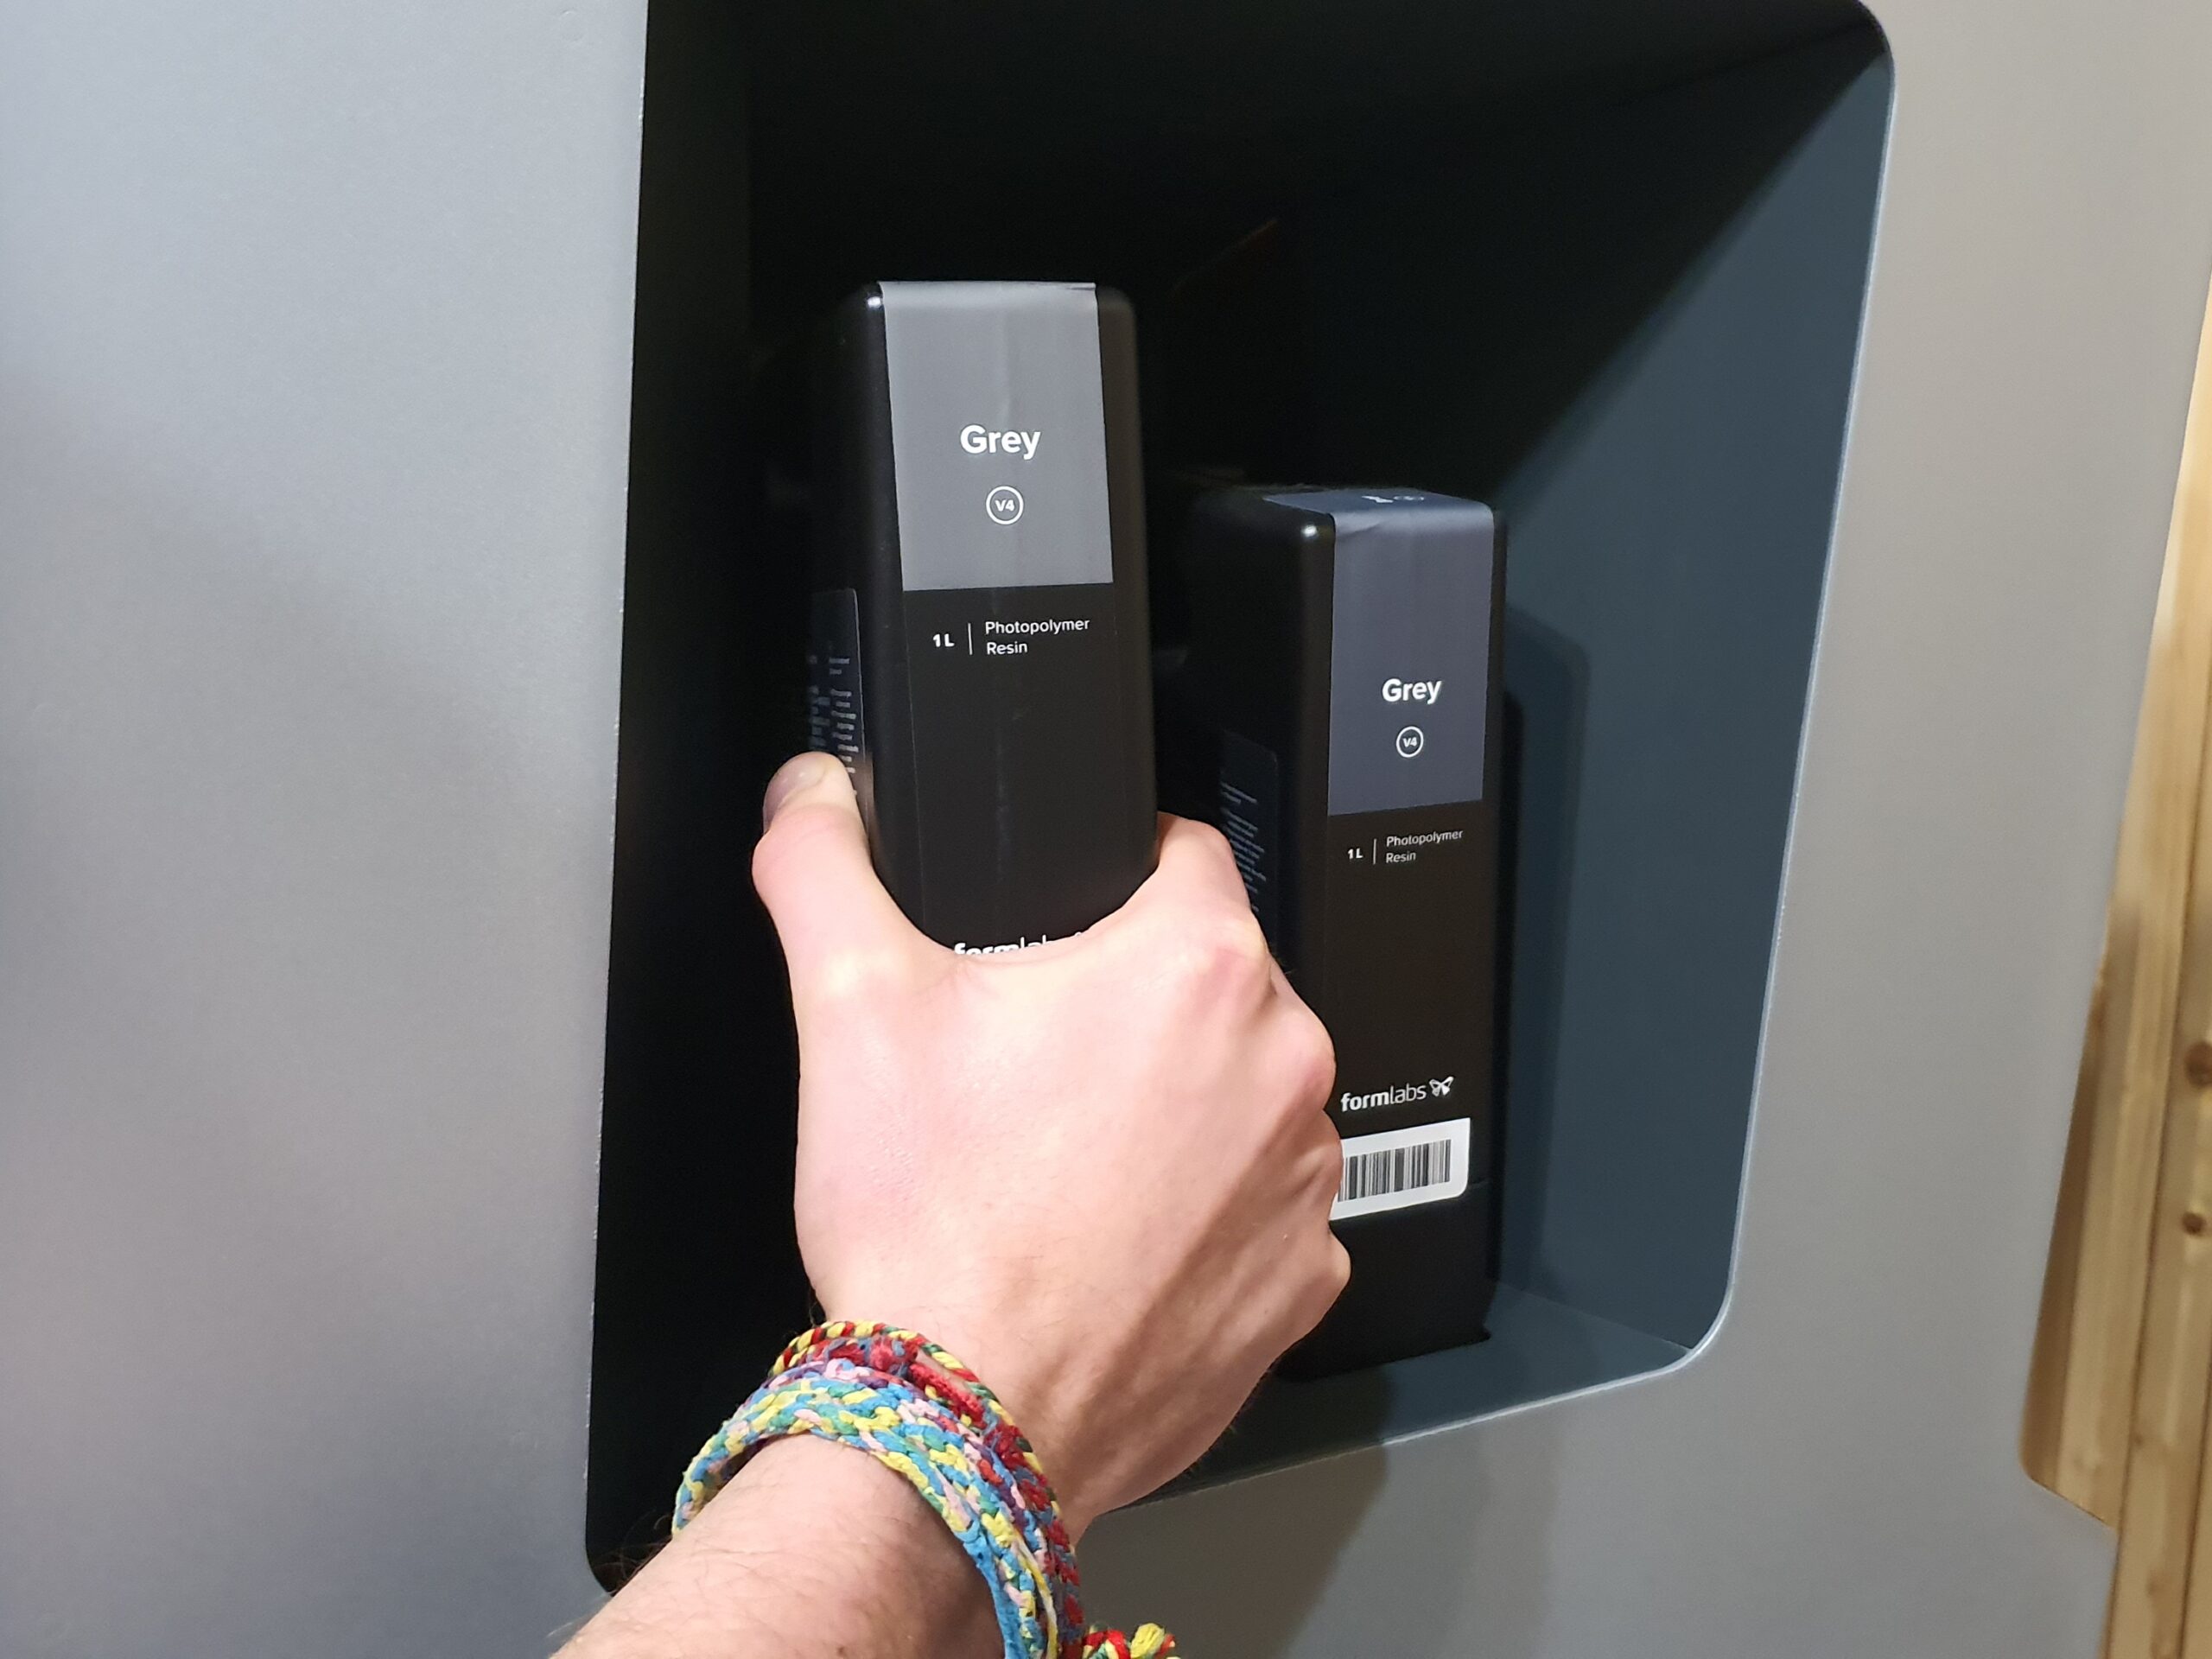
The Form 3L has two slots for its proprietary resin cartridges (photo credits: 3Dnatives)
Once these first steps have been completed, it is recommended that you use the “prime” function of the 3D printer to prepare it for its first print. This operation aims to mix the resin and ensure that there is a sufficient quantity of material in the tank.
Finally, it is necessary to link the Form 3L with a Formlabs account via Dashboard which we will discuss in more detail later. Note that it is also possible to connect the machine to the internet via the RJ45 port located at the back of the machine. Once the initial start-up is done, all that remains is to download PreForm, the Formlabs slicer, in order to launch the first print.
PreForm and Formlabs Dashboard Software
For both its operating system and its slicer, Formlabs has developed its own proprietary software. For the slicer, Formlabs has been using PreForm since the release of Form 1 in 2012. Since then, Formlabs has continuously improved its slicer to offer new features and an ever more intuitive user experience.
In addition to basic features such as scaling, part orientation, choice of printer, material and print parameters, PreForm offers smart features such as “one-click 3D printing”. As its name implies, this feature allows you to prepare a model in just one click. All you have to do is import your 3D model, choose the printer and the resin you want to print with, and then use this feature to orient the part and place supports to ensure optimal printability.
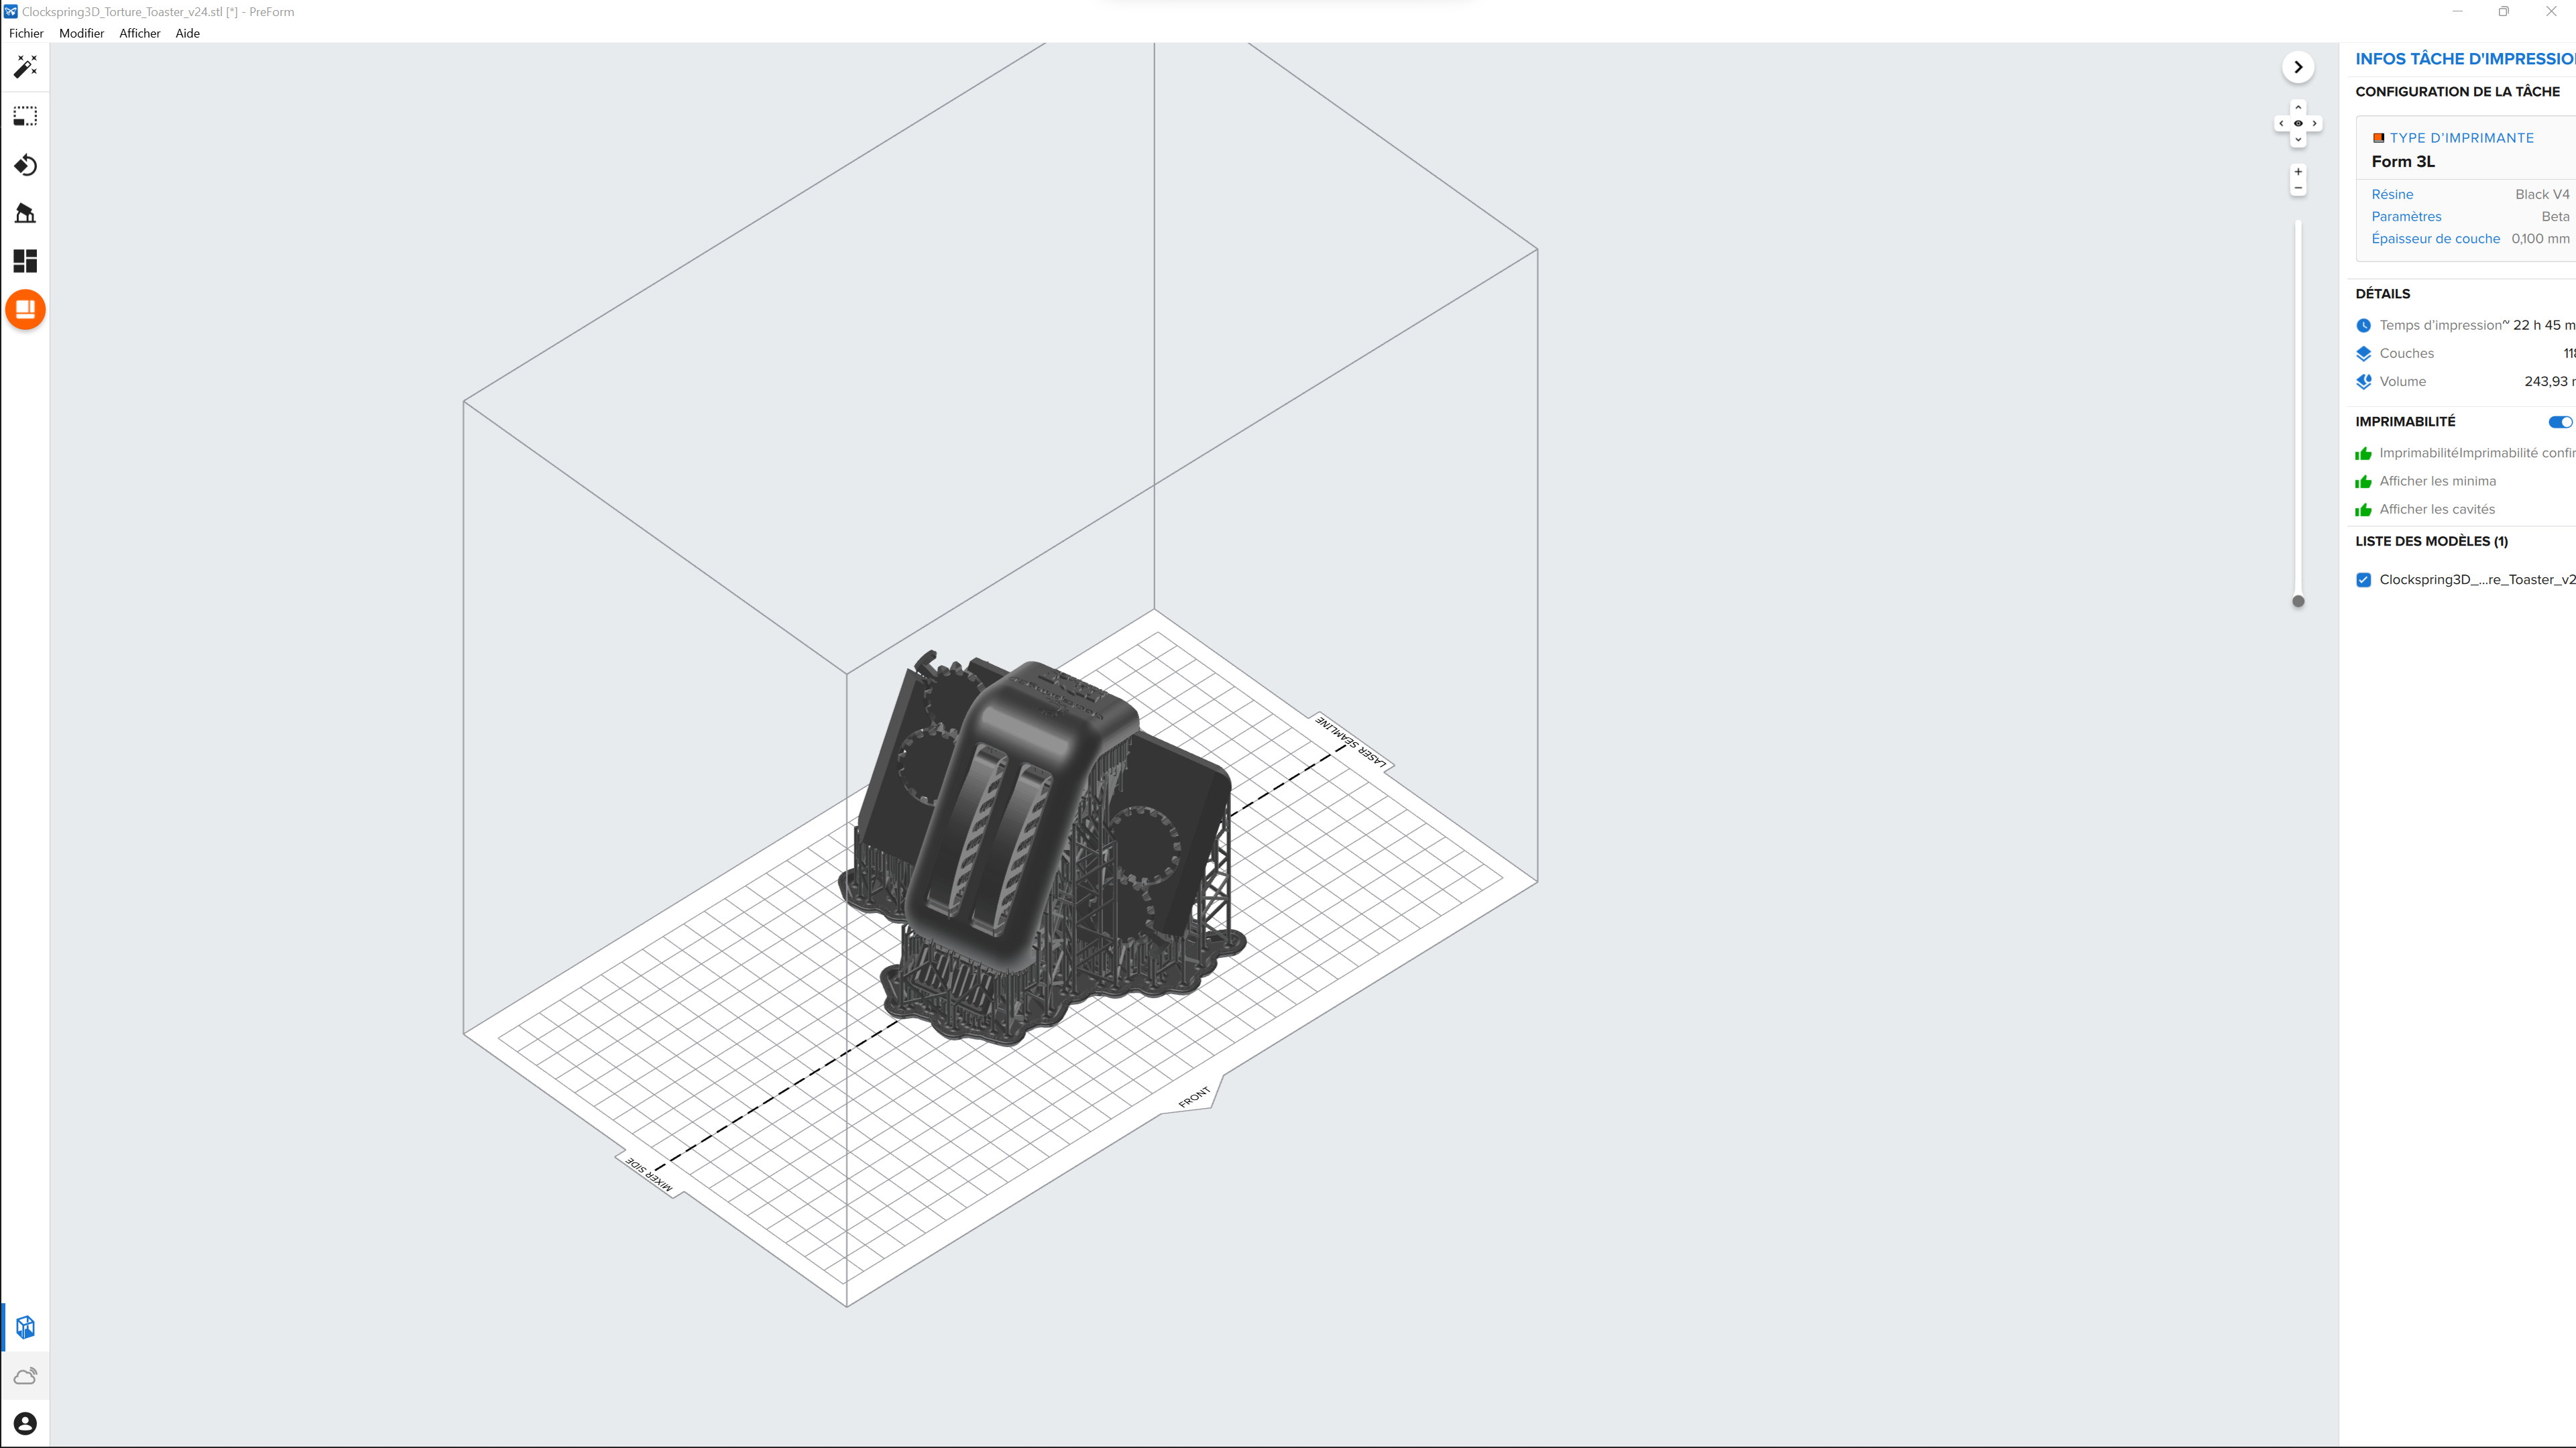
PreForm is the slicer developed and used by Formlabs for all its printers. It offers advanced features such as “one-click printing”
This feature allows the user to avoid adjusting certain settings. Once the automatic adjustments have been made, all the settings are still customizable for experienced users. During the test, we really appreciated the printability indicator that analyzes the model as well as the settings used and estimates the chances of a successful print.
Among the few negative we points encountered, note that despite all the advanced features of PreForm, at the time of our test, the software does not support 3MF files. Also, as mentioned in the unpacking part, the Form 3L is based on two LPUs allowing to cover a larger surface. The laser beams of each of these optical systems are then superimposed on the center of the printing surface. However, they may create an undesirable visible line on the prints. To prevent this problem, PreForm represents this line as a dotted line on the virtual plate.
Dashboard allows you to quickly consult the status of your printers as well as their printing history
Thanks to Dashboard, the cloud-based print management software, we could easily launch the prints remotely via the web application or directly via PreForm which integrates it natively. It is also possible to consult the print history and find the previous settings used.
First prints with the Form 3L and post-processing with the Wash L and Cure L stations
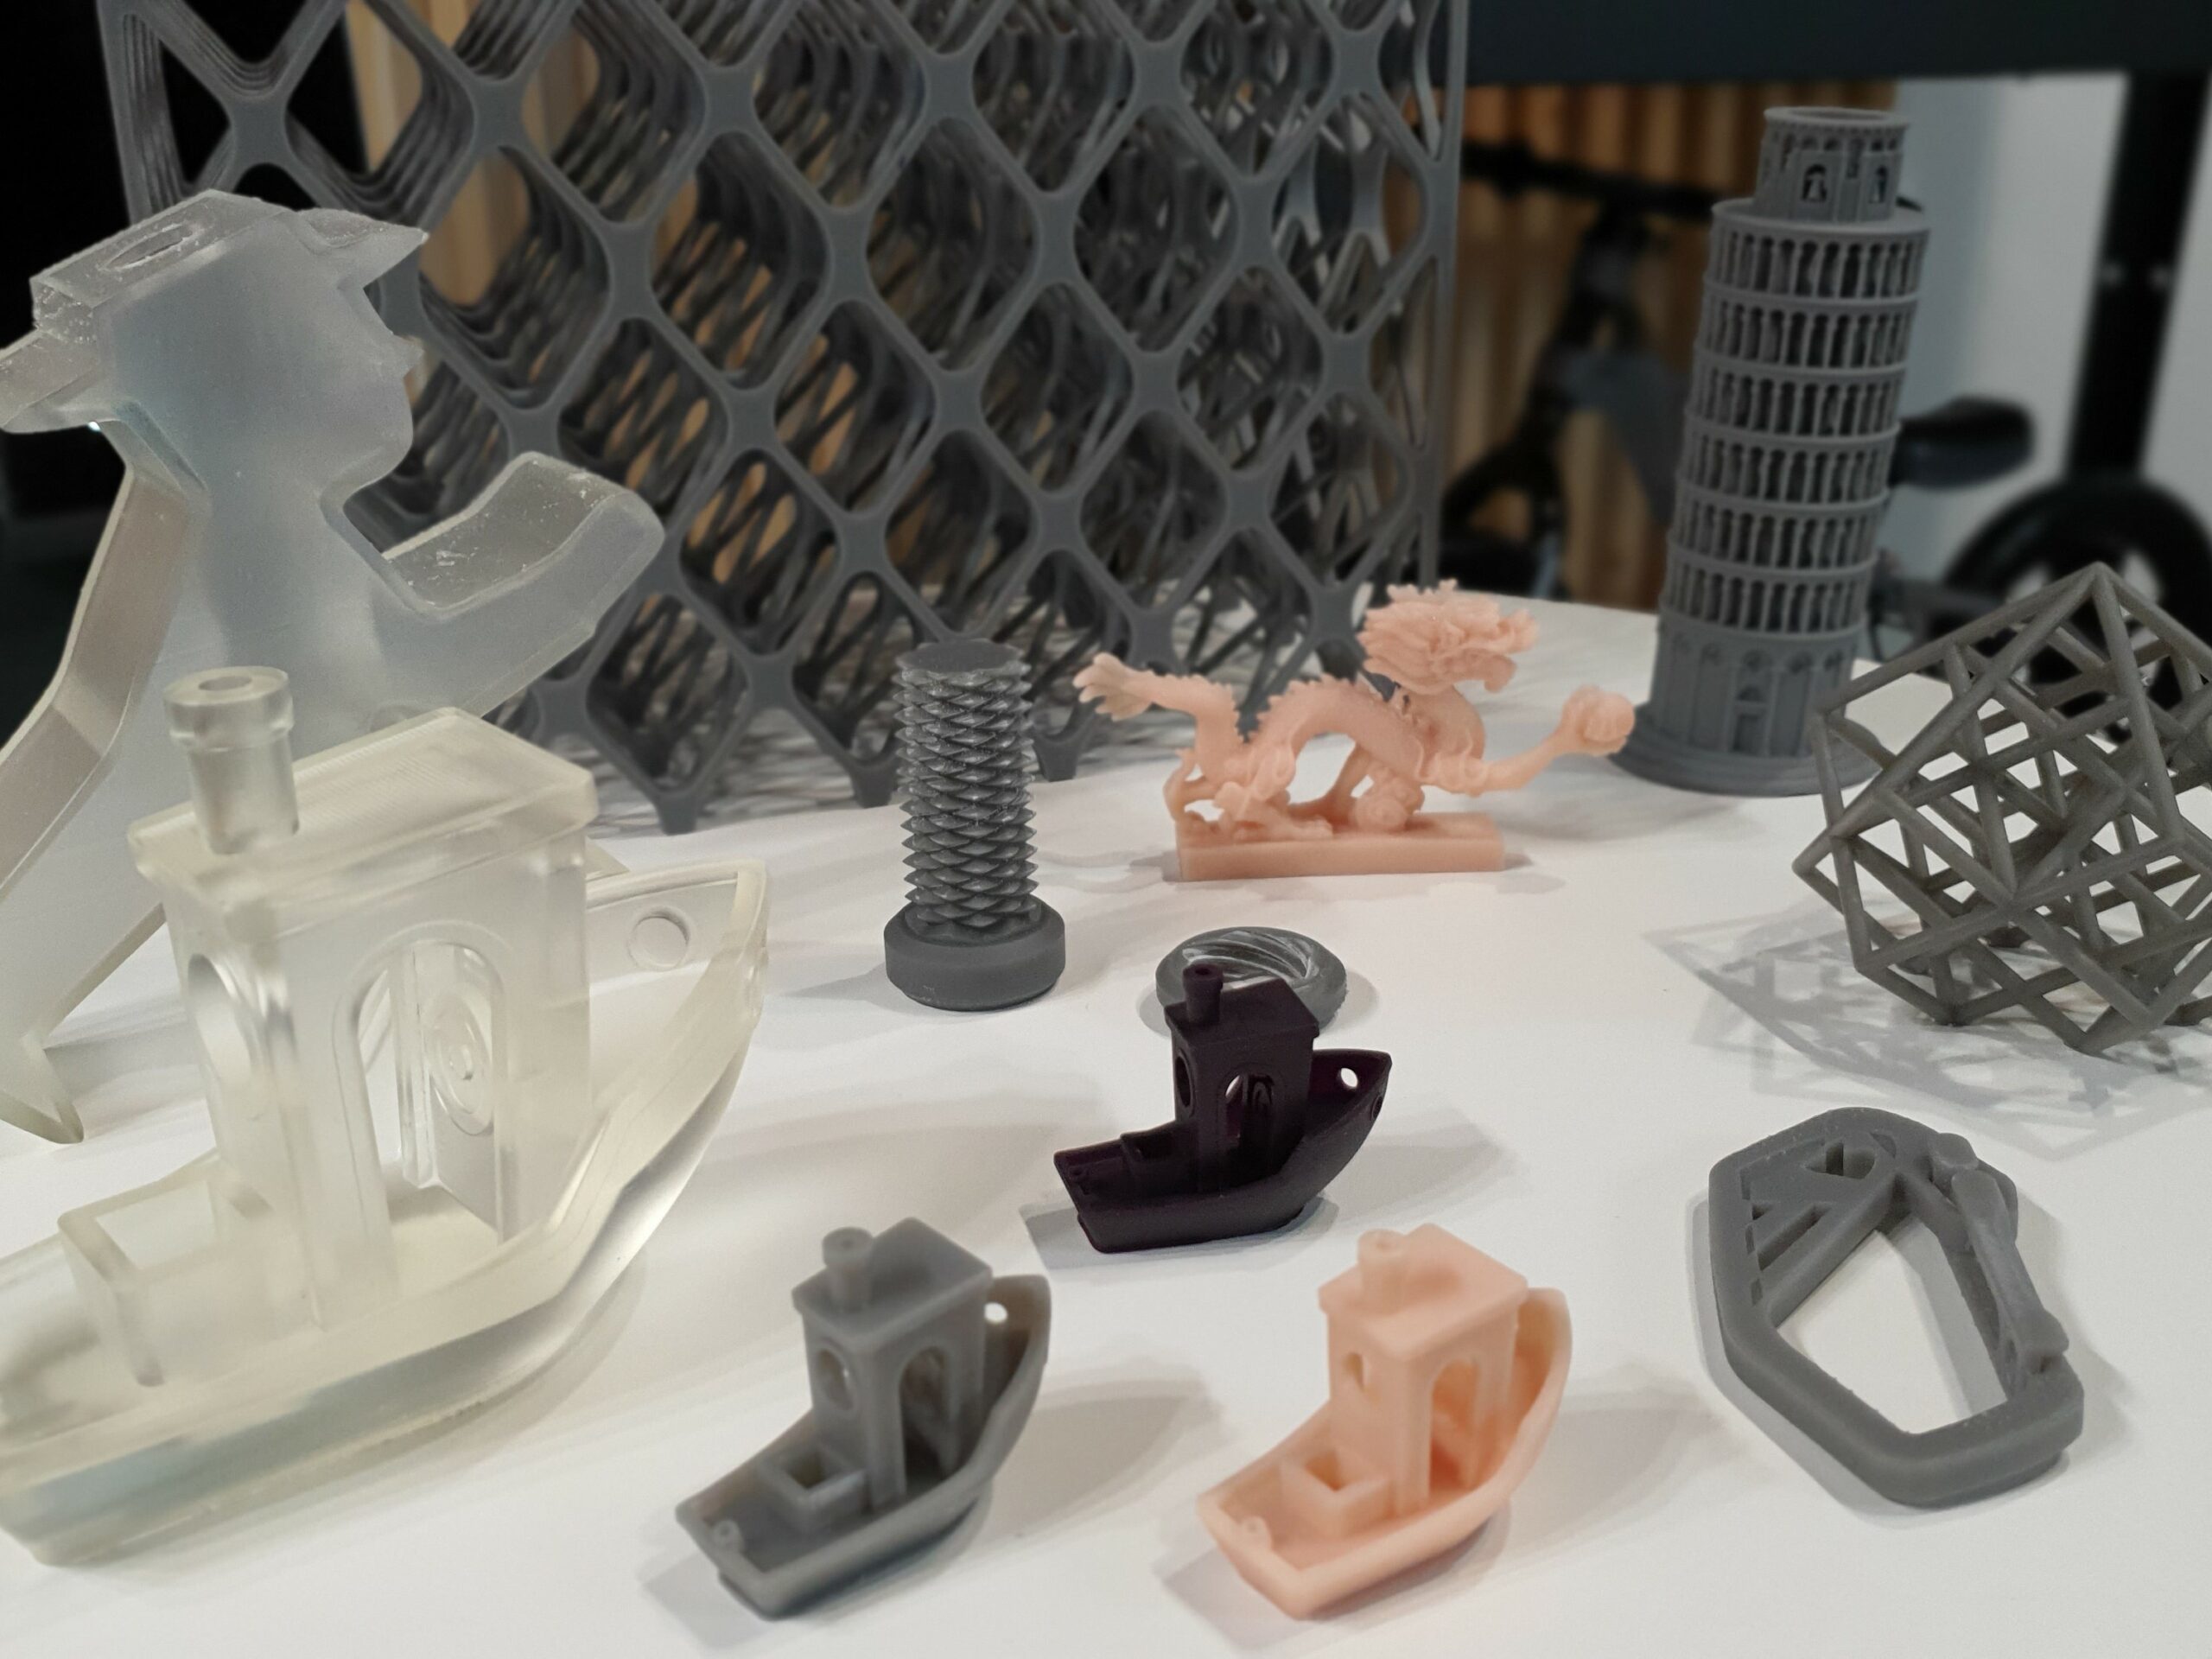
To begin the practical part of our test, we used the gray resin, which we had installed when we started the printer, and started printing a model of the Leaning Tower of Pisa with the default profiles offered by PreForm. With a layer height of 100 microns, the print took about 16 hours. Once out of the printer, cleaned, unhooked from the platen and run through the Cure L, the model was faithfully reproduced.
For our test, we used Wash L and Cure L to post-process all of our prints. Unlike FDM technology, resin 3D printing requires a few extra post-processing steps. When a model is printed, it is bathed in liquid resin. We must then clean up the excess resin that has not solidified during the printing process to prevent it from hardening on the surface of the model.
The most common method is to clean the model in an isopropyl alcohol bath. To simplify this process, Formlabs designed the Wash L, a tank specially adapted to the size of the Form 3L printing plate. This tank holds the alcohol to prevent splashing and speeds up the cleaning process with different customizable profiles.
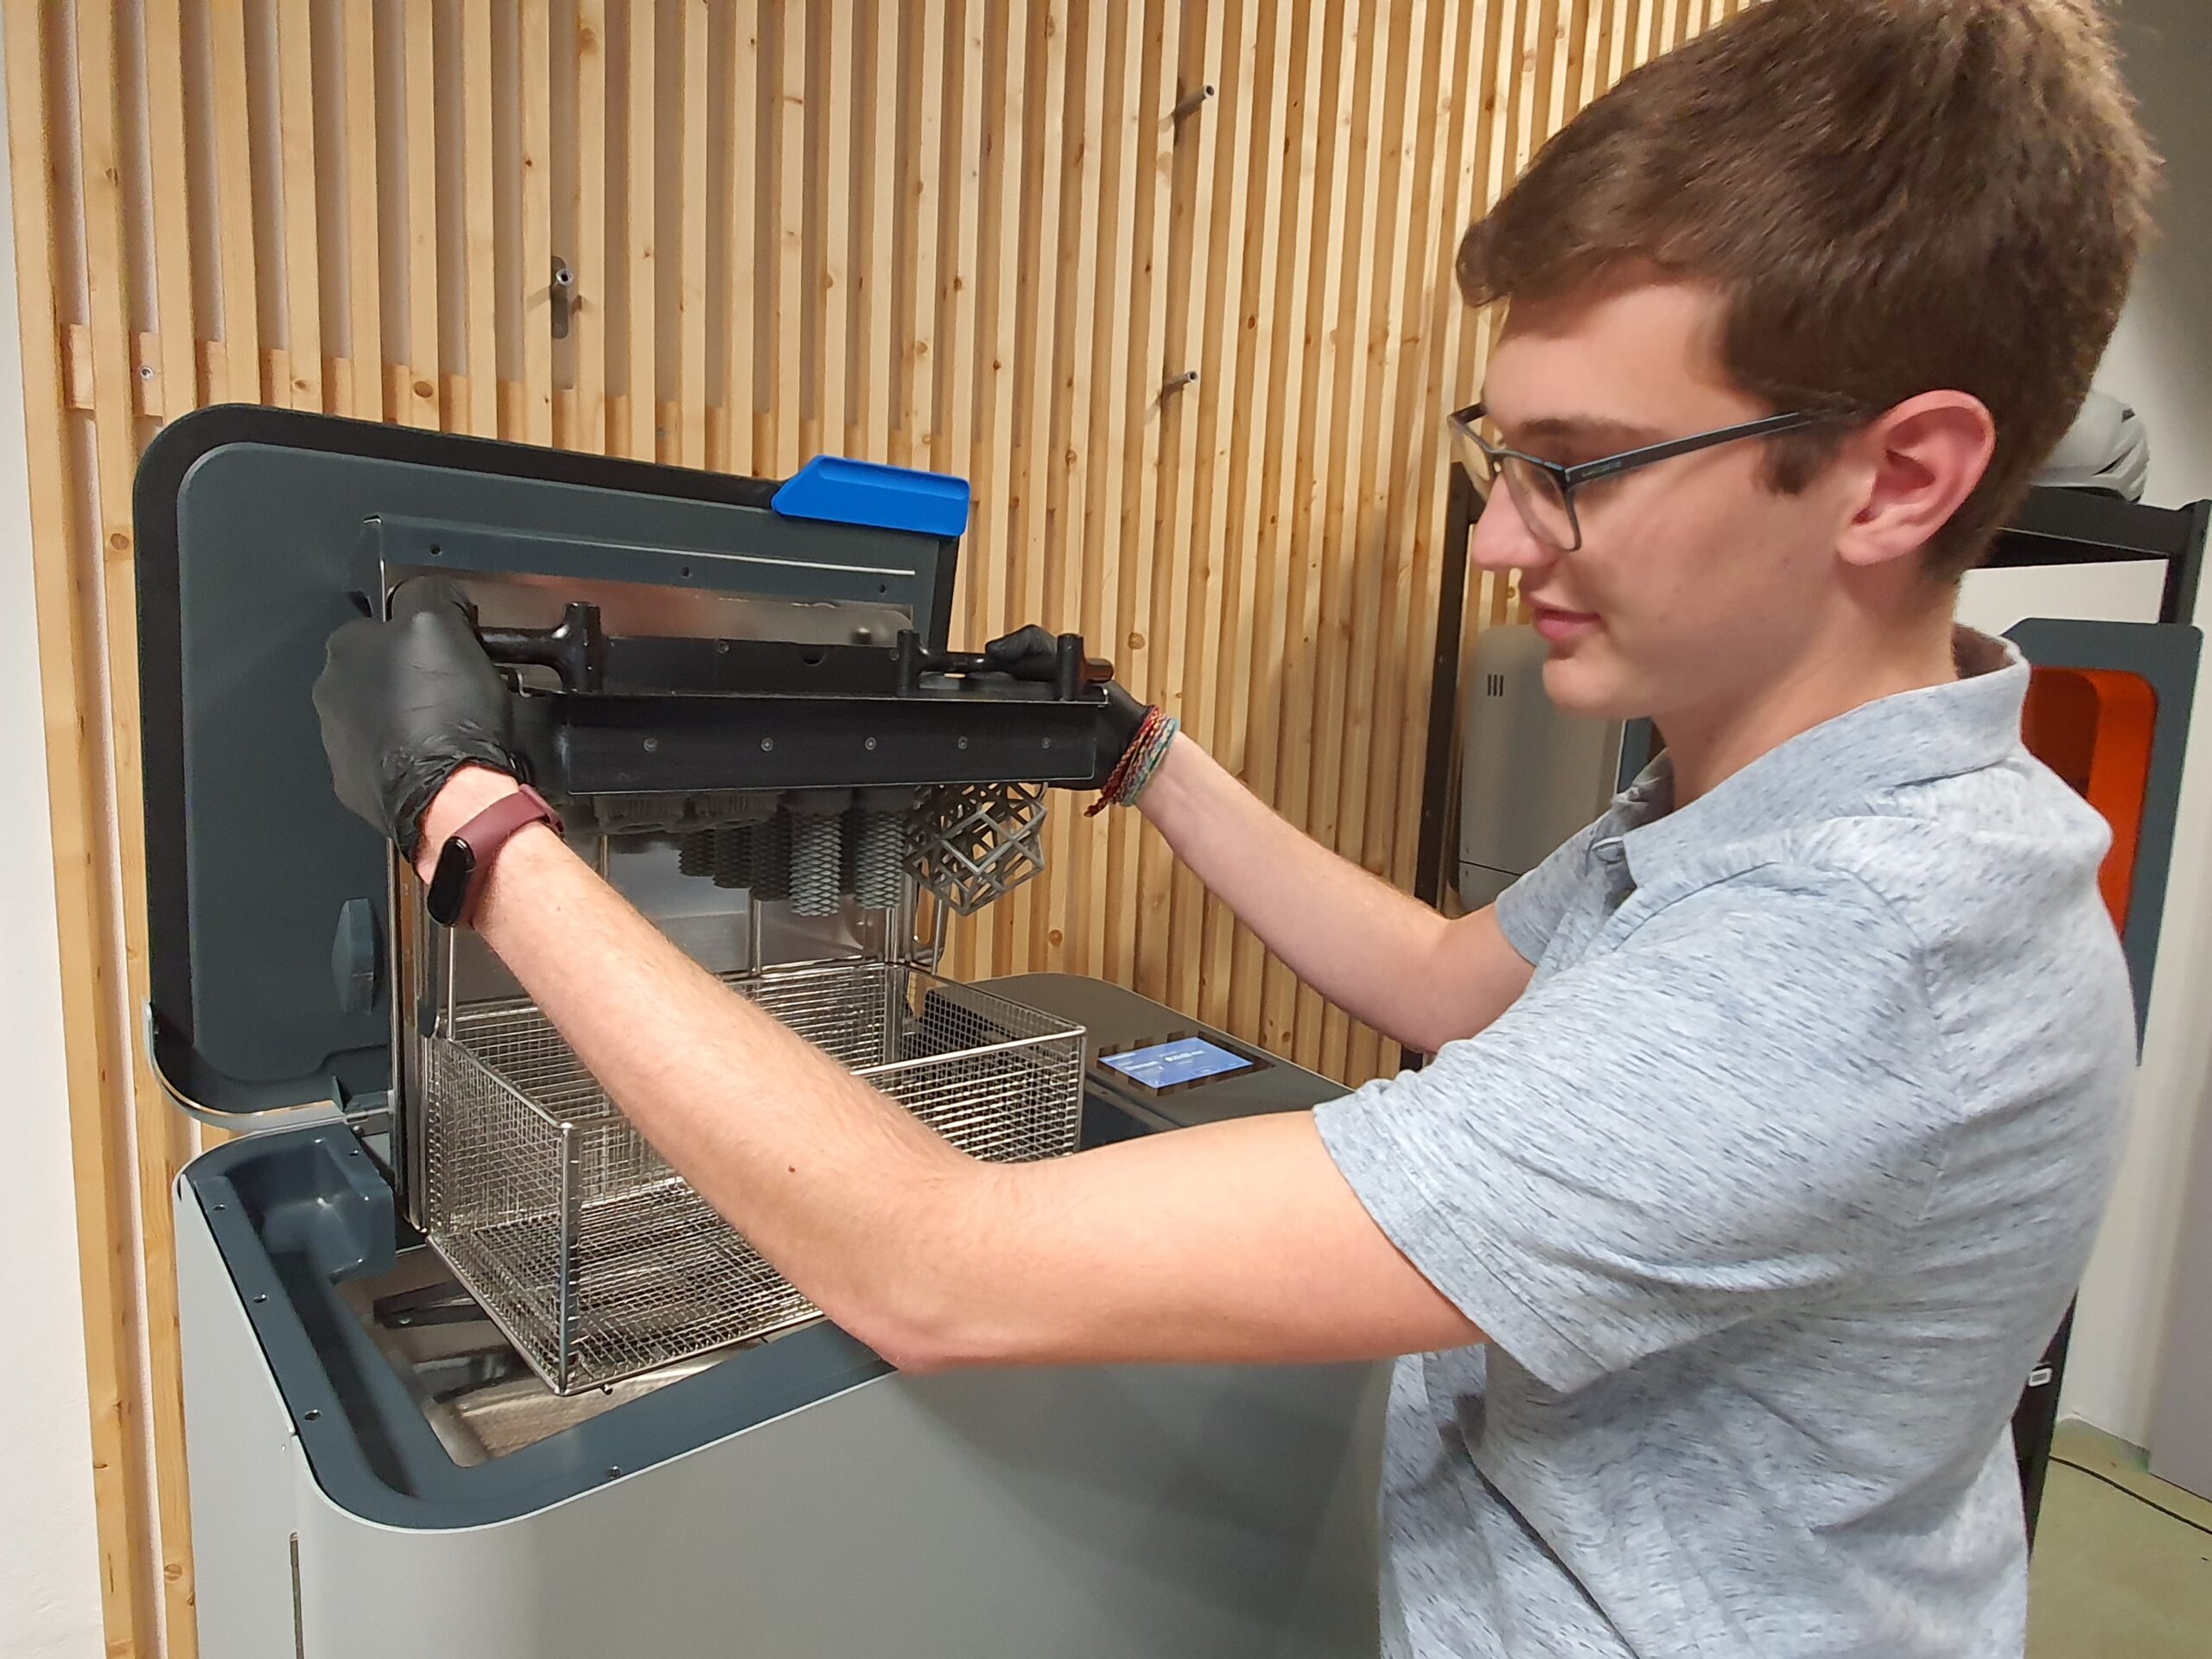
The Wash L makes it easy to clean small as well as large parts produced by the Form 3L (photo credits: 3Dnatives)
Moreover, during the printing process, the UV rays of the printer polymerize the liquid resin to make it solid. However, at the end of the machine, this polymerization process is not completely finished. It is then recommended to finalize this process using a UV source.
It is possible to use different sources such as the sun, which is the most abundant source on Earth, but in order to ensure optimal and uniform curing, Formlabs has developed a post-curing machine, the Cure L. This is a “UV oven” specifically designed to fit the print volume of the Form 3L.
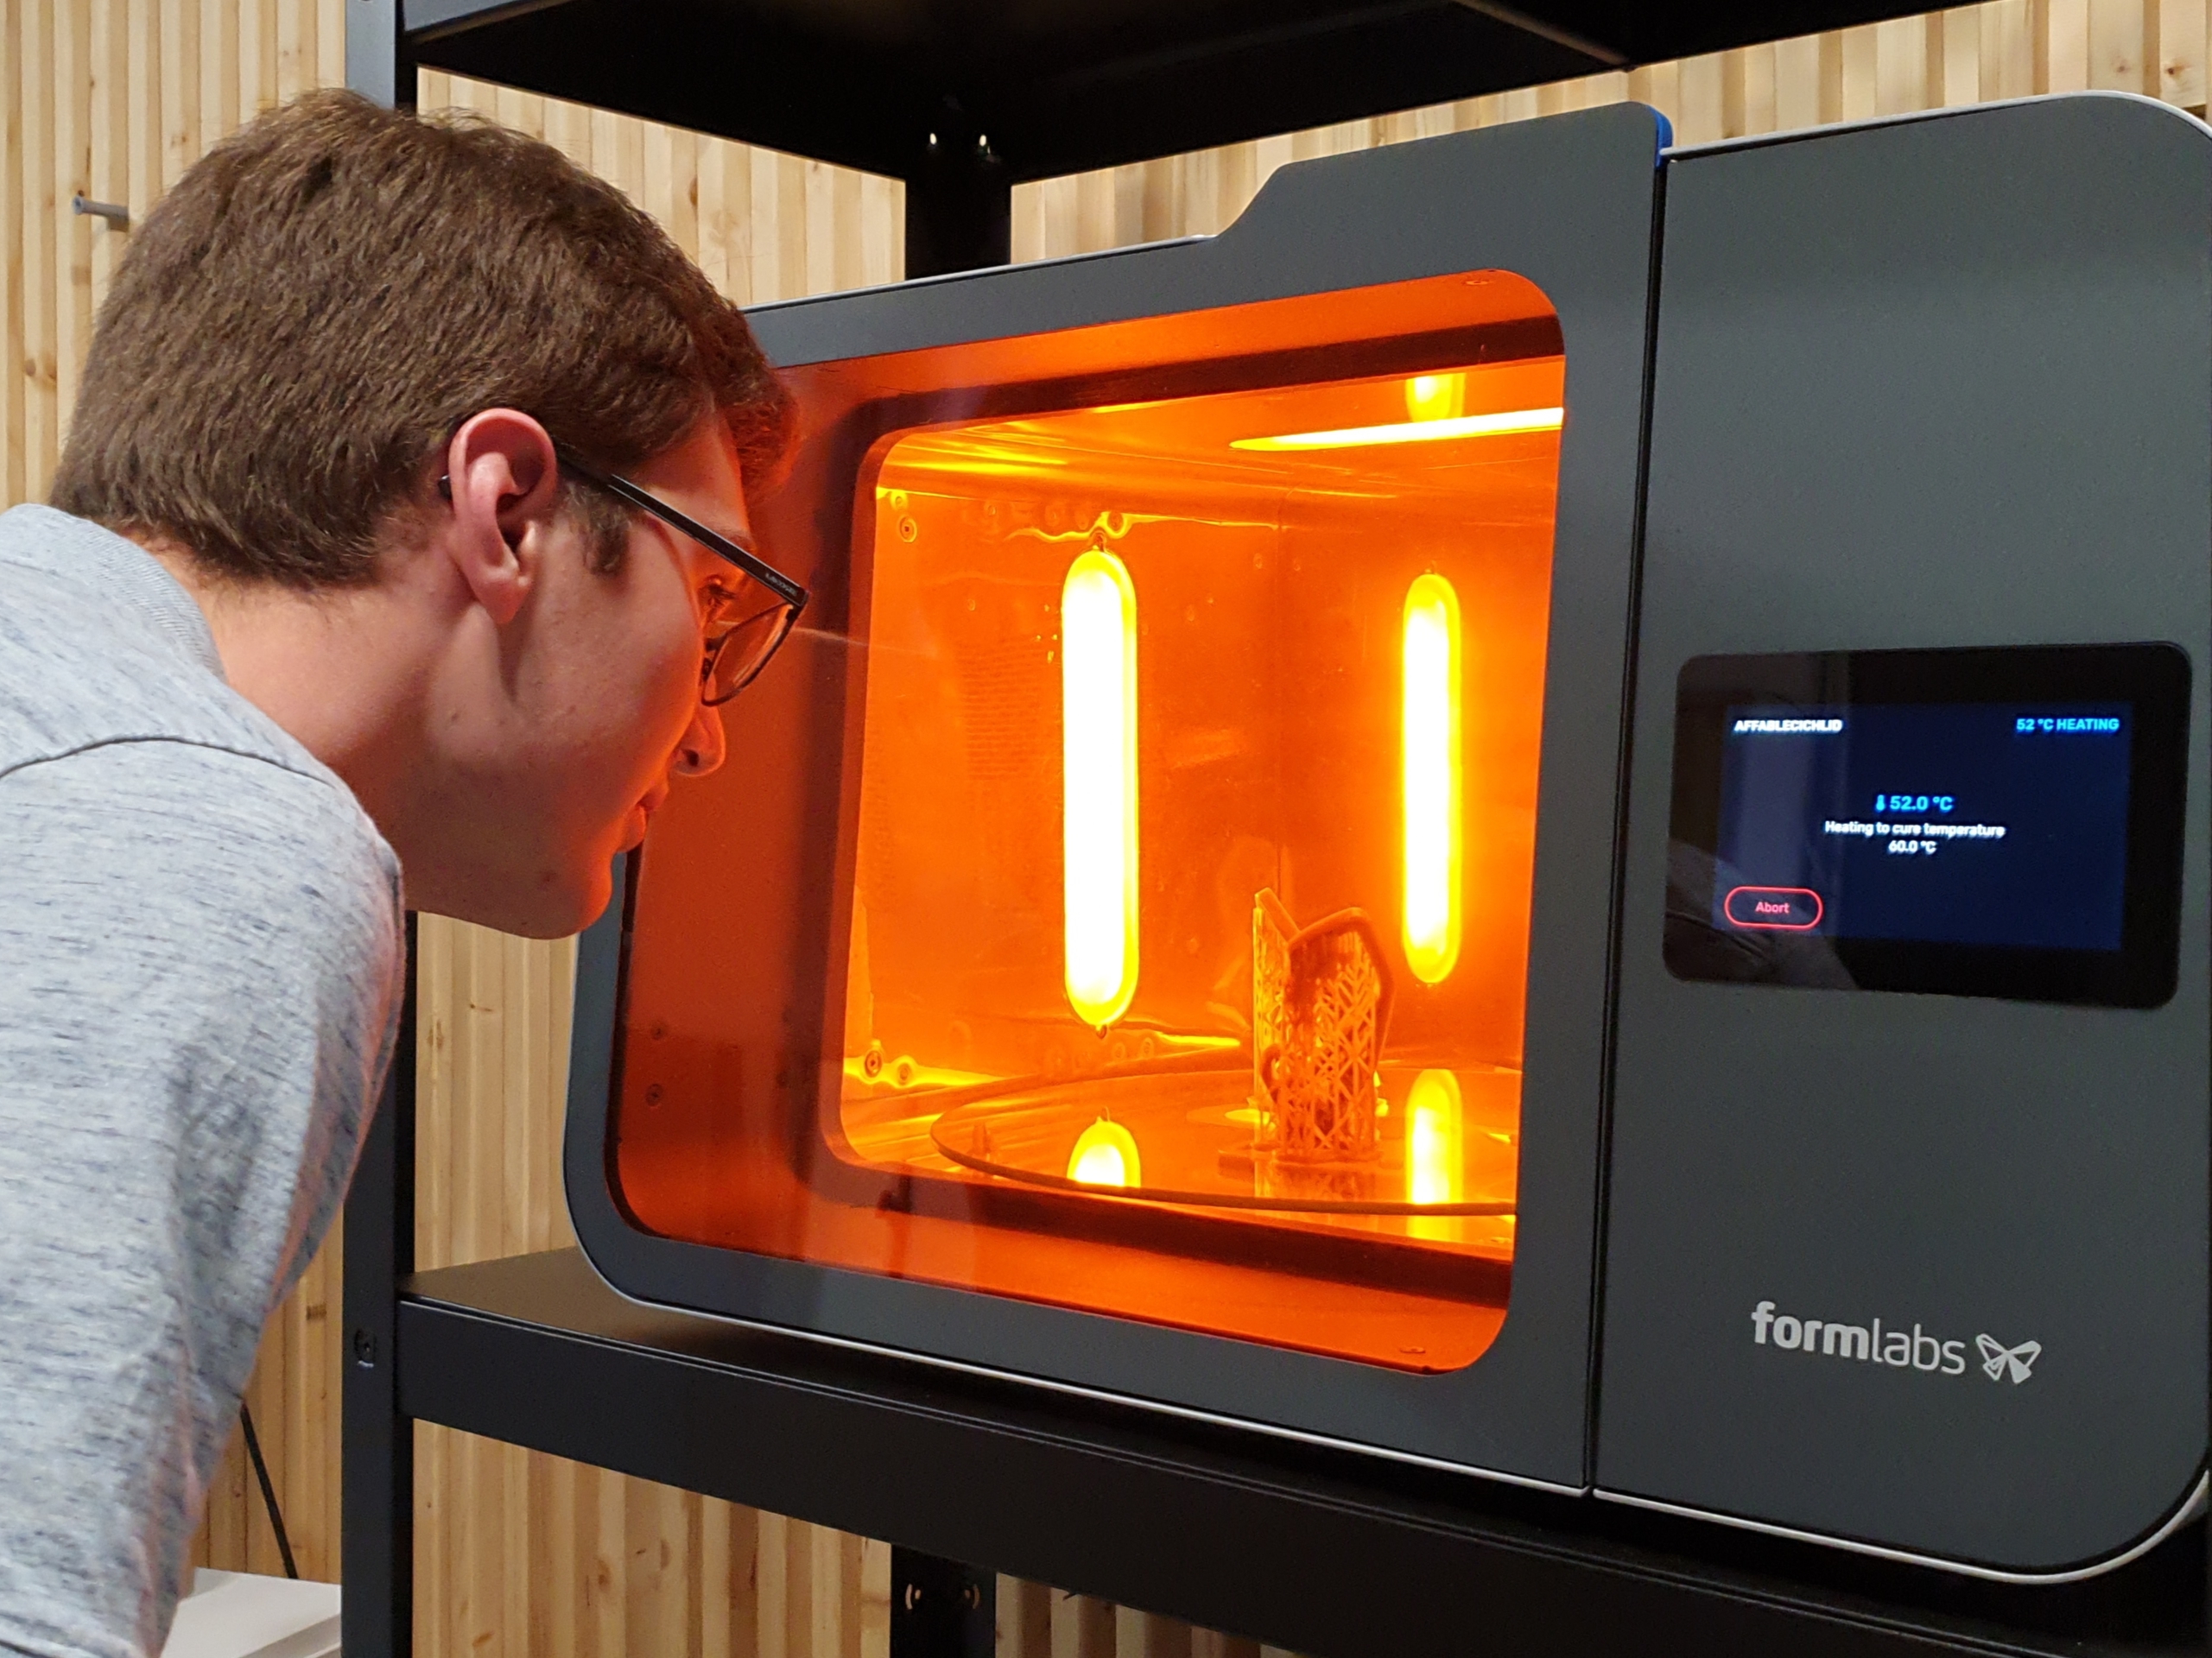
The Cure L ensures a uniform and optimal “post-polymerization” while offering a volume adapted to that of the Form 3L (photo credits: 3Dnatives)
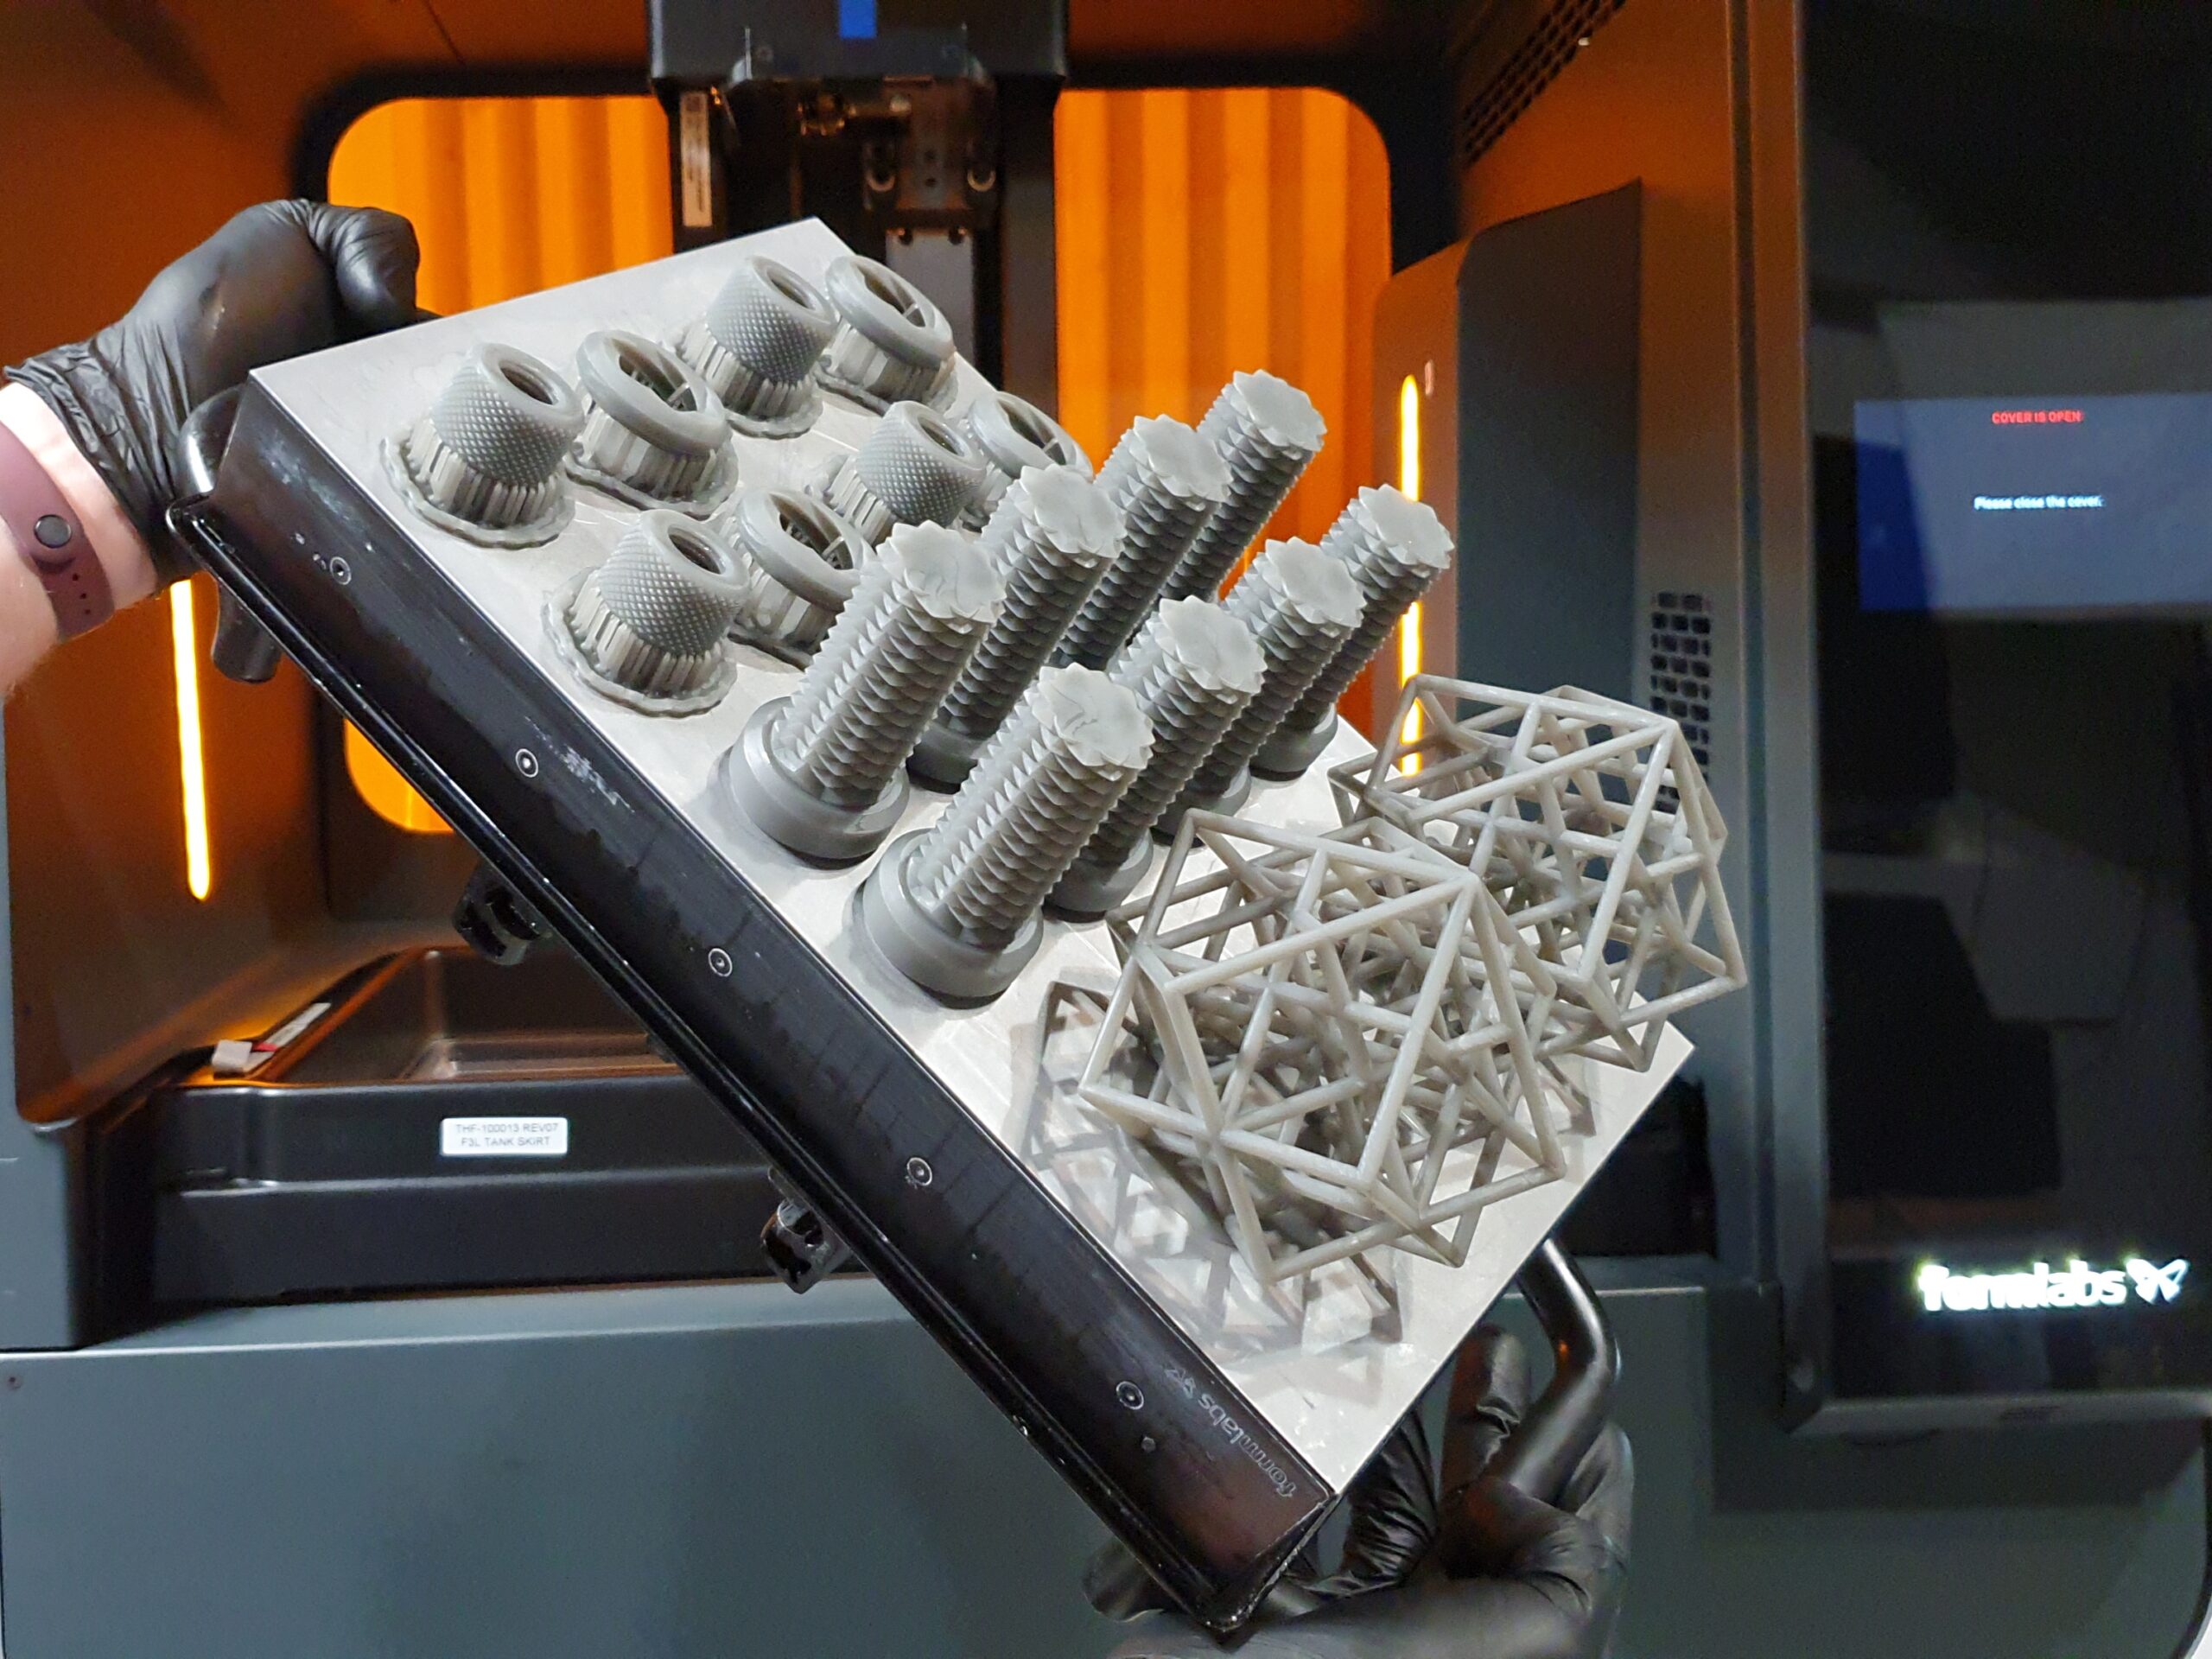
After our Leaning Tower of Pisa print, we did several other prints by reviewing some of the Formlabs resins. The Form 3L is compatible with 17 types of resin with various properties and appearances. Next, we further experimented with the dental resin “model V3” with which we printed benchies and a dragon model with many fine details requiring good precision. With a layer height of 50 microns, the prints were successful.
We were also able to try the “Tough 1500” resin which offers a greater solidity to the printed part, the “castable wax” which makes it possible to carry out metal parts via a process of lost wax casting as well as the “Clear V4” which gives translucent impressions. Also, by printing a benchy with the “Draft” resin, we cut the printing time in half compared to the same print with “Grey” resin. Despite this significant time saving, we did not notice any compromises on the print quality.
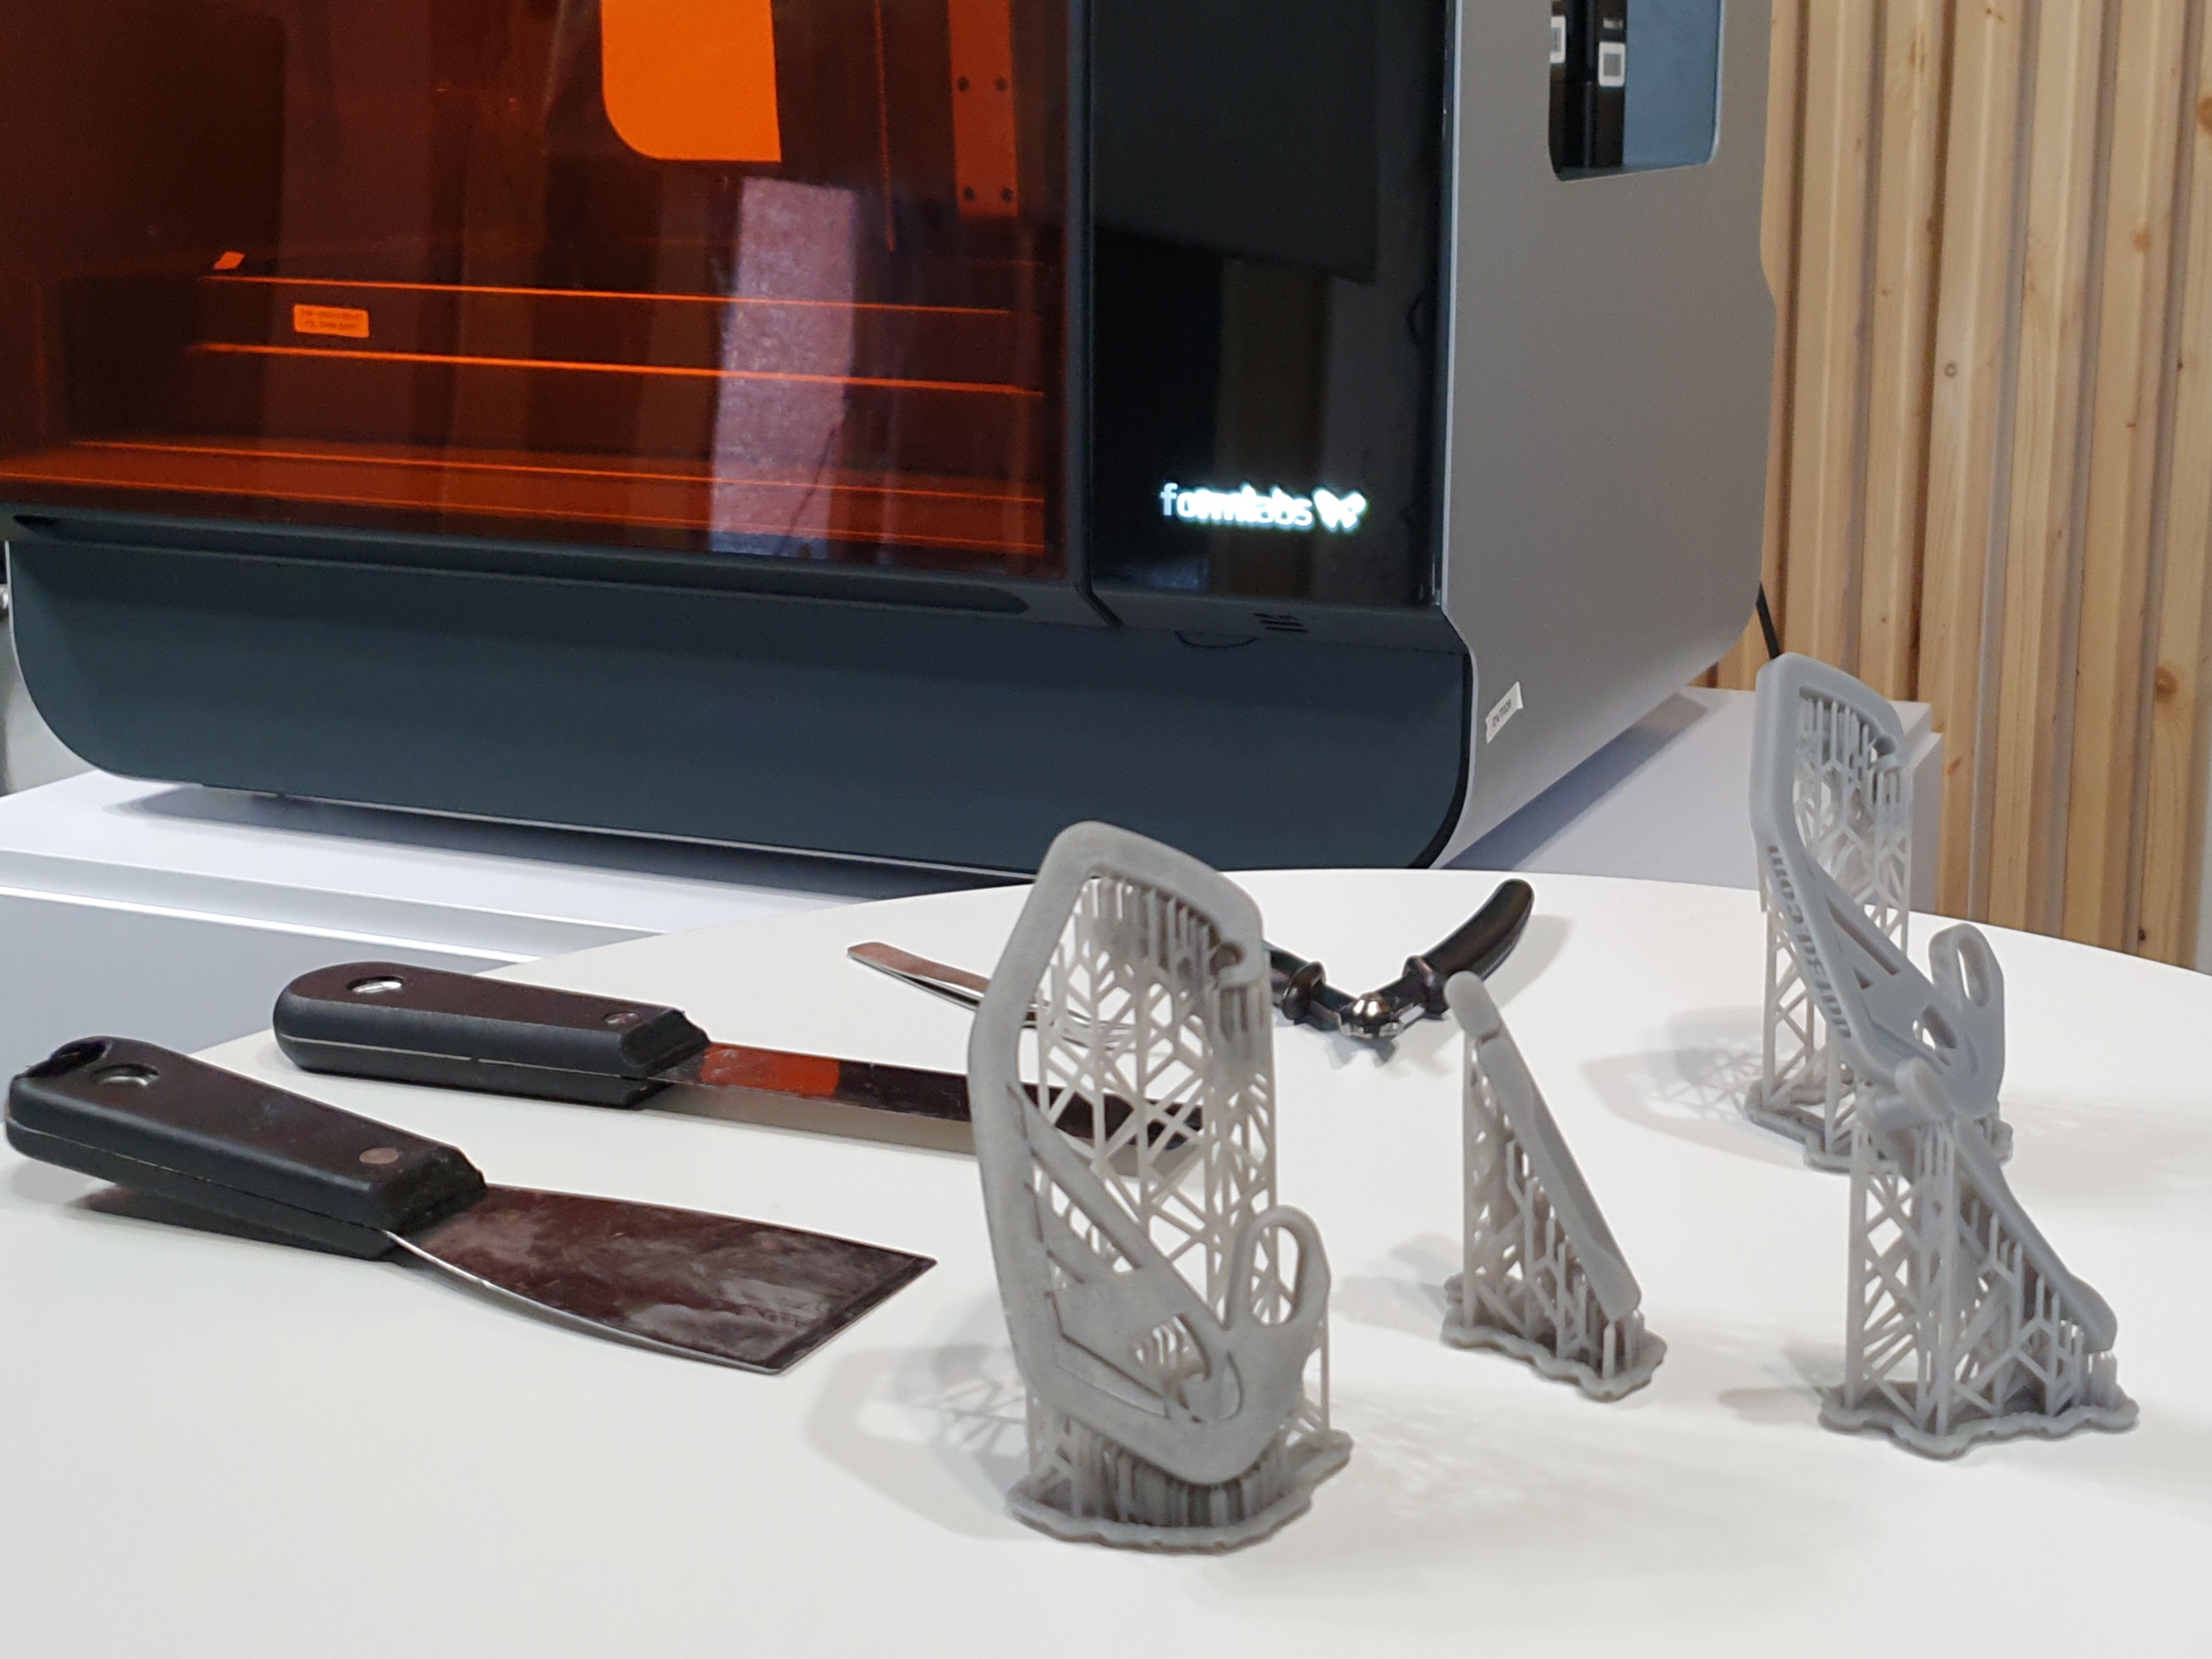
During our test, we were able to print different parts of any size with the Form 3L
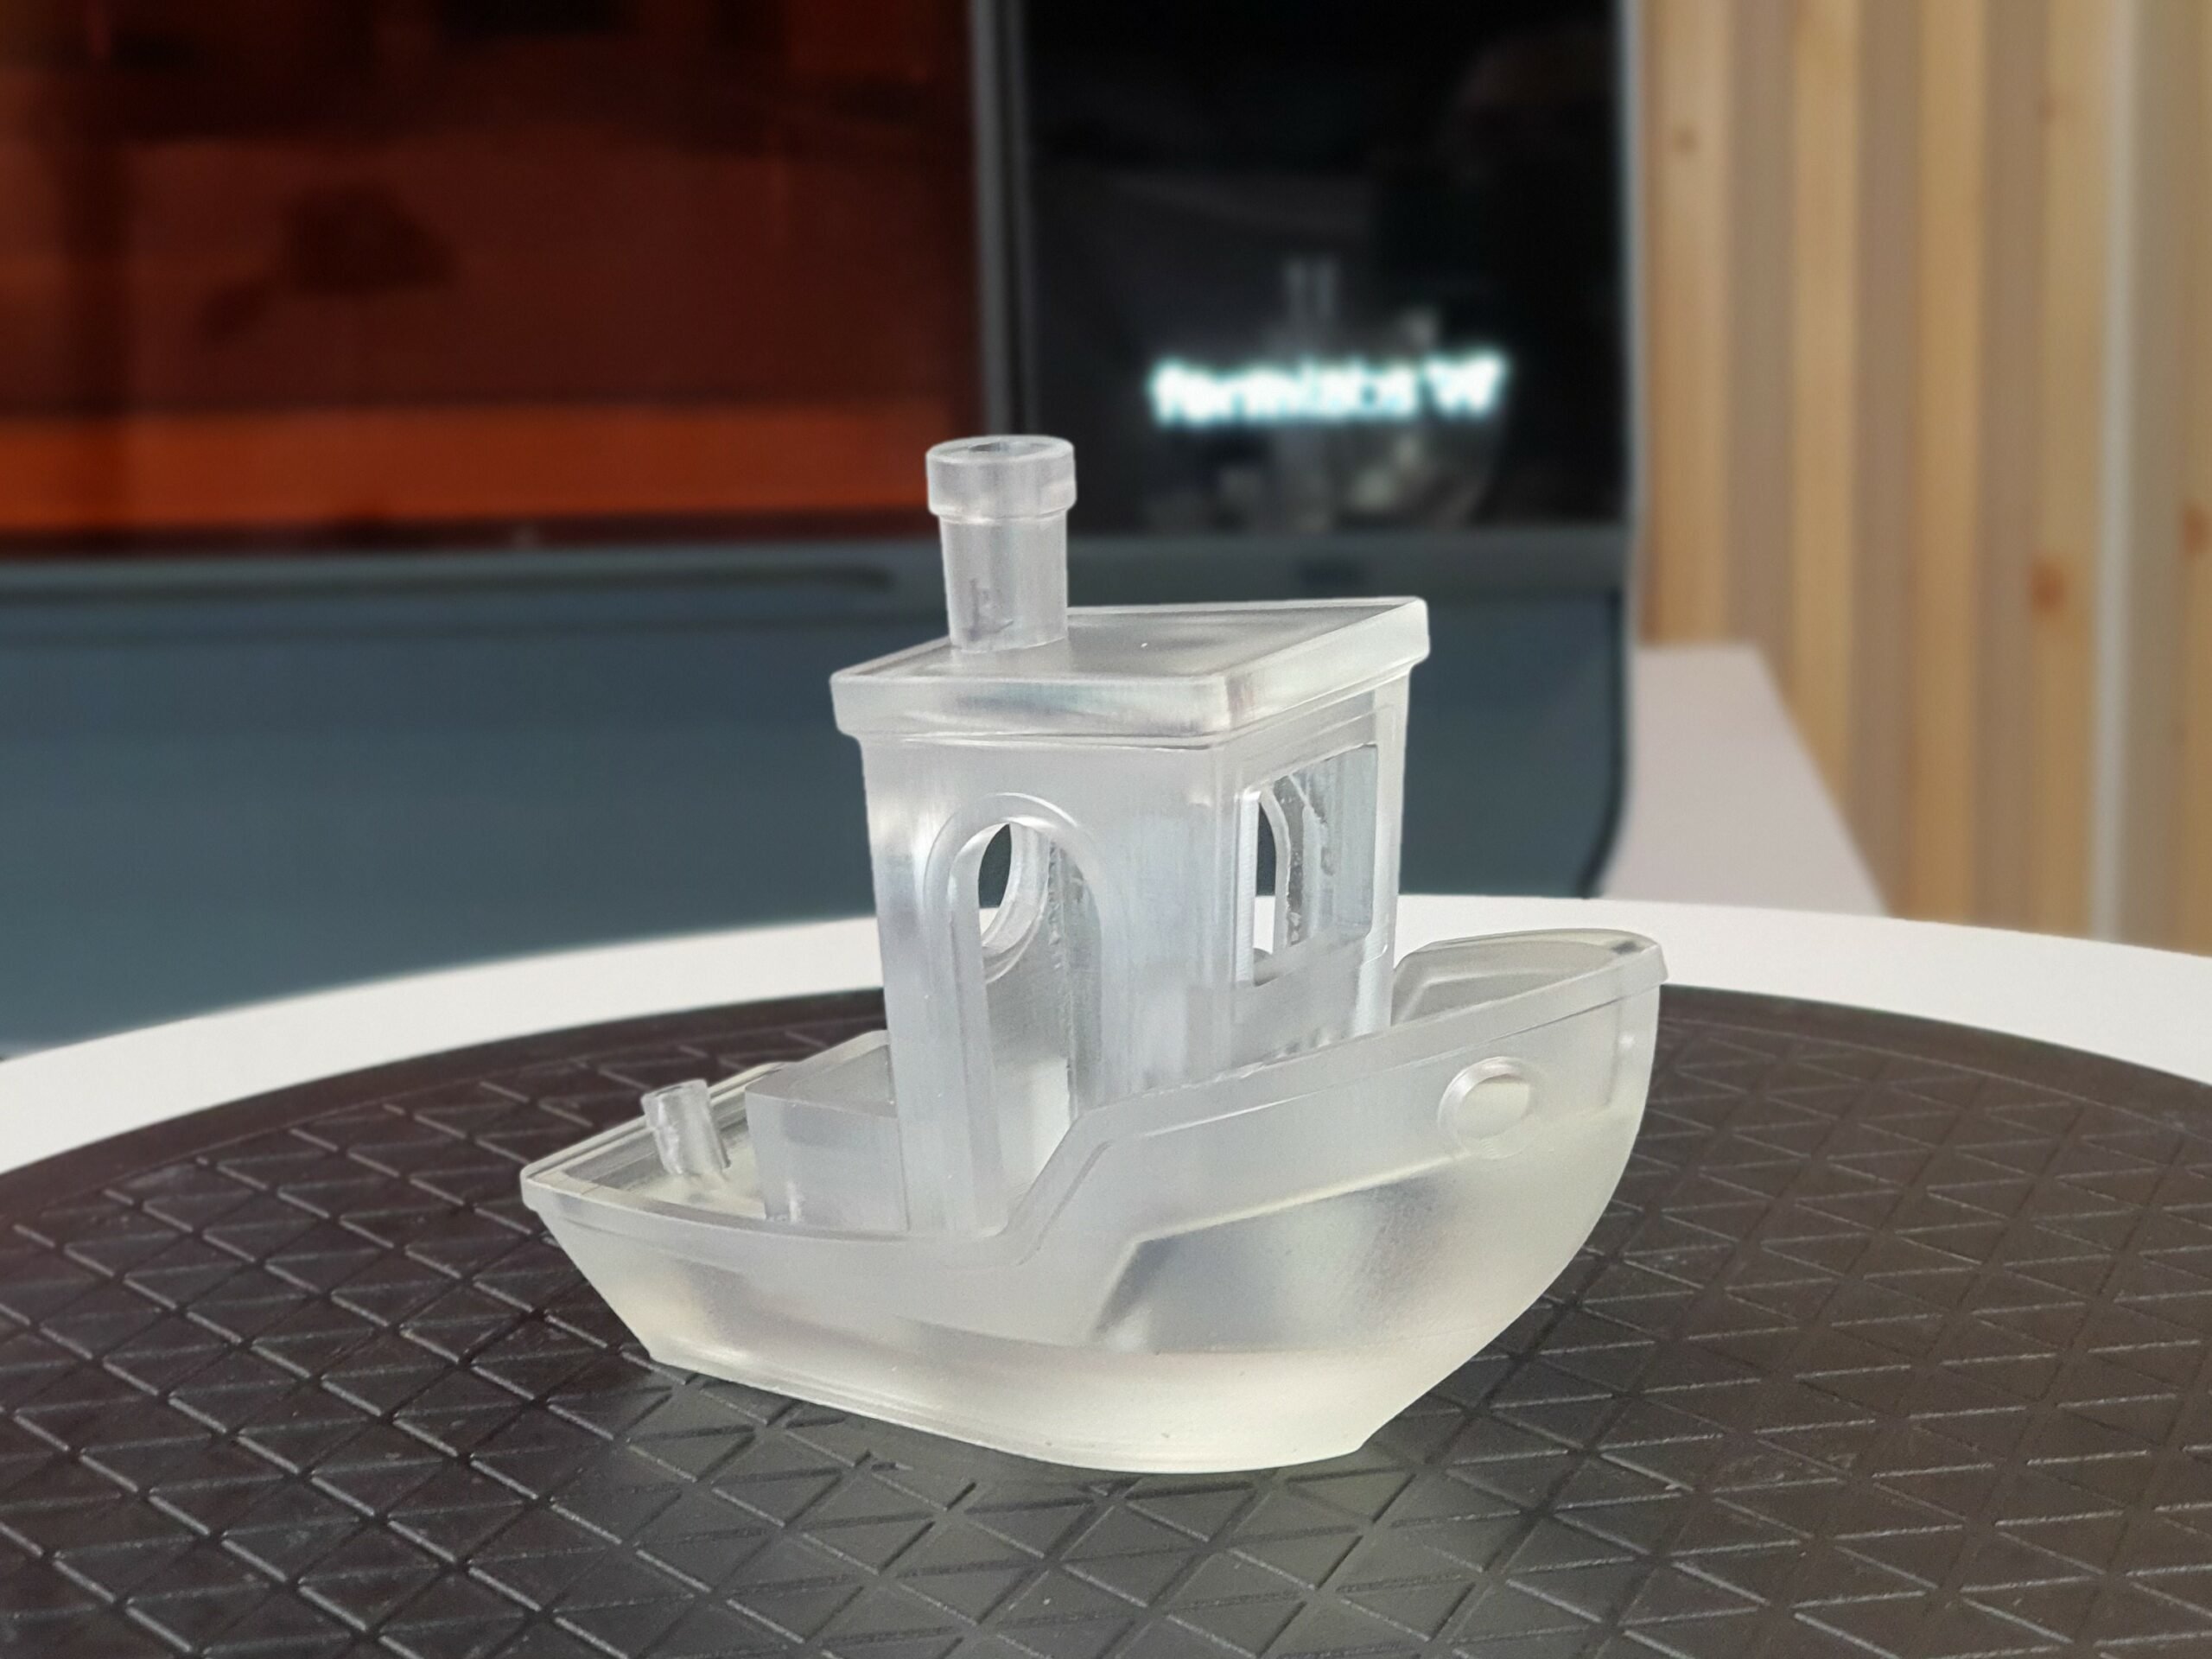
The different layers are invisible to the naked eye on this large translucent Benchy
The large printing plate can also be useful when producing smaller parts simultaneously
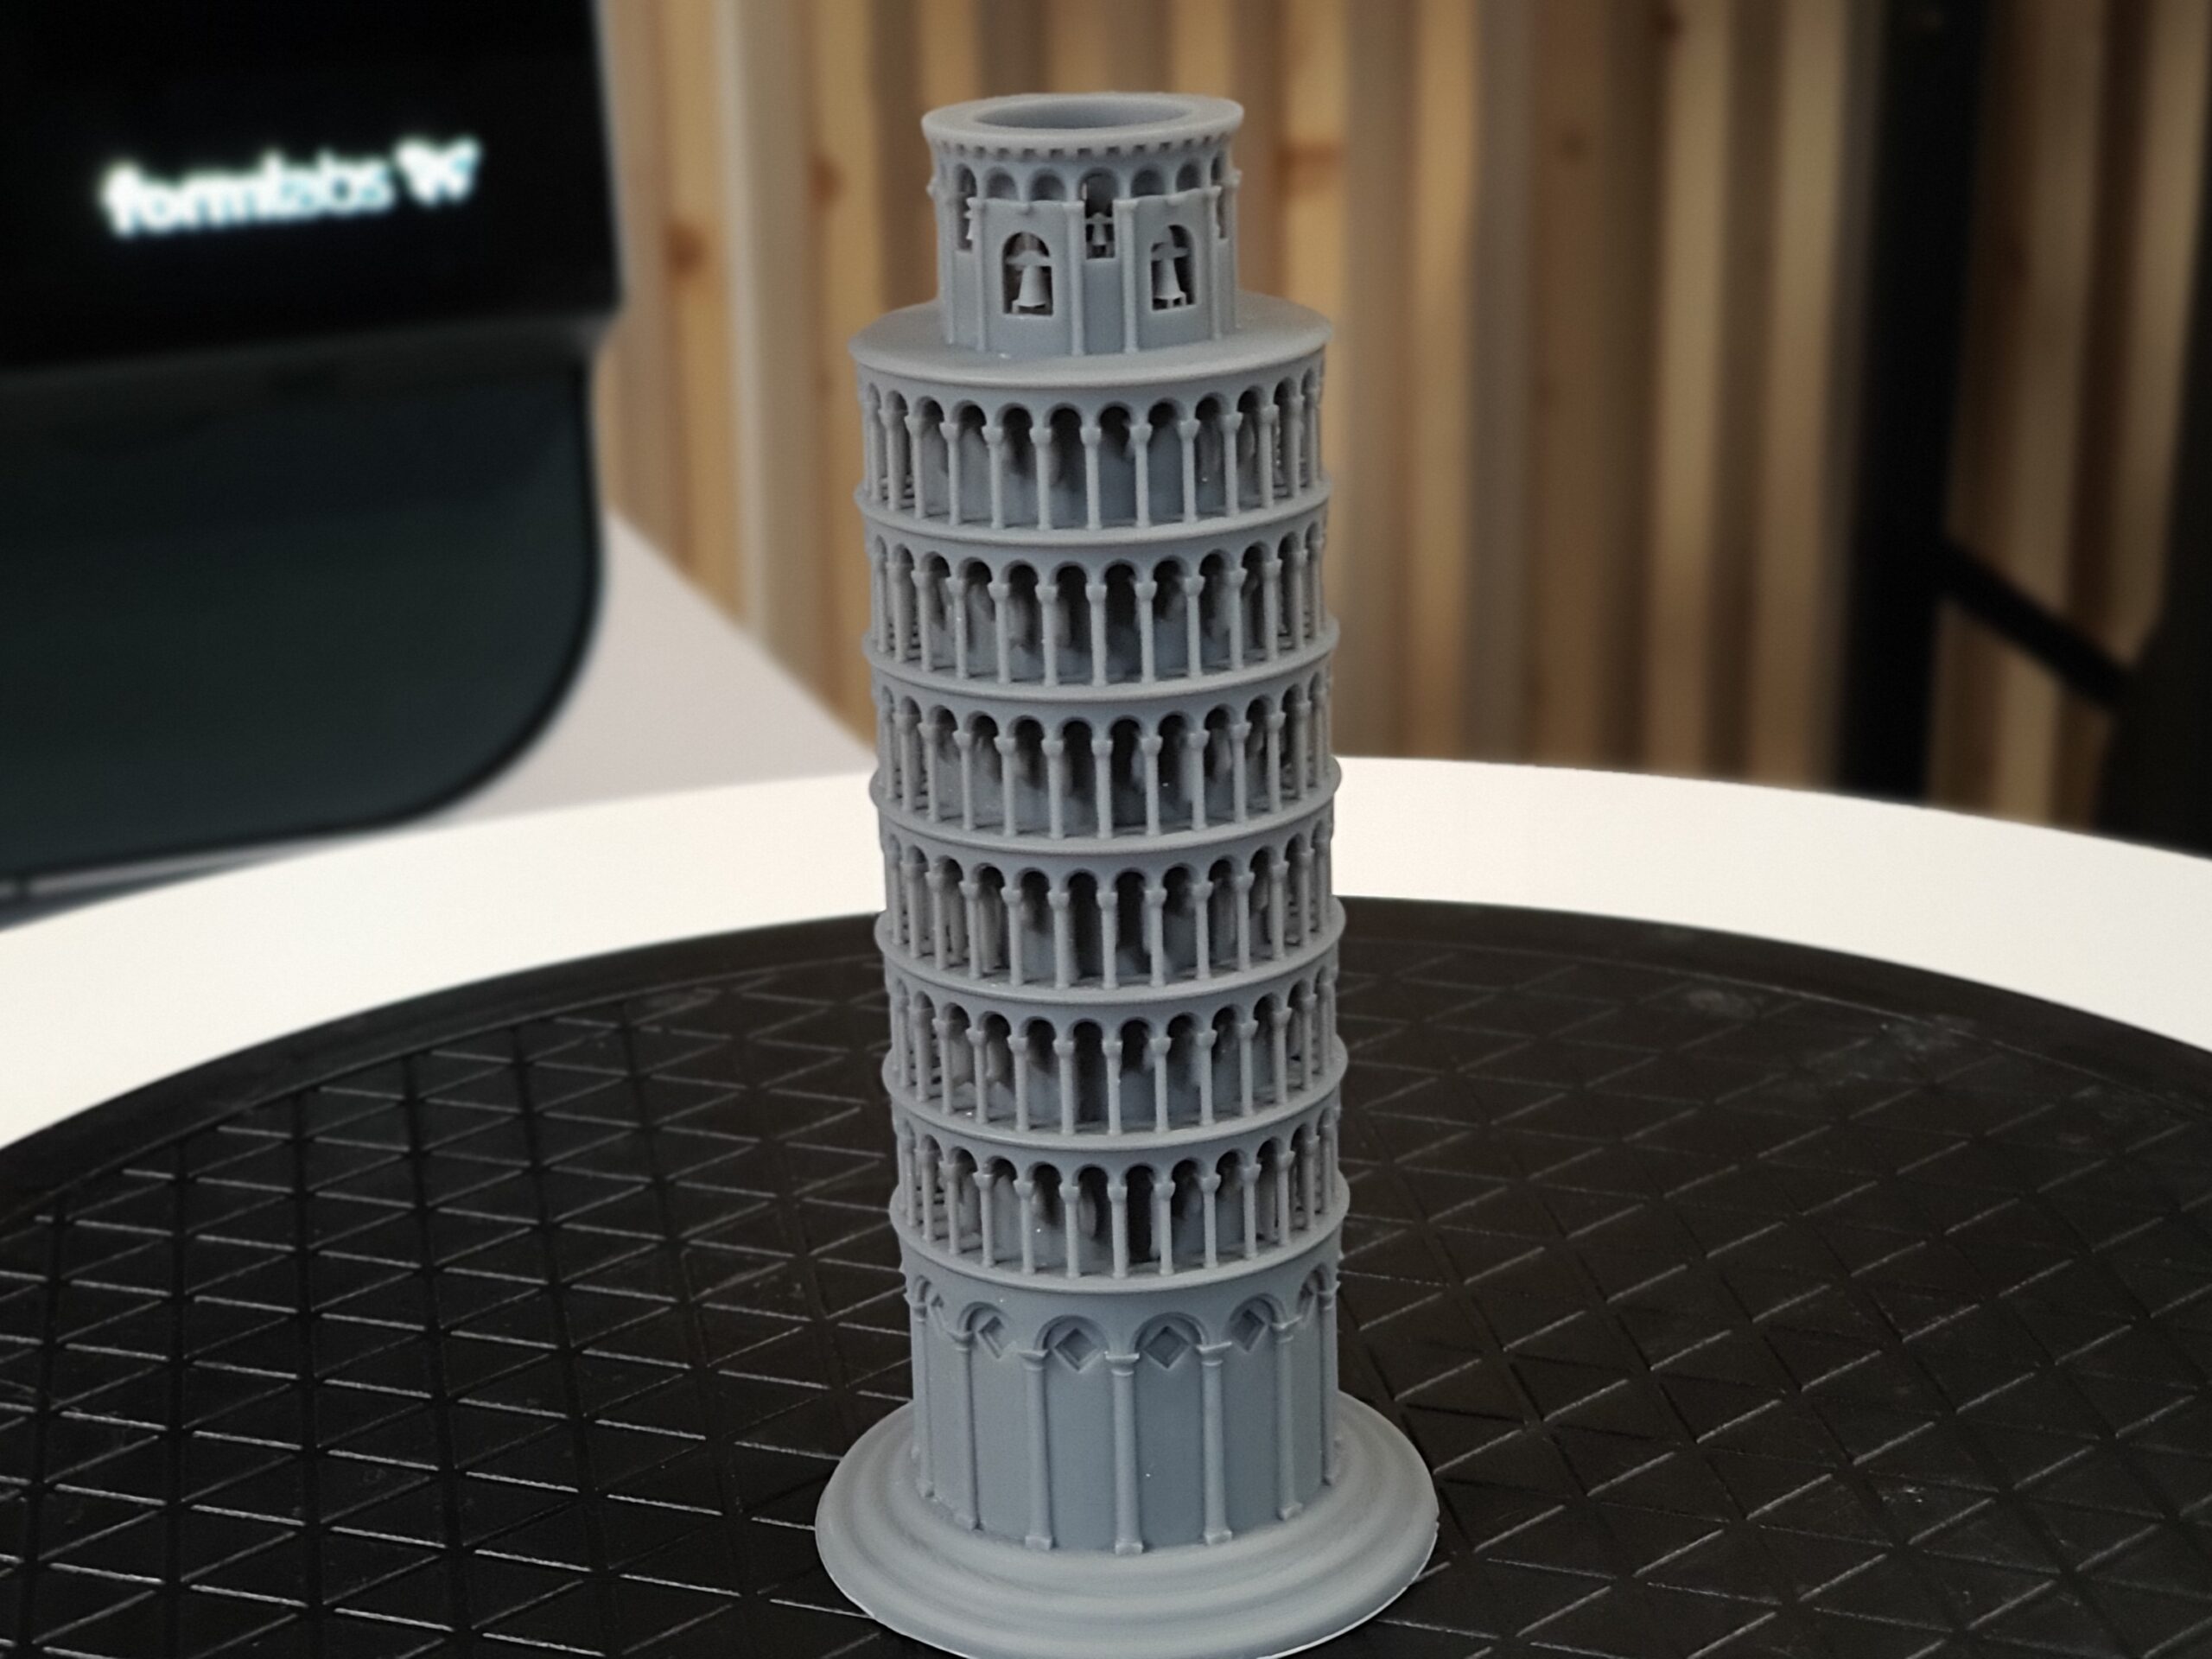
All details of the Leaning Tower of Pisa are faithfully reproduced in the print
Thanks to the Tough resin, our carabiners are very resistant
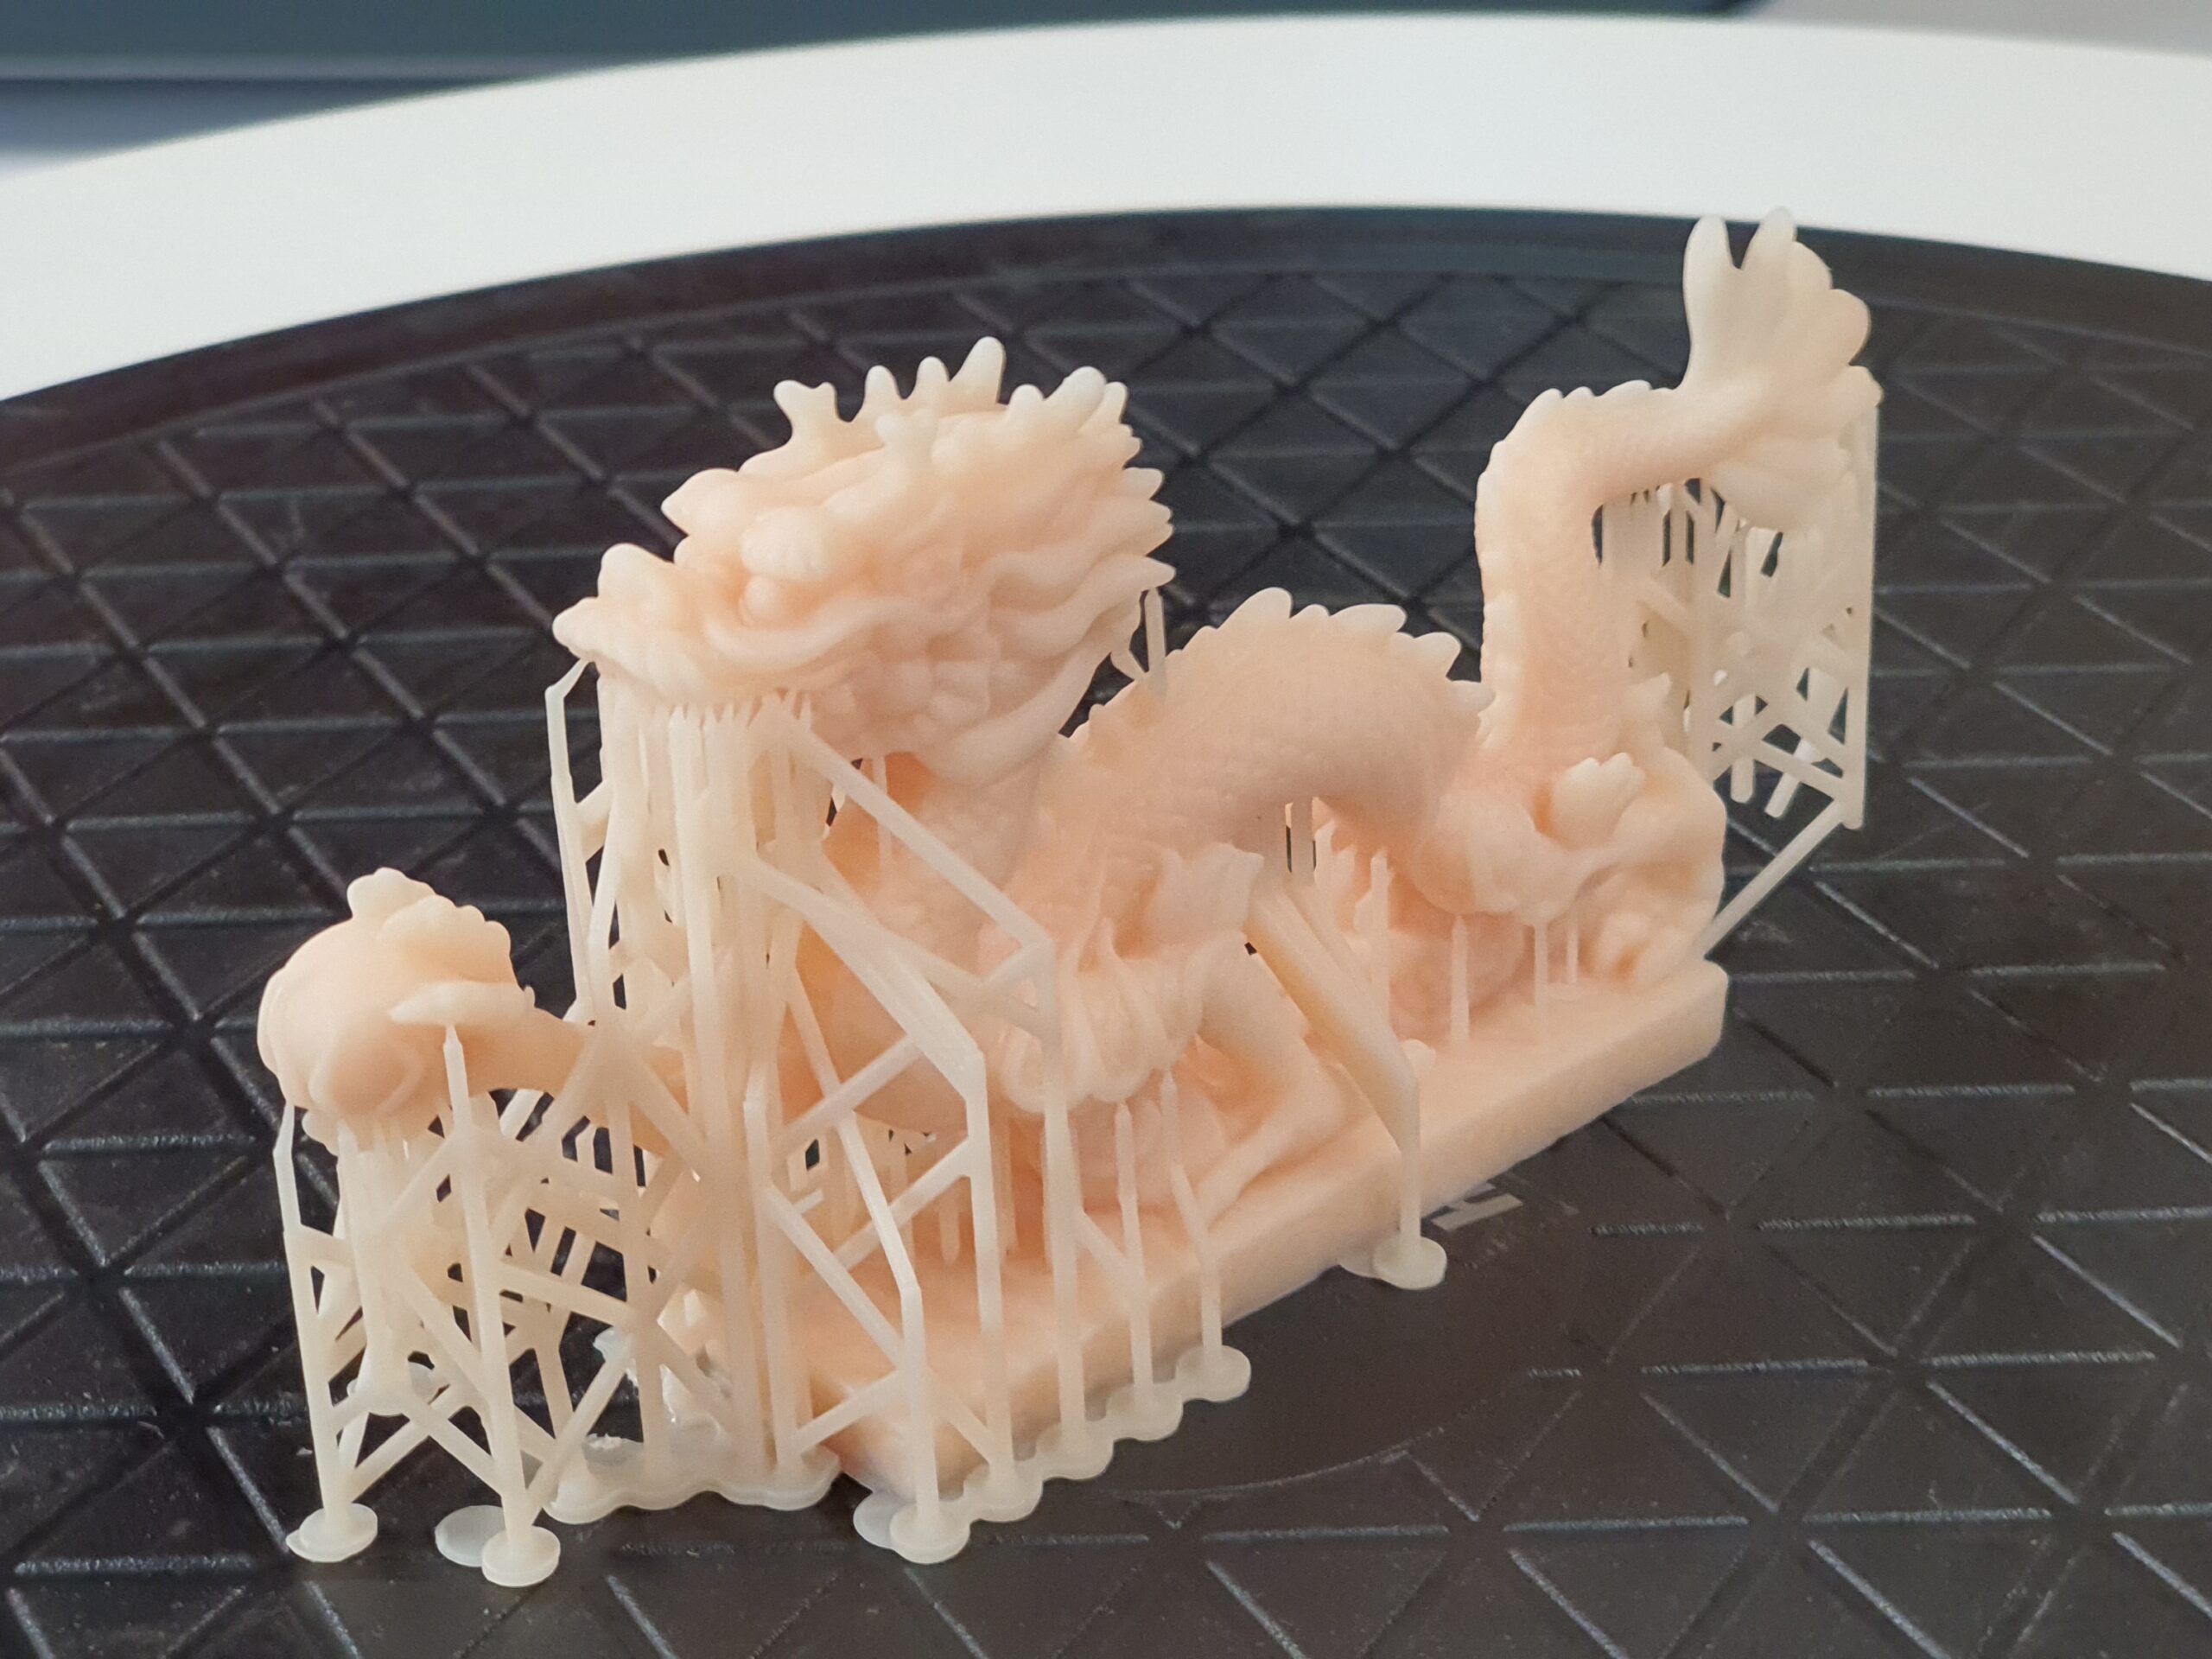
Despite a shift in the layers at the beginning of the printing process, all the details of this dragon were successfully printed
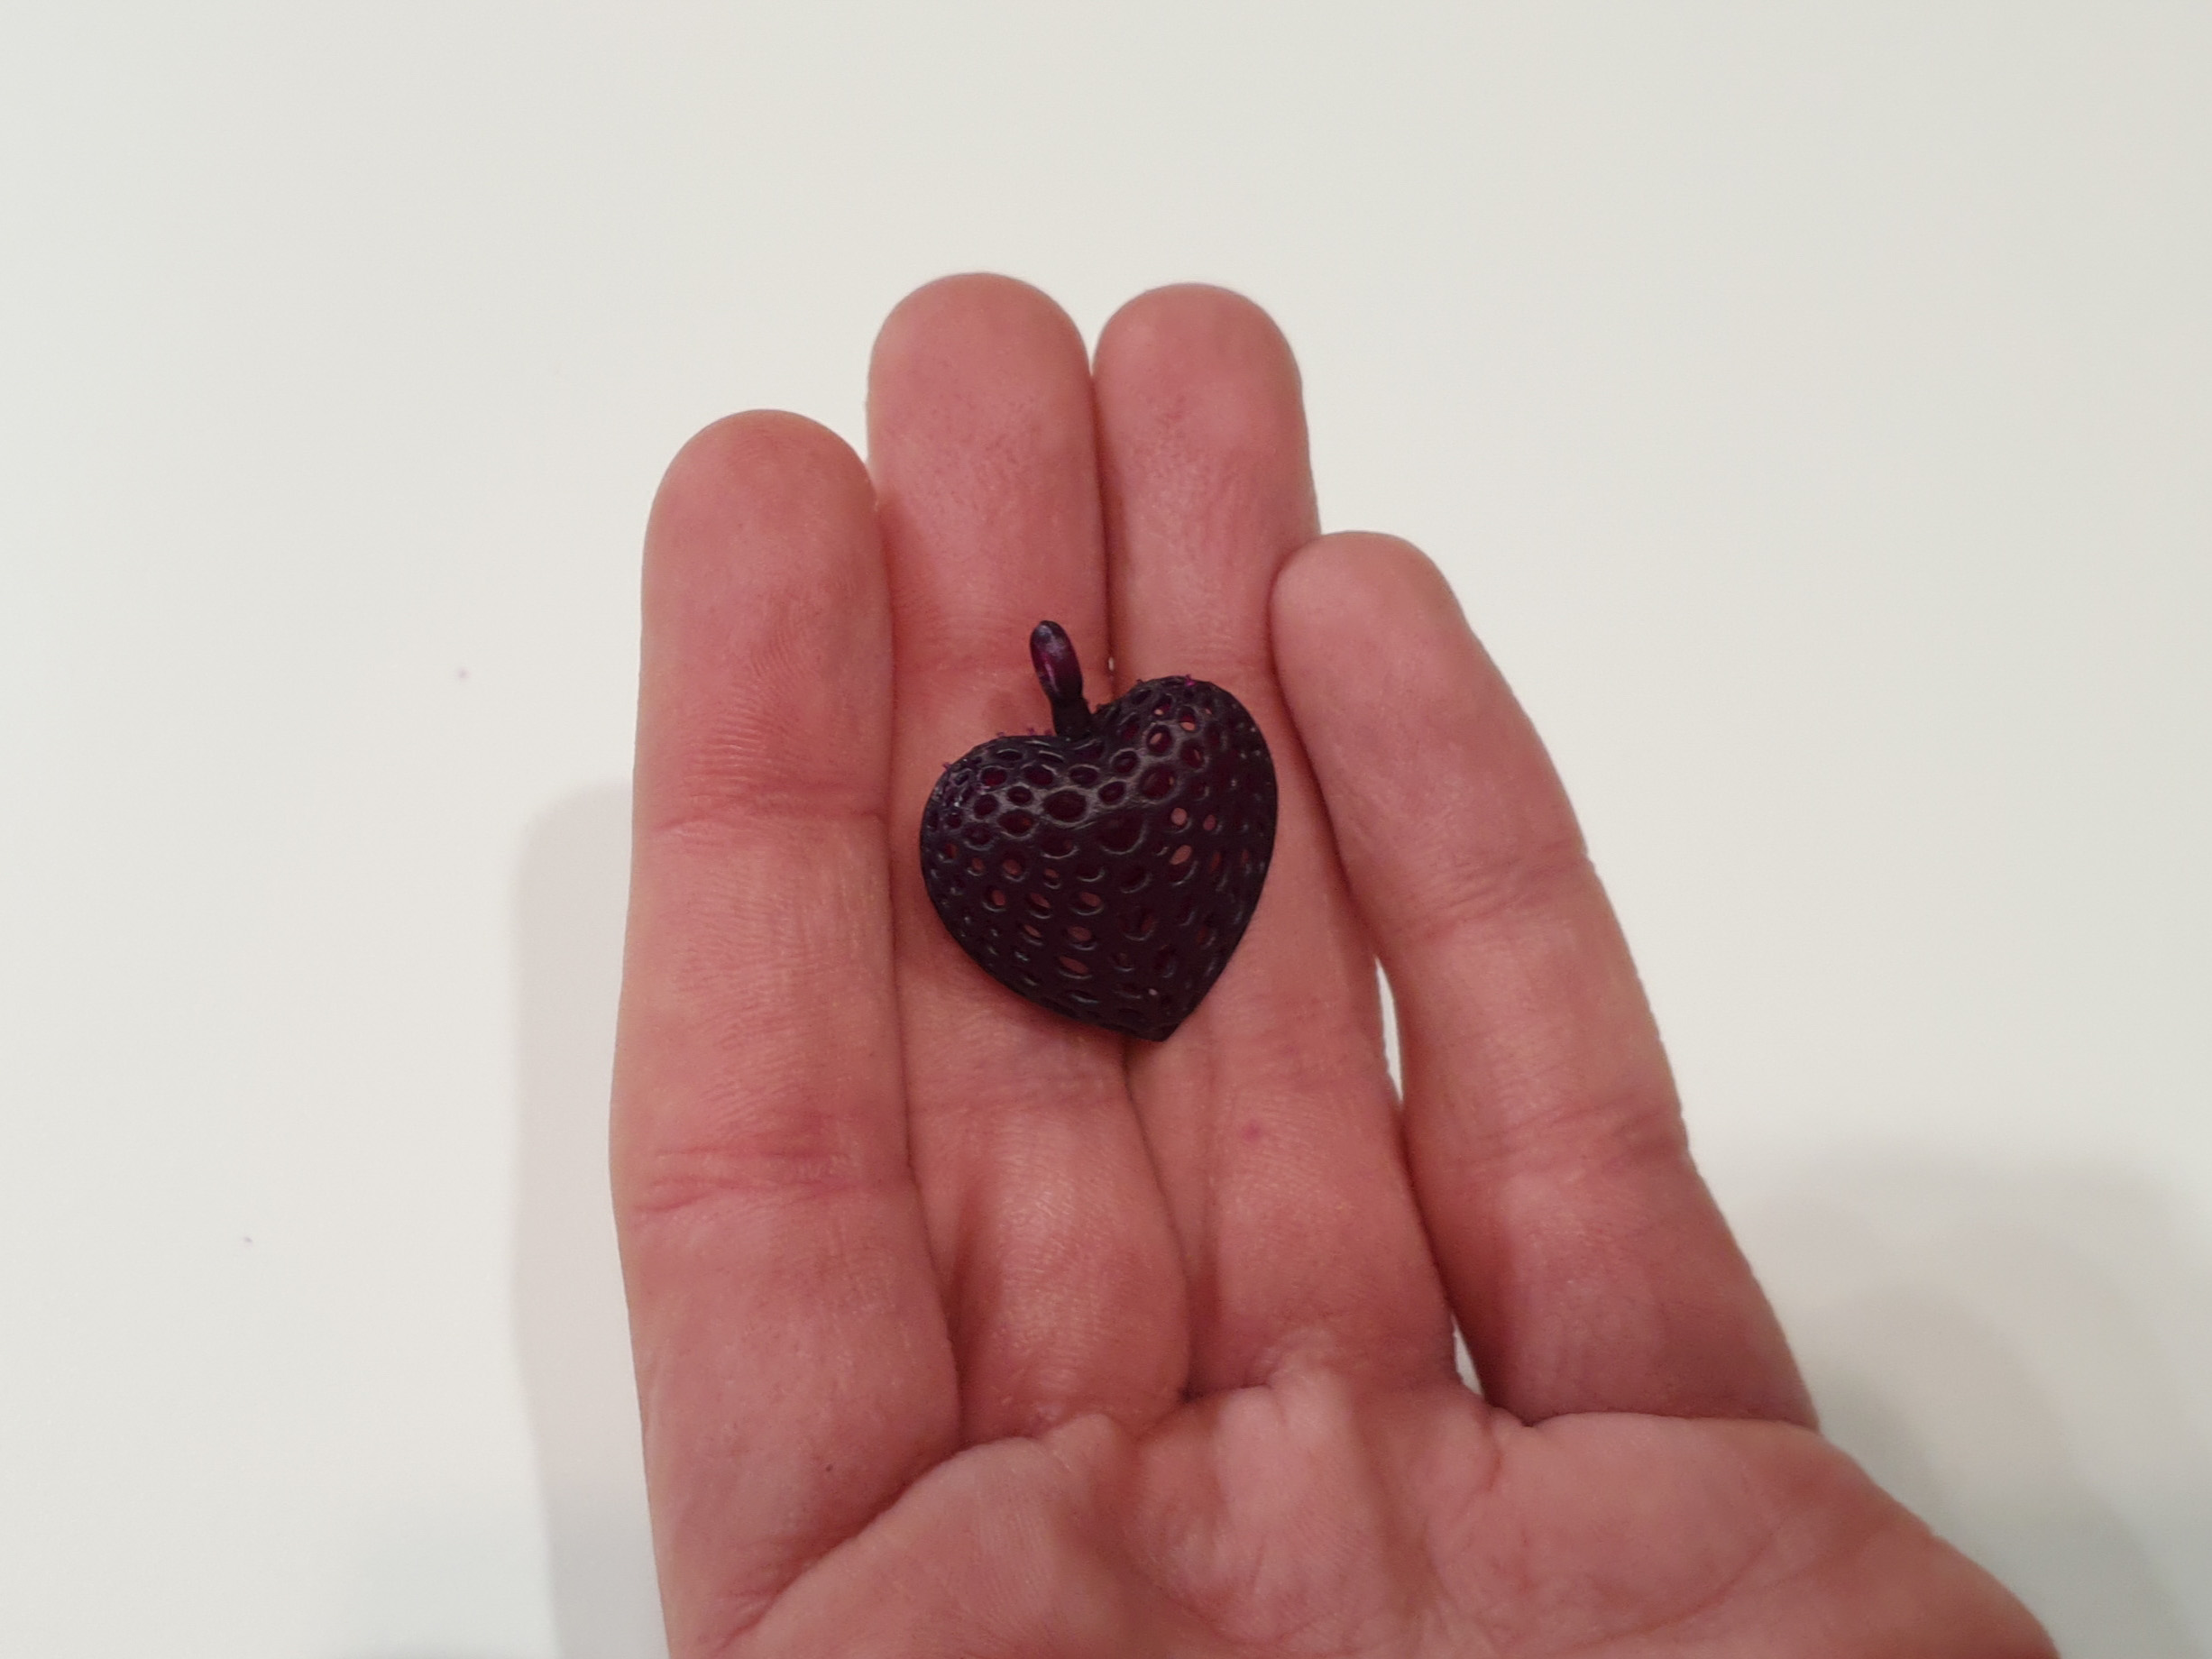
The Form 3L is also capable of printing very small parts
Find all of our 3D printer tests in the 3Dnatives Lab
Conclusion
- 3D Printer Features and Accessories 8.5/10
- Software 10/10
- Printing Quality 10/10
- Ease of Use 9.5/10
Pros:
– Printing volume
– Wide choice of resins
– Smart and connected machine
Cons:
– Price
– Proprietary system
– The demarcation line from the two LPUs
To conclude, one of the key advantages of the Form 3L is obviously its large build volume and the simultaneous use of two optical systems (or LPUs) allowing users to print large parts but also small series up to twice as fast as the Form 3. The use of two independent optical systems is reminiscent of the dual independent extruder systems found on some FDM machines.
The numerous prints made during our test confirm the ease of handling as well as the repeatability offered by the Form 3L. We also appreciate the work of the manufacturer concerning the Wash L and the Cure L, these two post-processing solutions are really developed for the Form 3L, offering a fluid global experience throughout the building process. Coupled with intelligent and intuitive software that is regularly updated, this ecosystem is really put to good use.
The Form 3L will meet the needs of users looking for a resin 3D printer offering a wide range of manufacturing capabilities, whether they are novices or experienced. A great innovation that comes at a price, however, starting at $10,999.00 for the Form 3L 3D printer alone, $2,999.00 for each post-processing machine, or $16,399.00 for a package including the 3D printer and the Cure L and Wash L post-processing stations.